2016年8月23日星期二

Galaxy Note 7 Teardown for screen, battery, charging port replacement

Since the most attracting new flagship of Samsung, the Galaxy Note 7 has been released not long ago, many Samsung fans are eager to see how difficult it is to replace the battery, curved screen or charging port, here we’re going to give it shot -- disassembling the whole Note 7 to see what’s the differences when compared to the Galaxy Note 5 in repair procedure.
Repair Tools Needed:
Heat gun or hair dryer
Guitar pick or sharp cards
Step 1 Remove back glass cover
Power off the phone and take out the S pen first.
1.power off note 7
2.take out note 7 s pen
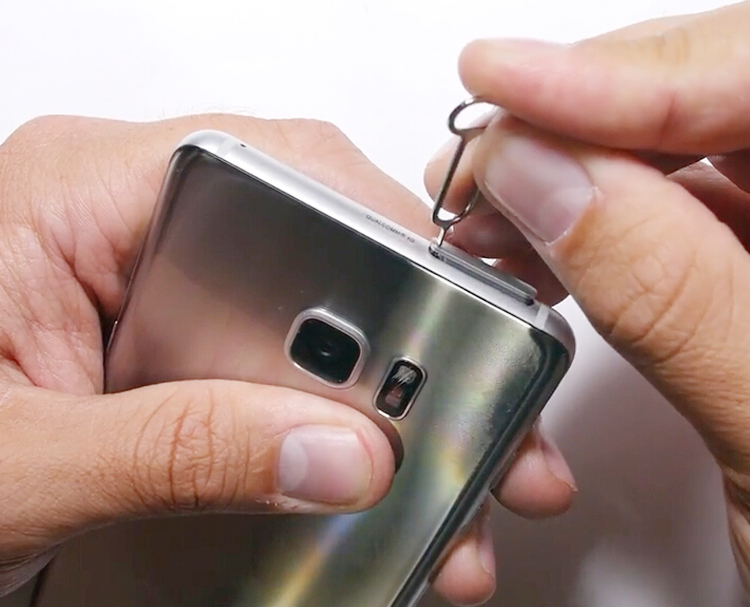
Then remove the SIM card tray.
3.take out sim card tray
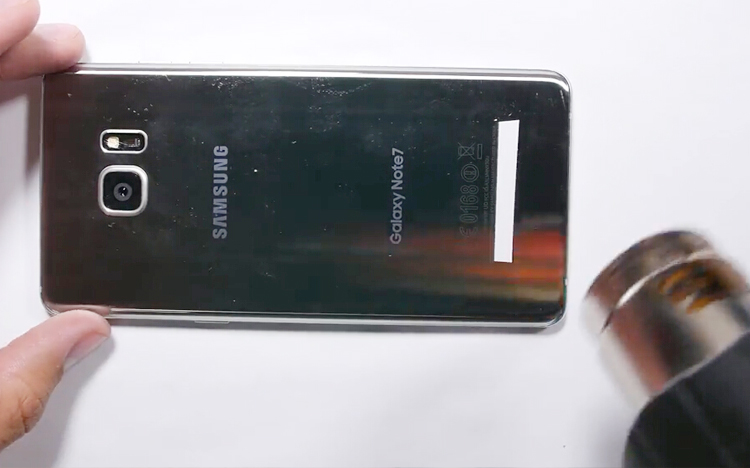
Heat up the back glass cover for a while like always.
4.heat up note 7 back cover
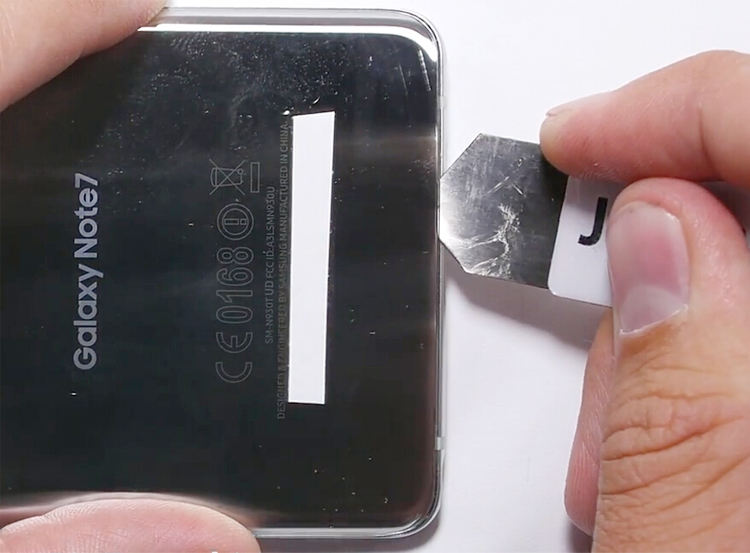
Then insert the metal opening tool to pry up the back glass cover.
5.pry up note 7 back glass
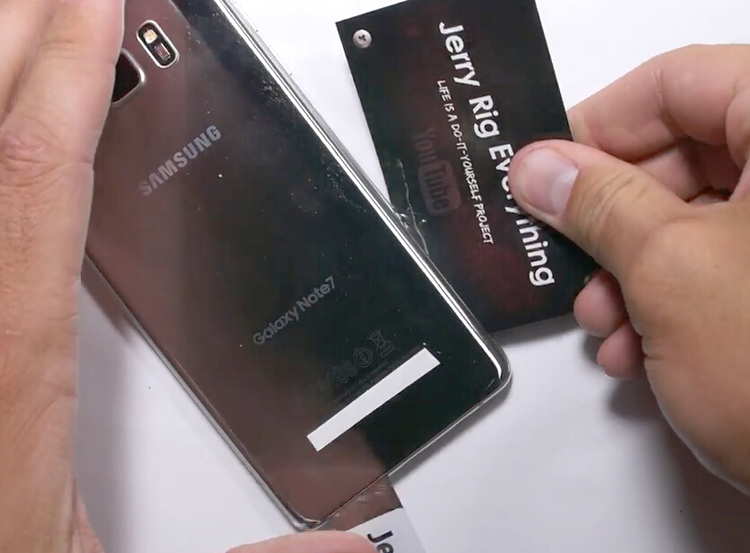
Use a sharp paper card or guitar pick to cut the waterproof back cover adhesive stickers. (You may need to heat up the back cover several times when cutting the adhesives, just take your time)
6.cut back glass adhesive sticker
After loosen all the adhesive stickers around the edges, you can remove the back cover now.
7.remove back glass cover
Step 2 Remove battery
Undo 11 screws on the plastic back frame by Phillips screwdriver.
8.undo screws
Then the loudspeaker module comes out easily.
9.remove loudspeaker module
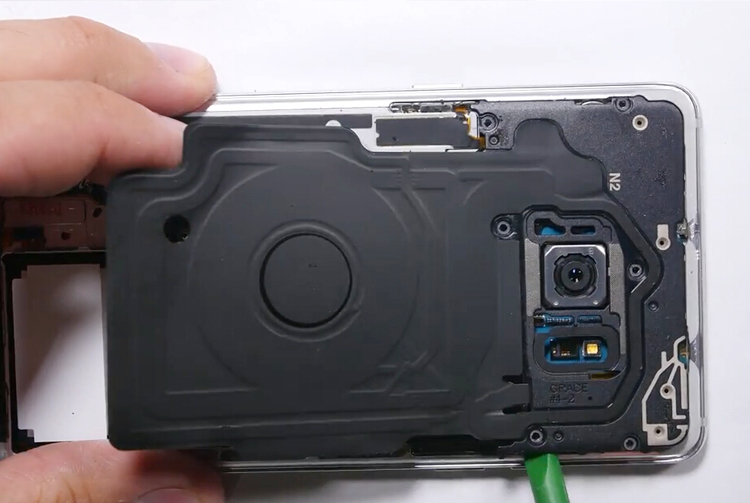
Next move, take the wireless charging & NFC pad away.
10.remove wireless charging&NFC Pad
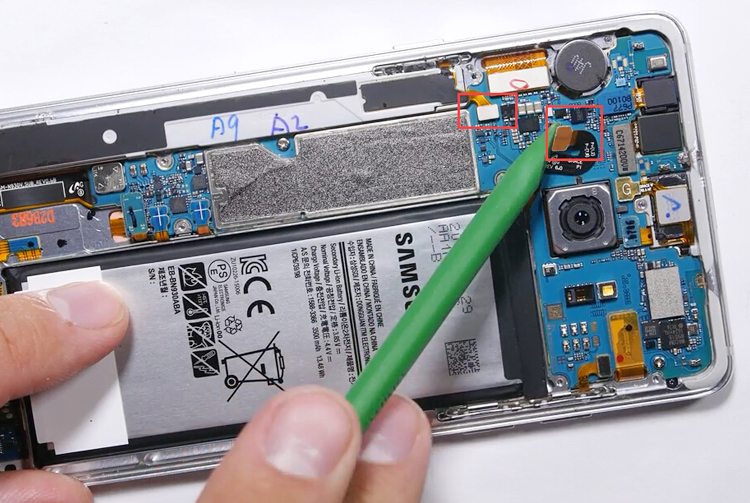
Then release the battery connector and the S pen connector.
11 remove battery and s pen connector
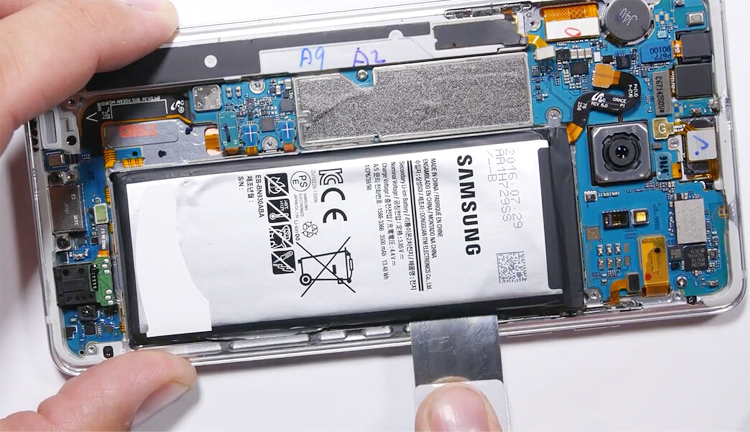
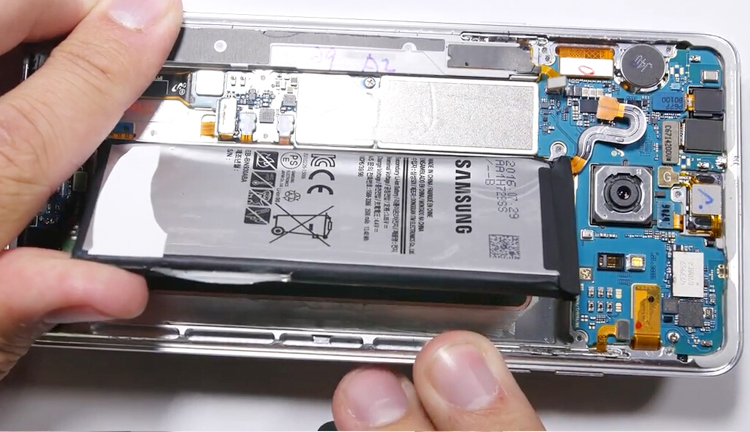
Now the battery can be taken out, use a metal opening tool to pry it up, be careful not to hurt the battery, the tough adhesive is underneath.
12.pry up battery
13.remove battery
Step 3 Remove small parts
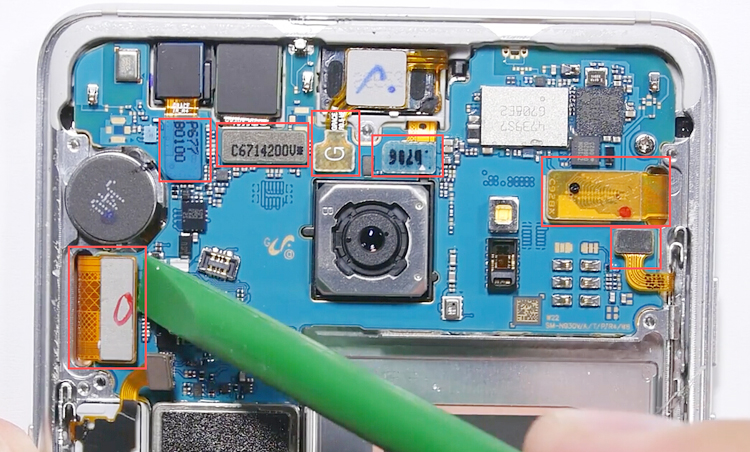
After remove battery, then we can release all the connectors here, the screen ribbon connector, camera connector, earpiece connector, sensor connector, another screen ribbon connector and power flex ribbon connector.
14.undo all the connectors
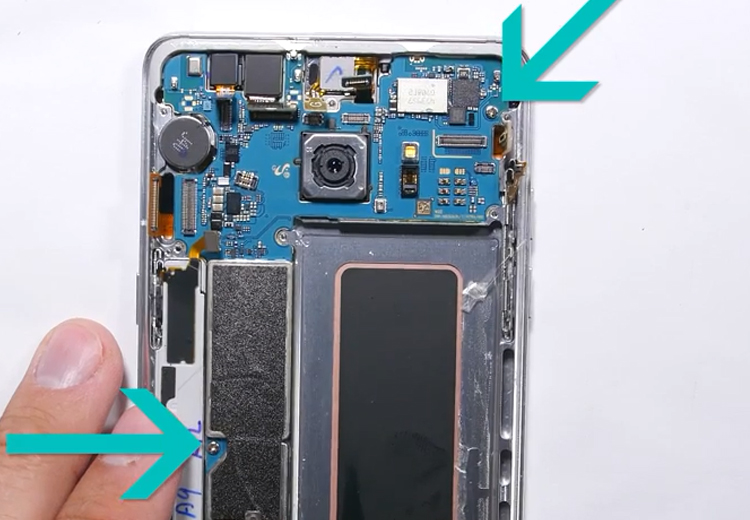
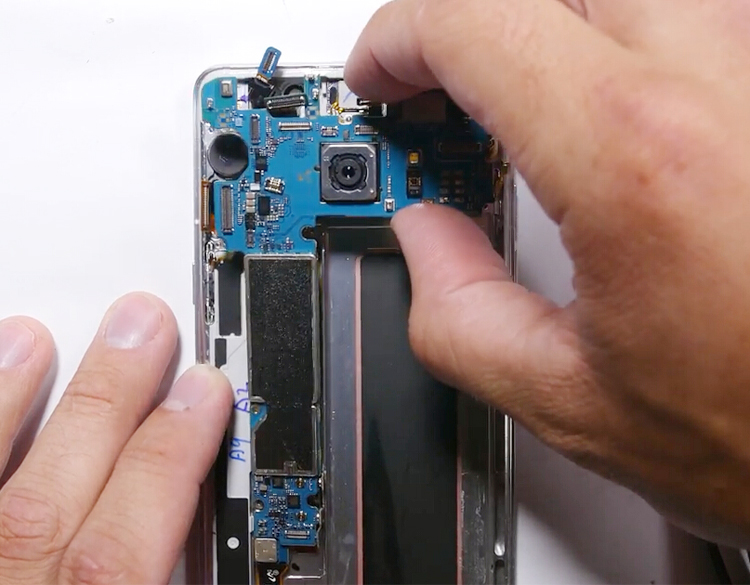
After that you need to undo 2 screws before removing the motherboard.
15.undo 2 screws
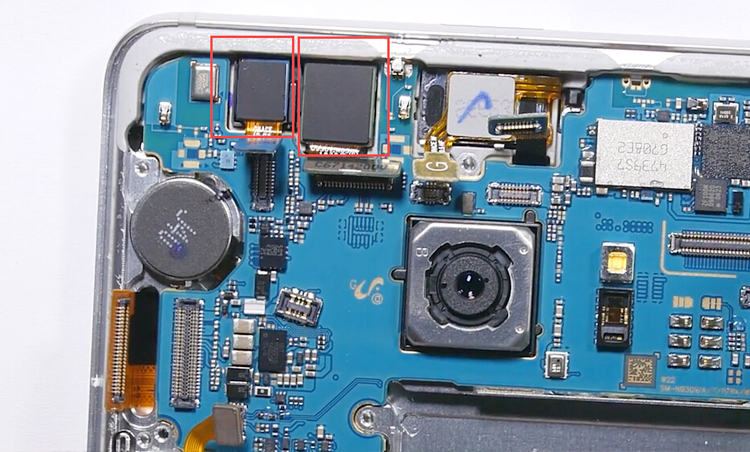
By the way, remove the front facing camera and iris scanner.
15.1 remove front and rear camera
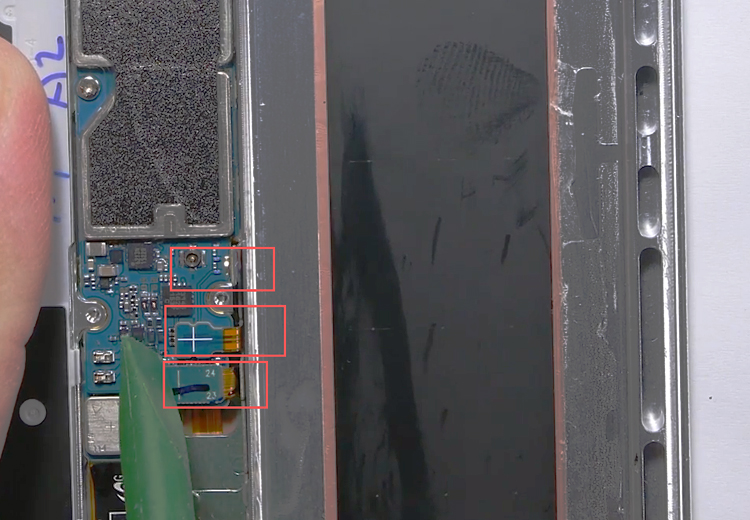
Moving down, there are 3 new connectors, 2 signal cable connectors and the home button cable connector.
15.loosen connectors
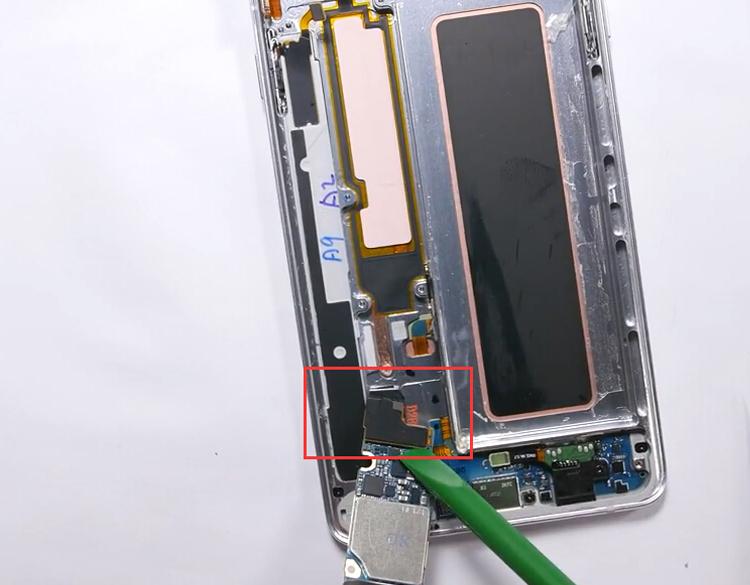
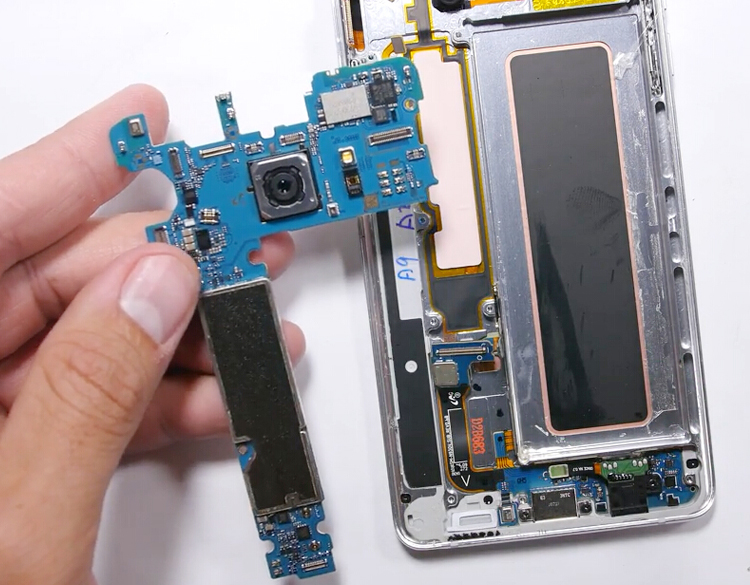
Lift up the motherboard, don’t be so urgent to tear apart the motherboard cause there is still a connector to the charging port on the bottom.
16.lift up motherboard
17.loosen connector
18.mother board
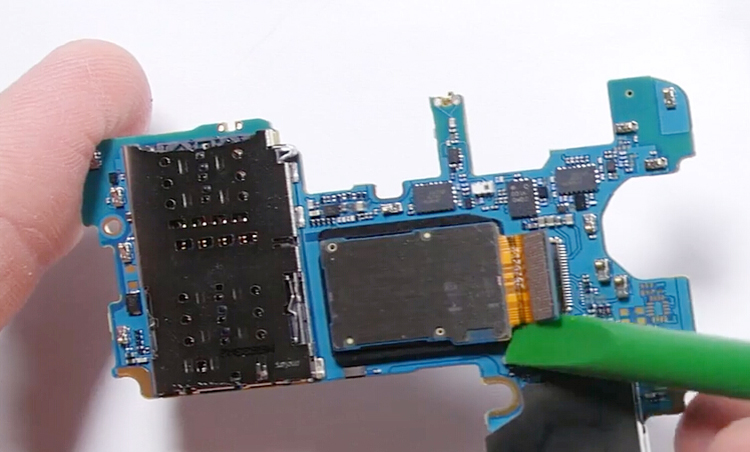
Next step you can remove the rear facing camera from the motherboard now.
19.remove rear camera
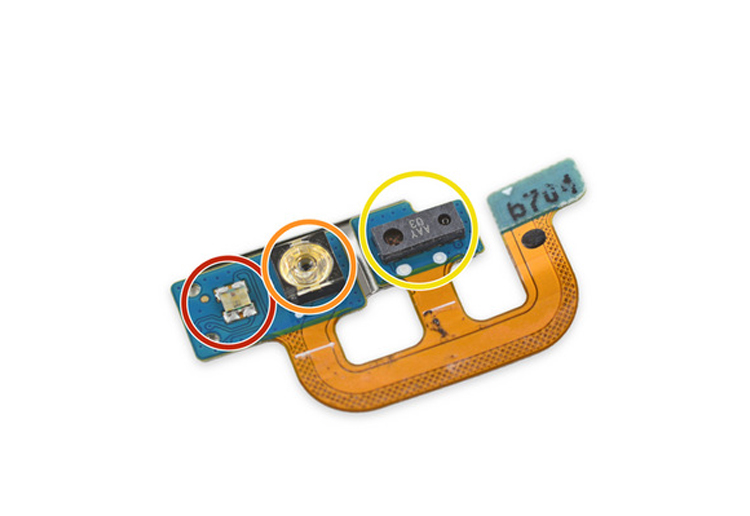
Back to the middle frame assembly, we can start with the front array, which comes with an infrared LED helping with the iris scanner in low light situation.
19.1 front array
front sensor array
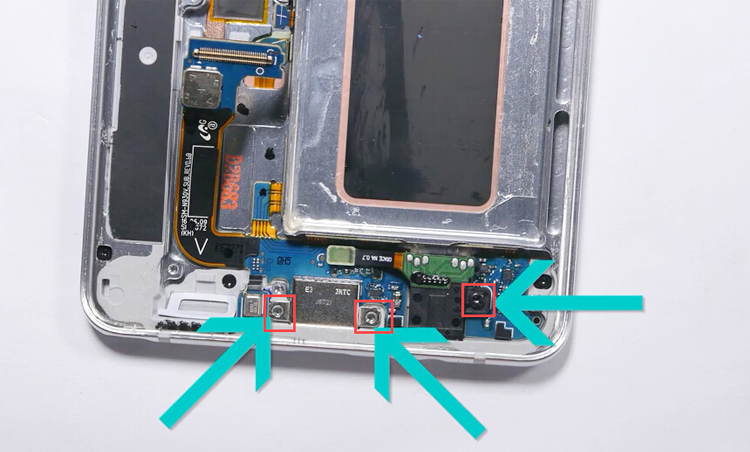
Then undo 3 screws to remove the headphone jack cable and charging port flex cable.
20.remove 3 screws
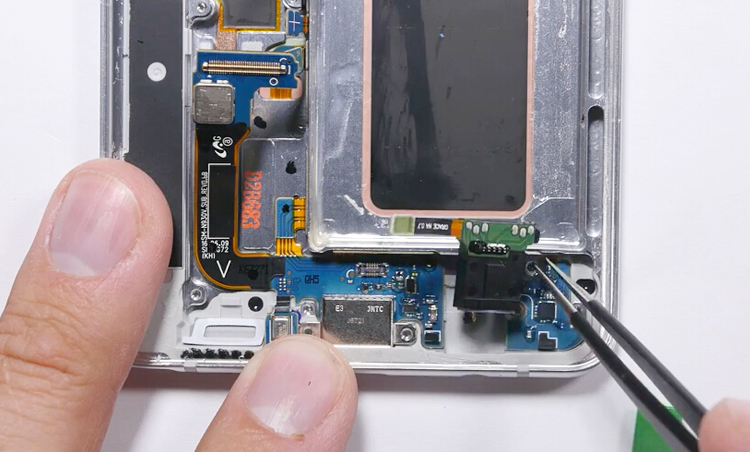
Release the headphone jack flex cable connector and remove it.
21 loosen headphone jack connector
22.remove headphone jack
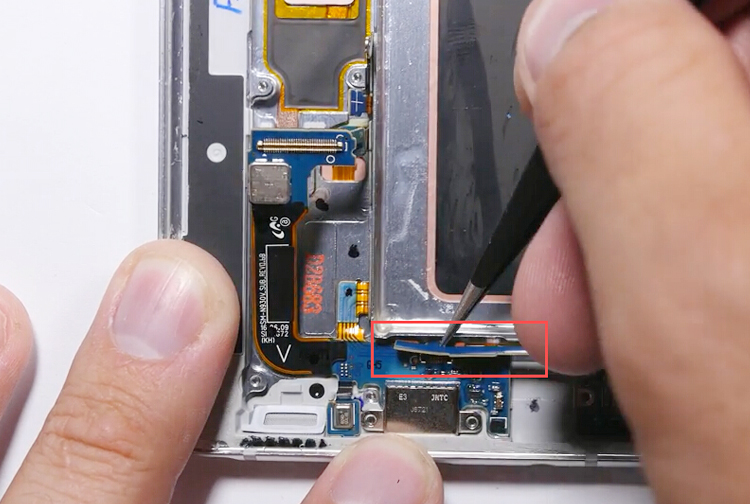
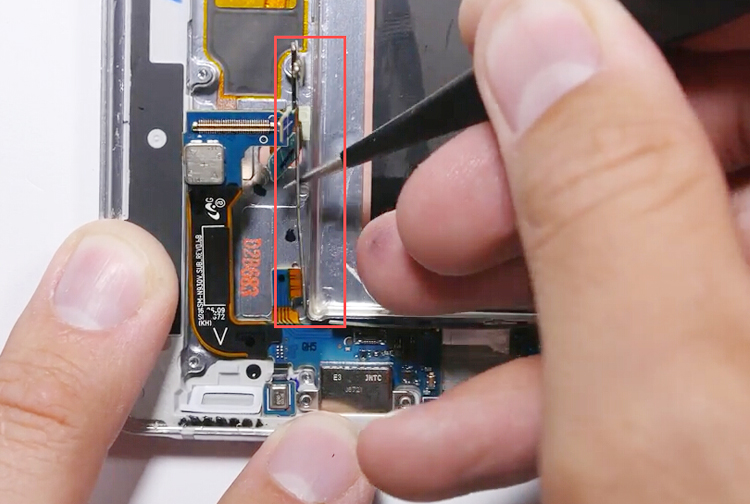
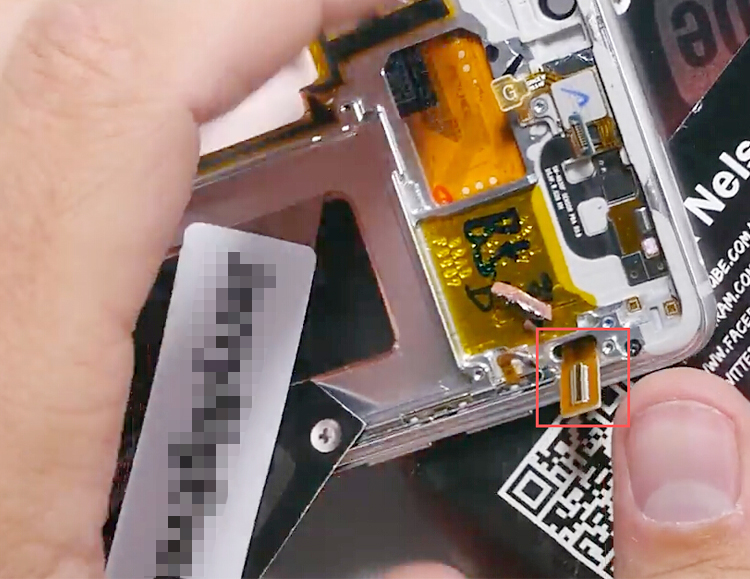
Next we’re going to take out the type-C charging port flex cable. Pry it out from that gap and then lift the signal cable which connected to the charging port flex.
23.pry out charging port flex
24. pry up signal cable
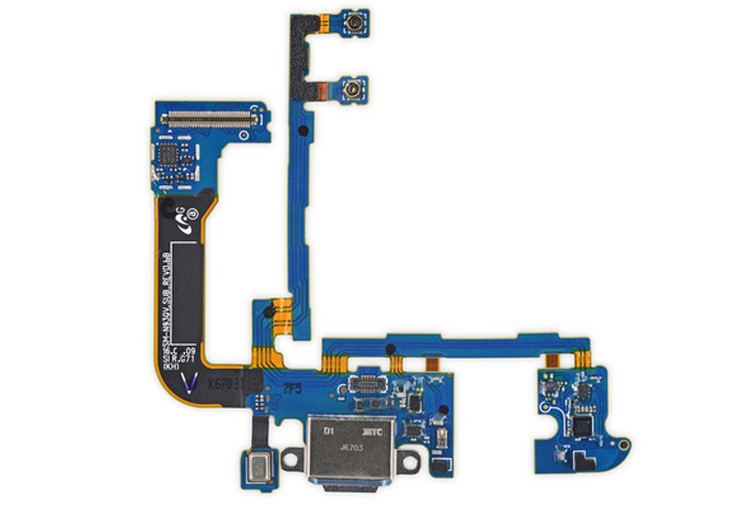
Now remove the USB type-C charging port, which is another new try for Samsung.
25.remove charging port
note 7 charging port flex cable
Step 4 remove AMOLED screen assembly
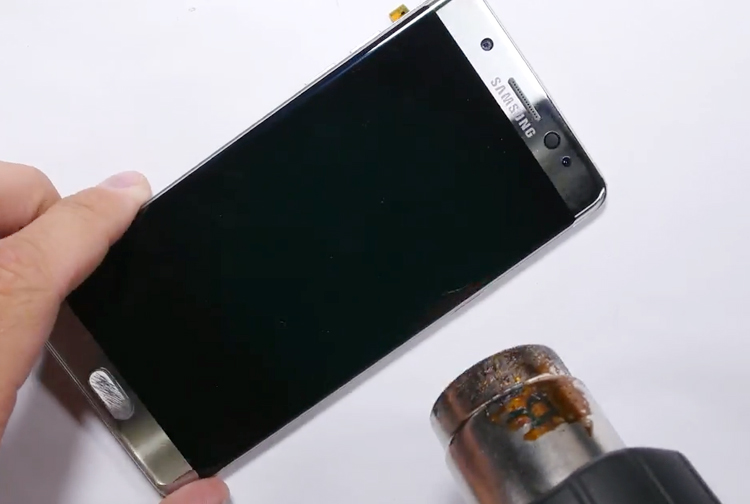
Heat up the screen for a while.
26. heat up screen
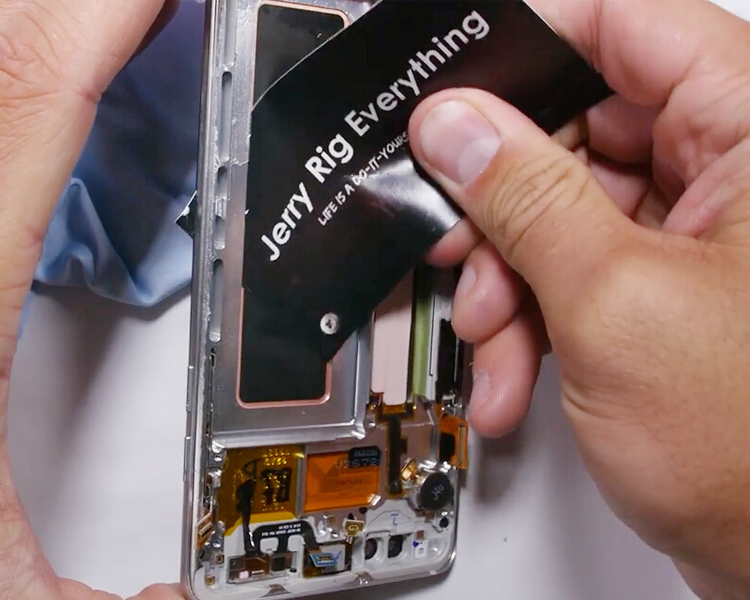
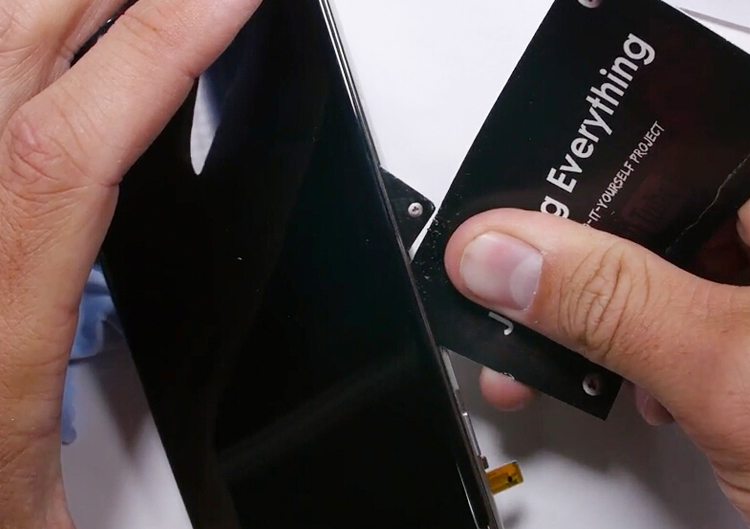
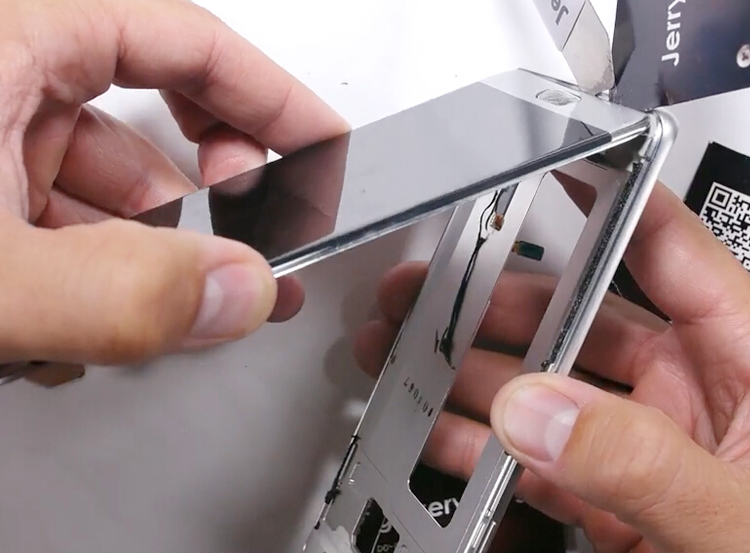
Then use a sharp card to insert into the gap between the screen and the middle frame from the inside.
27.insert card to screen gap
Use another card to insert to the little gap to loosen the supporting frame adhesives.
28.separate screen and frame
29. loosen screen adhesives
Have to say that this is a real hard job to loosen all the screen adhesives around the whole edges, there is a big risk damaging the screen, you need to be very careful.
Note: when cutting the screen adhesives, be careful not insert the card too deep in case you broken the screen flex cable ribbon.
30.do not ruin the screen cable
If you feel harder releasing the adhesives, try to apply more heat to the screen.
31.separate screen
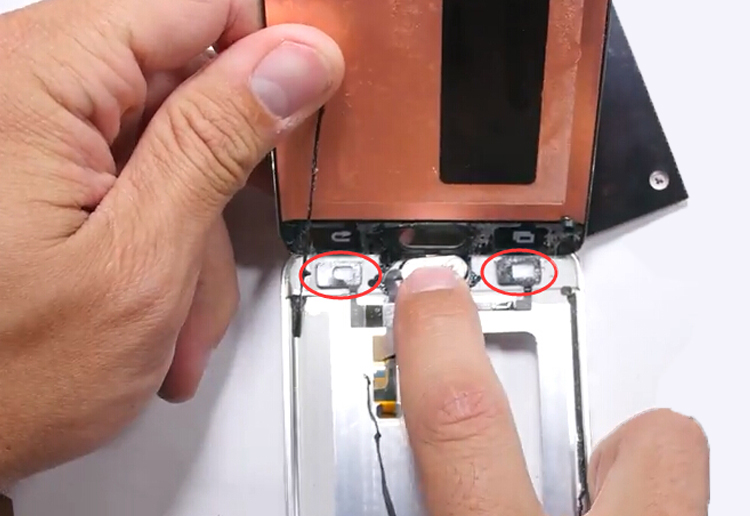
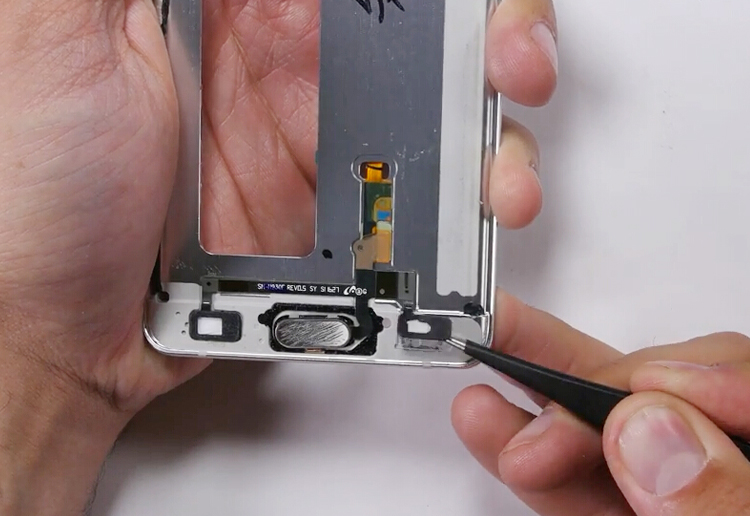
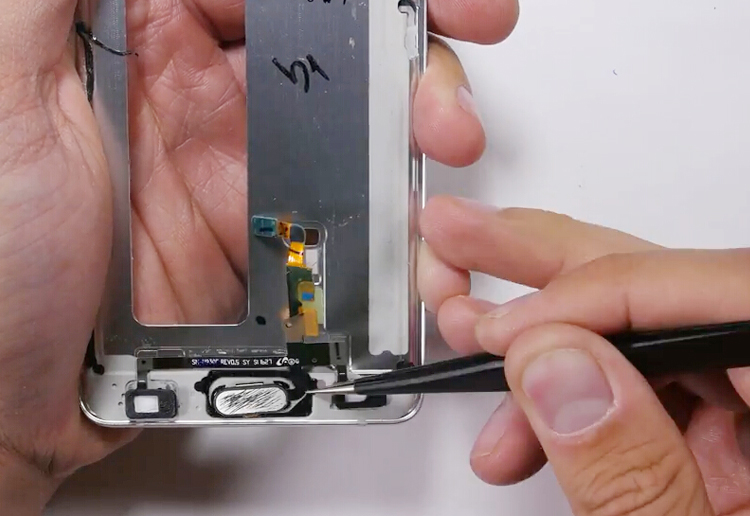
Also there you need to be careful with the touch key pad when removing the screen off the middle frame.
32.be careful with touch button flex
Now we can remove the home button flex cable.
33.remove home button flex
One more thing, the Galaxy Note 7 home button material is still made from metal and paint coating covered, there is the risk of getting scratched easily. Be aware of protecting your home button well.
34.remove home button flex cable
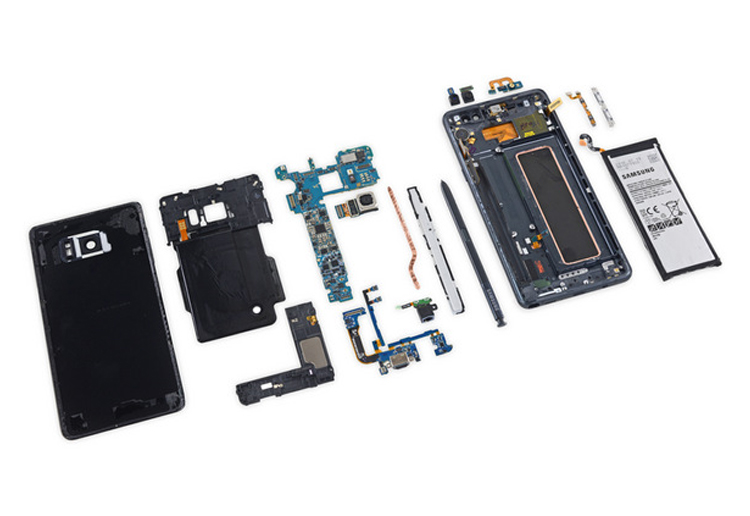
Removing the home button flex cable, then the whole teardown work has been completed by now.
note 7 teardown
From this disassembly work we can see that the Galaxy Note 7 is easier to be fixed in some way compared to the predecessor Note 5, the USB type-C charging port flex can be replaced without disassembling the screen, the battery can be taken out without removing the motherboard. However replacing the screen is still difficult because of the curved display. Better providing some protections to your beloved Galaxy Note 7!

Did high pixels makes your phone camera take better pictures?

Needless to say that camera has become one of the most important part in smart phone nowadays, which is also an important consideration when consumers buying a smartphone. However there is a misunderstanding among many people that the camera photos quality will be better when the cell phone pixels is higher. Here we are going to explain what exactly affected most to the camera photos quality.
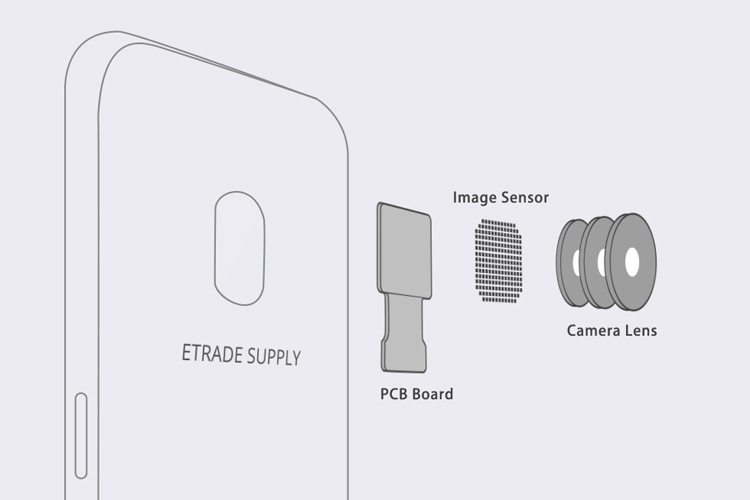
The picture below shows the structure of the main components.
Camera components
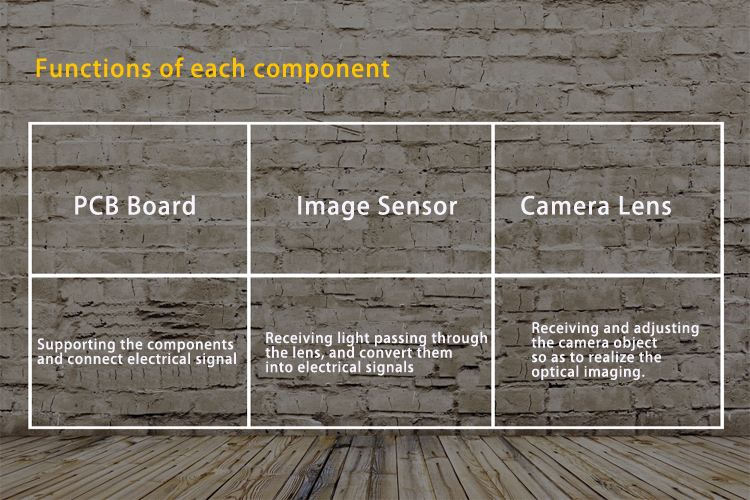
The main parts of camera are the PCB boardCMOS image sensor and the camera lenses.
Camera components2
The PCB is shorted for the printed circuit board, which is used to support the components and connect electrical signal.
The CMOS image sensor is used to receive light passing through the lens, and convert them into electrical signals.
And the camera lenses is used to receive and adjust the camera object so as to realize the optical imaging.
So what is the cell phone camera pixels?
We’ll find that many cell phone manufacturer are committed to increase their phones pixels, however is it true that more pixels equal higher camera photos quality? To realize the truth we need to know these involving factors--pixels, CMOS image sensor size and the single pixel size.
CAMERA PIXELS.
The image sensor is in a rectangle shape and the pixels is just like the small square grid, each small square grid is a single pixel, more square grid means higher pixels and the single pixel size is smaller when the image sensor is under a certain size. And the bigger the image sensor size, more light can be received and the higher the photo image quality.
CAMERA PIXELS2
The mainstream image sensor size of a flagship smart phone is 1/3 inches.
Like the iPhone 4S55C, which features 1/3.2 inches while for iPhone 5S66 Plus, 1/3 inches image sensor has been adopted.
Compared with the SLR camera, the Full Frame Digital Camera is about 35 times of the 1/3 inches image sensor. And for the single pixel, the mainstream mobile phone camera pixel are is 1.12um and 1.4um at the moment.
Using the same generation technology, if the single pixel can receive more lights when its size getting bigger, better image quality, better noise control and dynamic range performance it will be.
The picture below for the iPhone pixel size is from Apple’s official website.
IPHONE CAMERAS
From which we can tell even though iPhone’s camera pixels is lower than many other smart phones, however the photos quality is higher, meanwhile the single pixel size is bigger than the mainstream pixels.
From the above, we can see that there is still a long way to go that the cell phone camera competed with the SLR camera like the cellphone manufacturer advertised.
And we can see that the number of camera pixels that most of us concerned is not the direct factor affecting the image quality most, more advanced and larger size image sensor, lens module, manufacturers of software set-up and equipped with optical image stabilization technology are the most important factors to mobile imaging quality.

2016年8月18日星期四

How well do you know about your Fast-Charging phone?

1.The reason Fast-Charging spring up

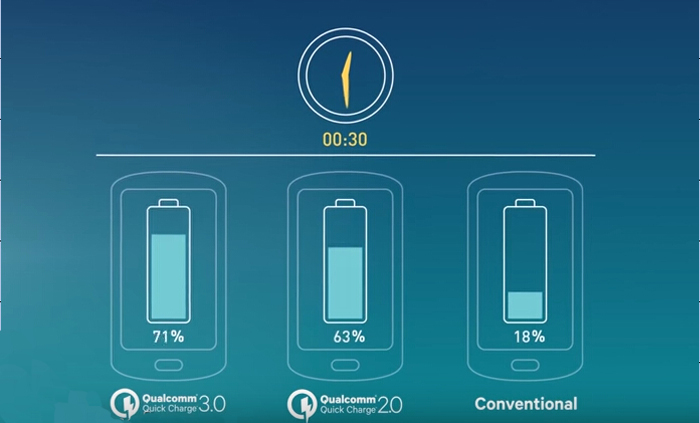
With the development and popularization of smart phones, which penetrates into our life deeply, the way to improve battery life and shorten battery charging time has become an important goal among all the cellphone manufacturers. As the battery capacity can’t be expanded without limits, the quick charge technology emerges to save people’s time. However, do you really know what is quick charge? Let’s get through this with a simple explanation.
Working principle
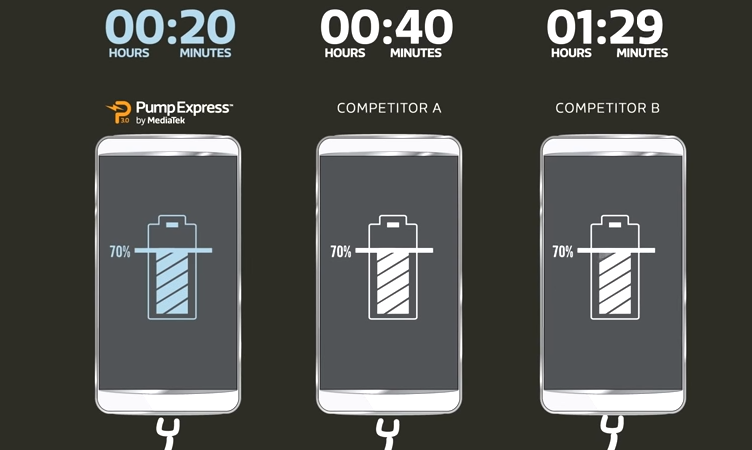
There are 3 main quick charge technology, Qualcomm’s Quick Charge (2.0/3.0), OPPO’s VOOC charge and MediaTek PumpExpress.
According to the formula P (power) = U (voltage) X I (current), improving the power means shorten the charging time while the battery capacity is fixed. All the fast charging technology is based on implementing bigger voltages and currents while charging.
A. Qualcomm Quick Charge 2.0
Qualcomm Quick Charge technology is designed for Qualcomm Snapdragon processor terminal, which has been developed to the 3rd generation already.
Charging process:
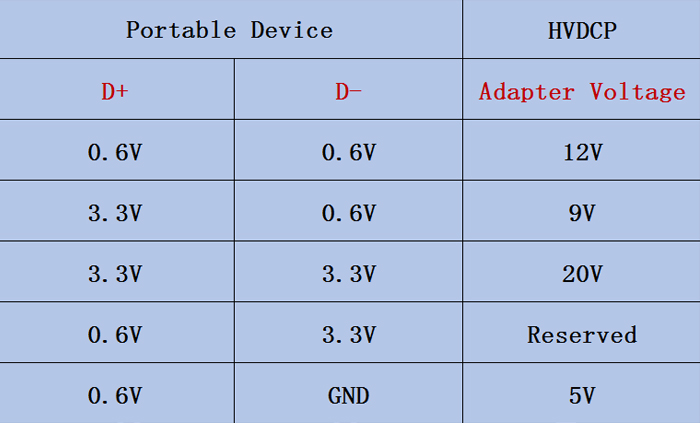
The QC 2.0 charger connects with the cellphone by on-loading voltages on micro USB port (D+ and D-) , to adjusts the output voltage.
USB port
quick-charge2.0
Step 1. When connected the phone to charger via USB cable, the D+ and D- port will be short circuit by default through MOS, the phone will be charged normally at the moment (the voltage is 5V). If the phone support QC2.0, the HVDCP(high voltage dedicated charger port) on the android device will on-load 0.325V to D+ port lasting over 1.25s.
Step 2. Lasting over 1.25s, the D+ and D- port will be disconnected and the D- voltage will drop.
Step 3. After the device detected the D-voltage has dropped, the HVDCP can read the value in the file of /sys/class/power_supply/usb/voltage_max, if it’s 9000000Mv, then the voltage on D+ port will be set to 3.3V and D- will be 0.6V, then the output voltage will be adjusted to 9V. If not, the voltage of D+ will be set to 0.6V while the D- for 0V.
Step 4. The charger will apply different Voltage to charge the device.
charging time
B. OPPO VOOC charge
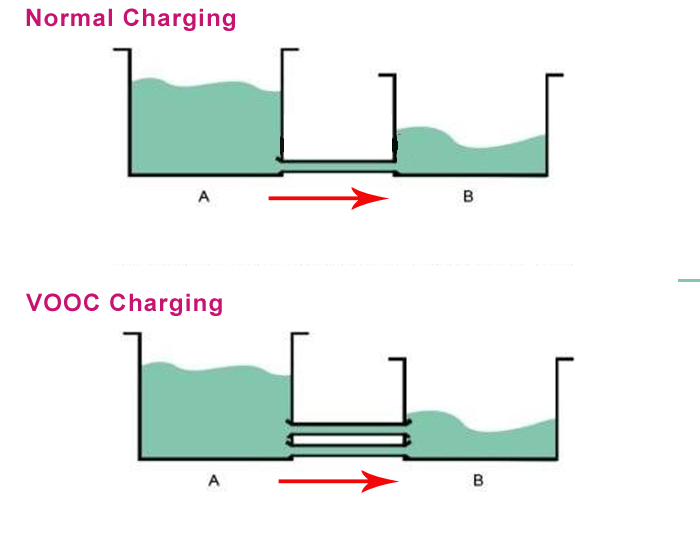
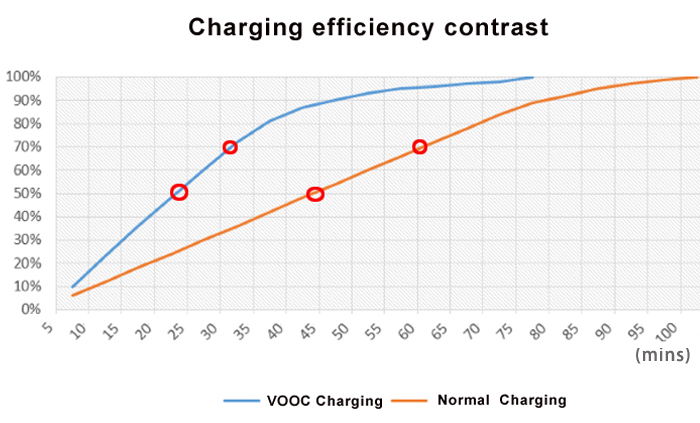
The vooc charge technology shorten the charging time by the way of increasing the electric current, it can be described briefly with the picture below.
vooc charging USB cable comparison 2
As we can see from the picture below, the OPPO Vooc charger cable is different from the normal USB charger cables, the charging interface port has been increased to 8 pins while the normal one only features 4-5 pins, which allows more currents passing.
vooc charging USB cable comparison
vooc charging effeciency2
C. MTK Pump Express
Actually the working principle of MTK PE charging technology is almost the same as Qualcomm Quick Charge 2.0, the difference is that the MTK PE charging ‘handshake protocol’ is realized by regular VBUS current pulse between the phone and charger. And another difference is that the highest MTK PE charging voltage is 9 and there is one more voltage rank 7V within.
MTK

2. Does fast charging technology hurt battery?

The quick charge process can only work when both the cellphones and the charger support fast charging. On the current situation, the charging power are totally affordable within the range of battery capacity, generally speaking, since the ‘handshake protocol’ can act as a coordination between the charge adapter and the phone battery to adjust the voltage and current value. As long as you choose the original charging power adapter to charge for your phone there won’t be damages to your battery.