2016年1月25日星期一

Why the Your iPhone Drains Quickly? Reasons and Solutions Here

This may have happened to everyone. You only have to charge your phone once a day at the beginning, however, after certain time of use, you have to charge your phone twice, or even three times a day. What happened? If you met this problem, just follow our tips to check for the reasons and the corresponding solutions.

Reason 1:
Too much life circle of your current battery.

This is the most possible reason for people who encountered this issue and it’s easy to find out. Simply by checking through a software named”iBackupBot for iTunes”, you will know whether your iPhone battery can server you any longer or not.

Install the software, then connect your iPhone. After it’s been recognized, click “more information”, and there will pop out a tab showing information of your iPhone. On top of it, it’s the battery information.
*CycleCount is the battery life circle detected.
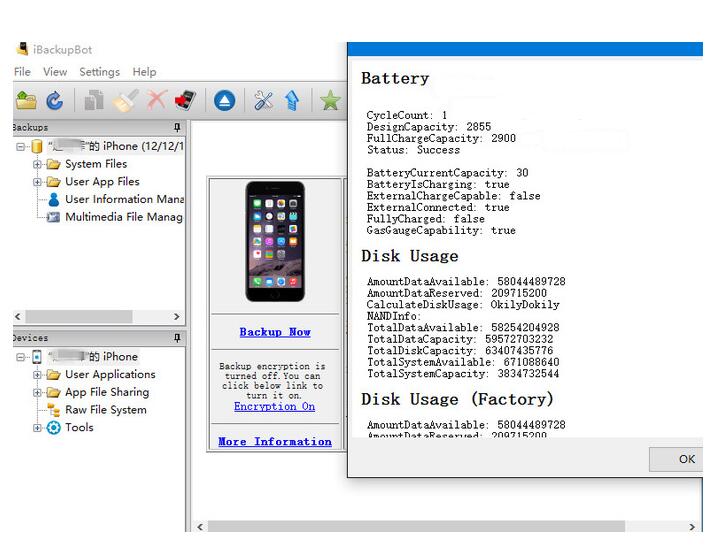
 
For normally used iPhone, you would experience a significantly drop in battery life when the battery circle has reached 400-500 times. If you found the battery circle is too high or the FullChargeCapacity is much less than the DesignCapacity, you have to replace the battery.

Reason 2:
Electricity leakage of your iPhone.

For some iPhones, after the battery has been swapped, the issue remained. This probably is caused by the electricity leakage on motherboard. Diagnose is not difficult, just do the following steps:

1.       Clear all the background apps of your iPhone.
2.       Go to Settings>General>Background App Refresh  Shut it down.
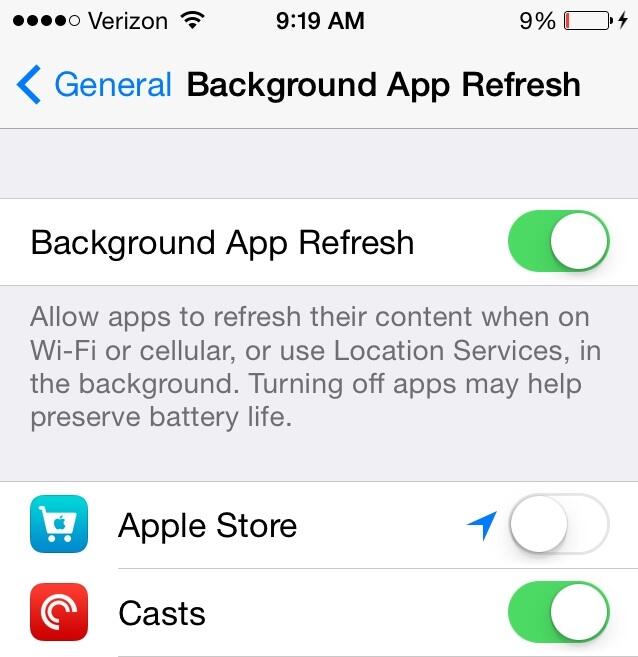
3.       Go to Settings>Privacy>Location Service   Shut it down.
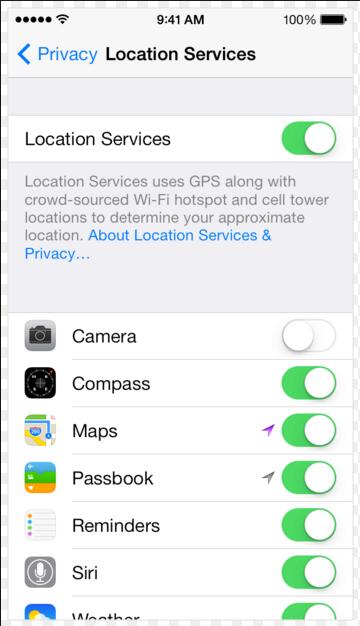
4.       Keep your SIM in and lock the phone for a certain time.

After all the steps above, let your phone there for an hour, and then check the battery change of your phone. Below are the normal battery drop of different iPhone models.
iPhone 5     1% drop
iPhone 5S    1% drop
iPhone 6     1% drop
iPhone 6P    0% drop

If your iPhone battery drop far more than the statics we listed above and you can feel the rear housing is slightly warming up, there is probably the electricity leakage of your iPhone.

If your iPhone is suffering from this issue, please take it to the professional repair shops to have a check.

Tips for daily uses:

  1.        To better use your iPhone battery, do not charge the phone when the battery is extremely low or the phone is shut down. If charged properly, the iPhone battery can be used for 2 years without any issue.
  2. Use the OEM cable and charger to charge your phone. Unstable electricity will harm your phone and battery. Here is the article for how to distinguish the fake & OEM charger and cables.
How To Replace A Cracked Motorola Droid Turbo 2 Screen

The Motorola Droid Turbo 2 was released in October, 2015, features an AMOLED capacitive touchscreen and is known for its super shatterproof screen. It’s really amazing that Droid Turbo 2 display can only be destroyed in a few extreme tests. To know what makes Droid Turbo 2 screen so durable, please check our post “Why the Moto Droid Turbo 2 Has the Best Shatter Proof Screen”. Well, if you’re unfortunately one of the few that cracked a Motorola Droid Turbo 2 screen, this tutorial guide might be of help.

Tools Needed:
4. Spudger
5. Heat Gun/Hair Drier

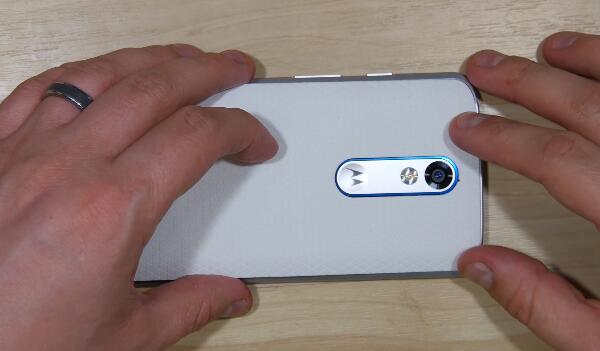
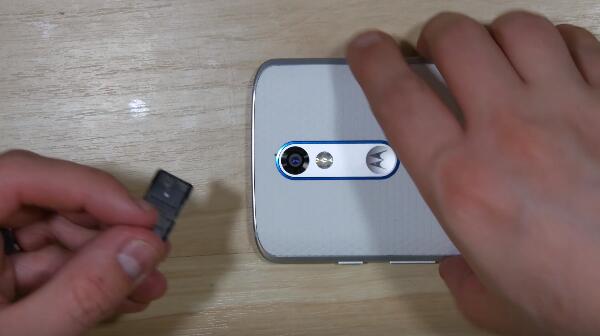
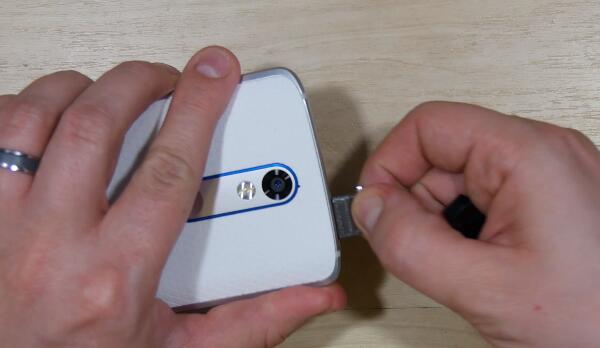
1. Power off the Motorola Droid Turbo 2 and remove the SIM card tray with the help of an ejector tool.

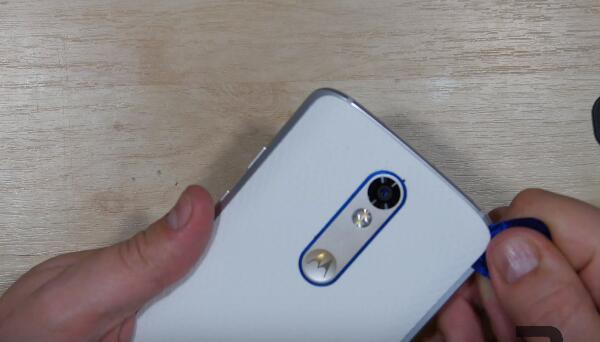
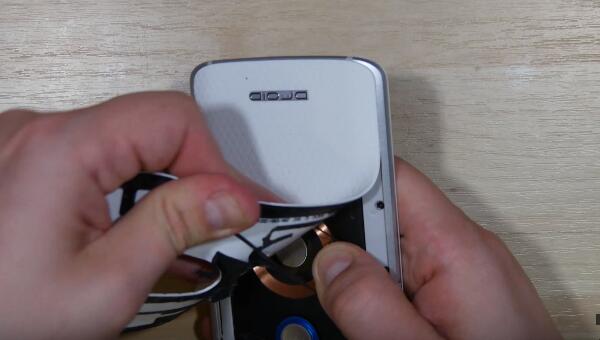
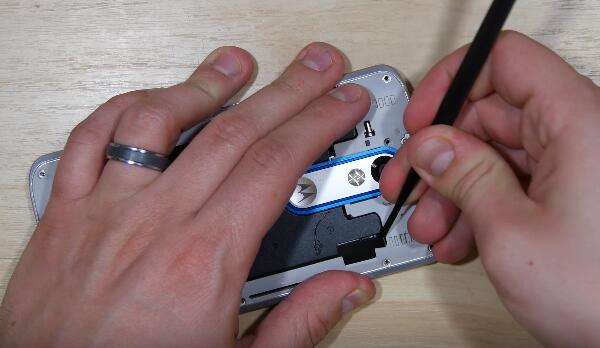
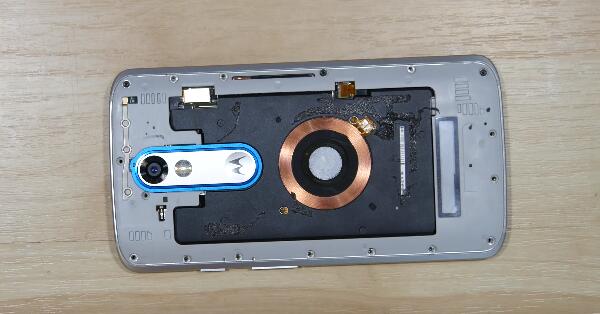
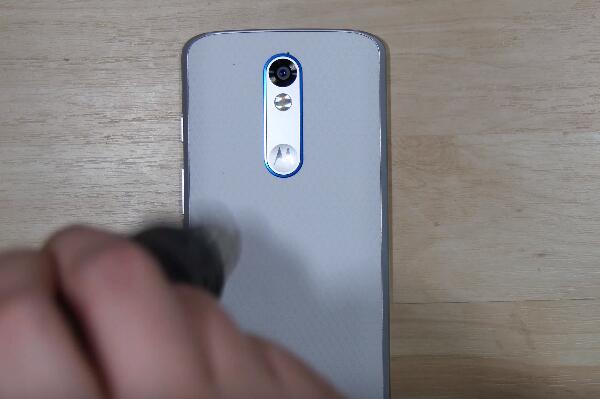
2. Heat up on the edges of Droid Turbo 2 back cover, insert a case opening tool in between and running it around, pull off it carefully so as not to damage the wireless charging coil underneath.

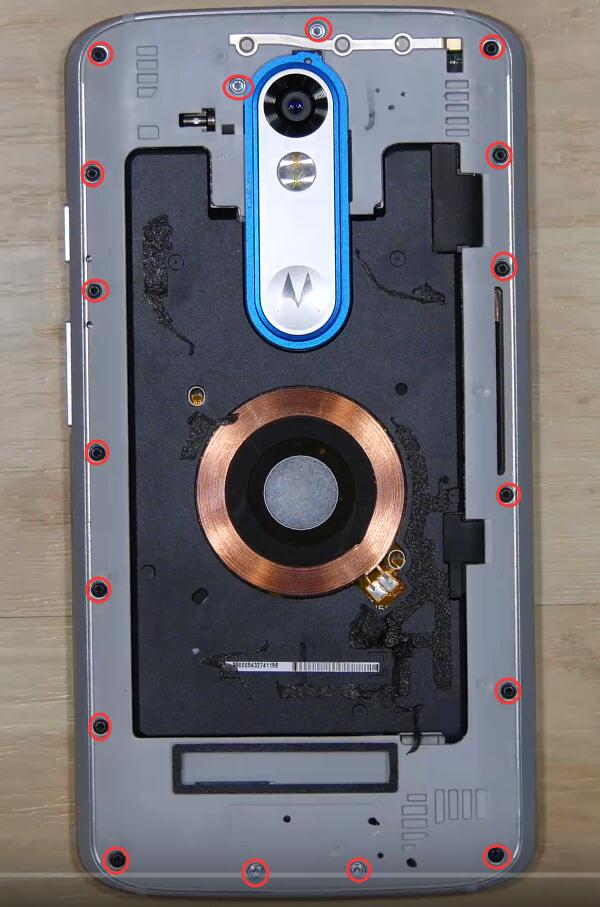
3. Undo the 17 screws in the Droid Turbo 2 rear housing.

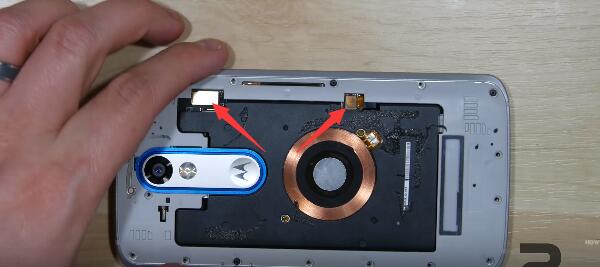
4. Pry up the 2 rubber caps and then pry up the connectors underneath.

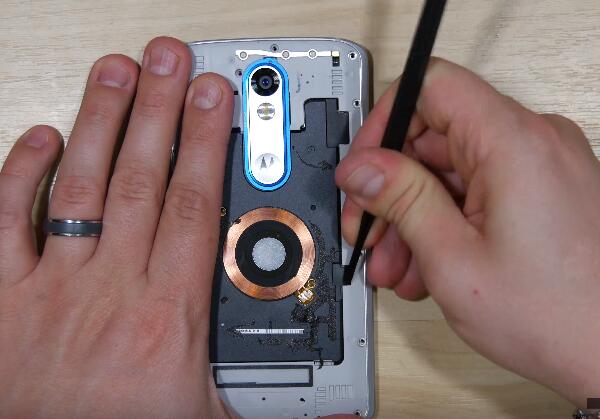
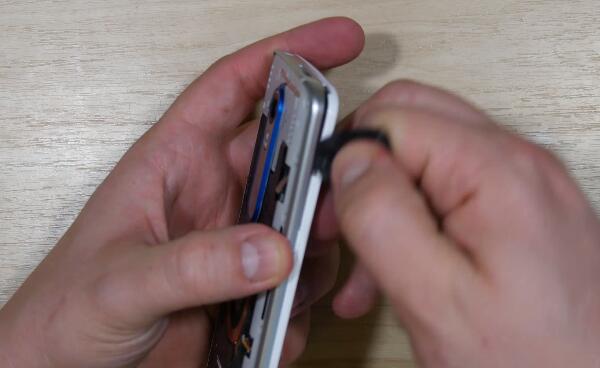
5. Insert the case opening tool and run it around to separate the rear housing assembly.

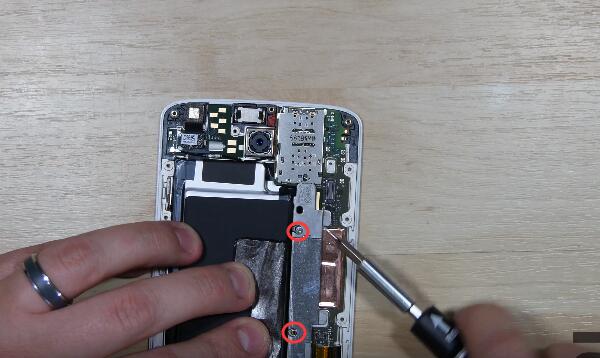
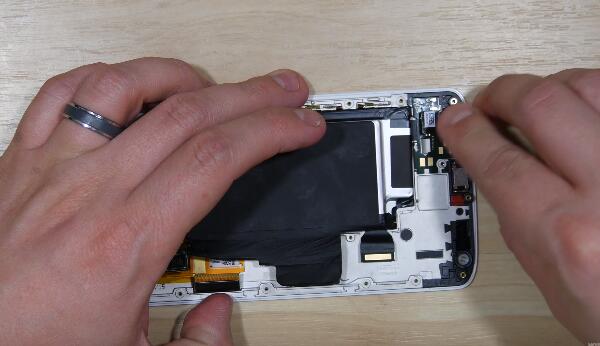
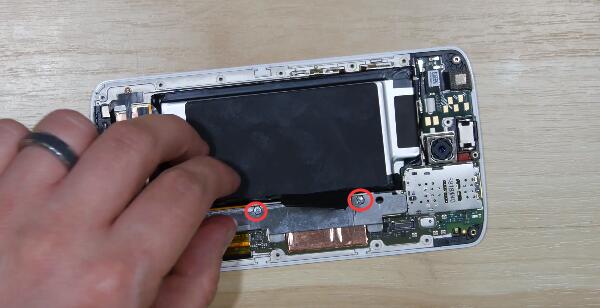
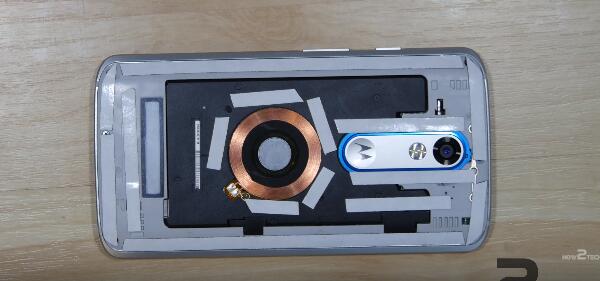
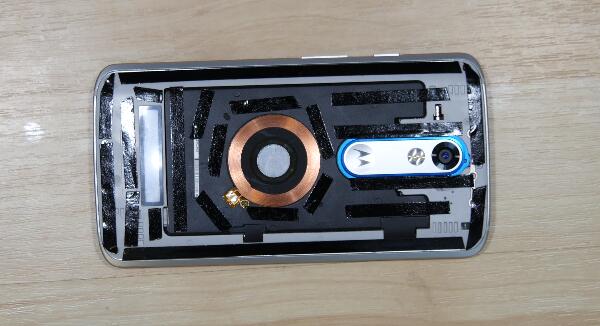
6. Peel off the black tape, undo the 2 screws to release the metal bracket.

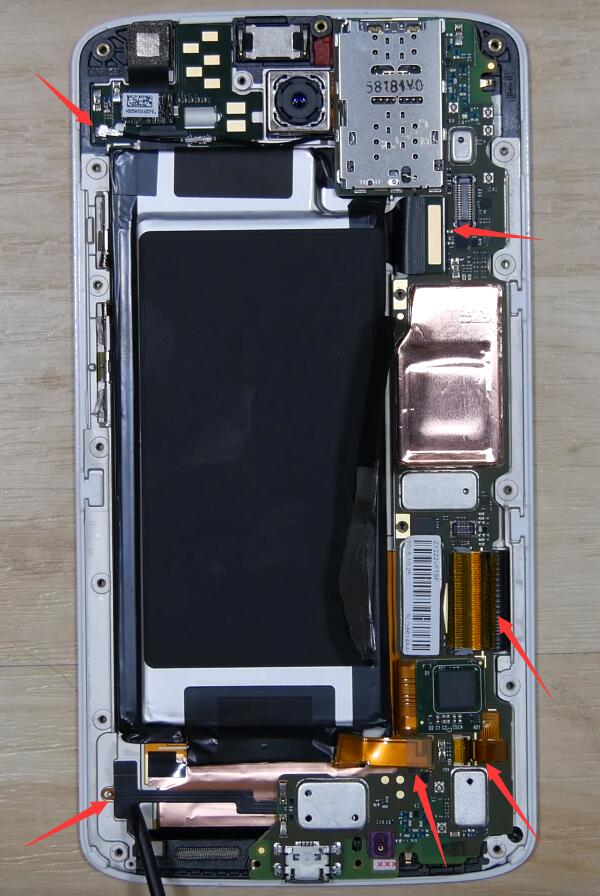
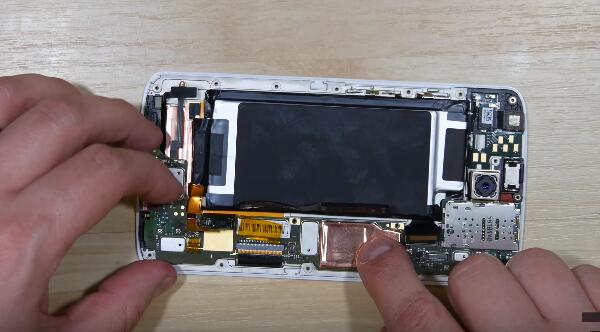
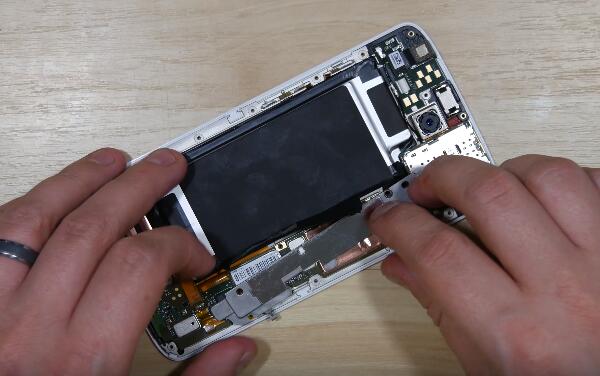
7. Pry up the connectors as shown below to release the Droid Turbo 2 motherboard, 2 connectors are covered by the yellow tape caps, remove the tapes before prying up the connectors. 

8. Remove the Droid Turbo 2 front facing camera.

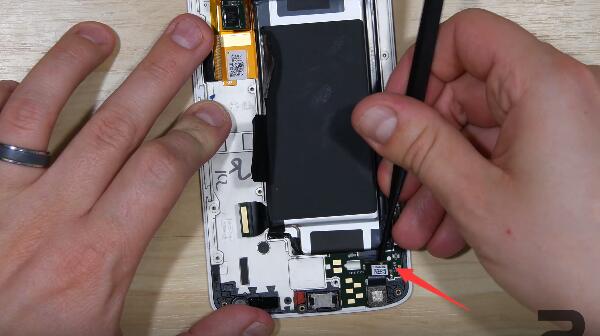
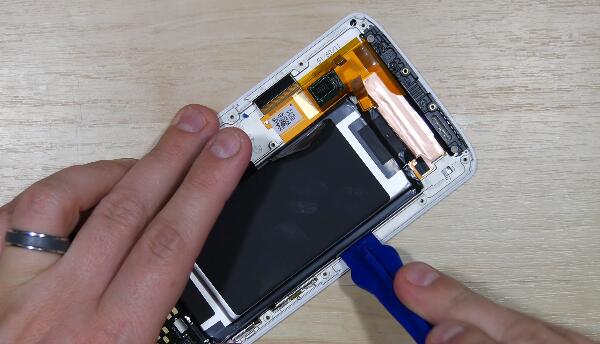
9. Pry up to remove the Droid Turbo 2 battery. Be careful and patient on this step so as not to bend the battery.
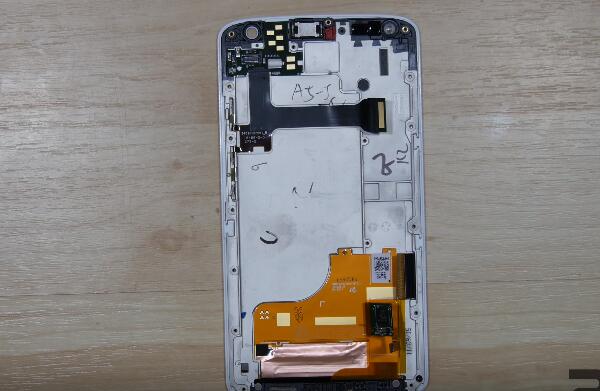
Now the Motorola Droid Trubo 2 LCD assembly with frame was left, reassemble all the parts together to finish the screen replacement work.

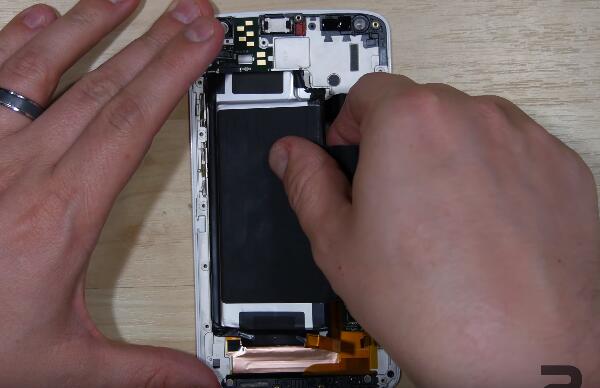
10. Reassemble the Motorola Droid Turbo 2 battery.

11. Reassemble the Motorola Droid Turbo 2 front facing camera.

12. Put the Droid Turbo 2 motherboard right in the slot and reconnect the connectors.

13. Reassemble the metal bracket, fasten the 2 screws and then recover the black tape.

14. Put the rear housing in the slot, reassemble the Motorola Droid Turbo 2 power button and volume button before fastening the 17 screws in the rear housing.

15. Reconnect the 2 connectors and then cover them with the black rubber caps.

16. Paste the double-sided adhesive on the rear housing if you don't have the Motorola Droid Turbo 2 back cover adhesive, then peel off the covering film.

17. Place the Motorola Droid Turbo 2 back cover on the rear housing. 

2016年1月21日星期四

How to Replace the Microsoft Lumia 950 XL Screen

As the little brother of Lumia 950, the Microsoft Lumia 950XL features a 5.7 inches AMOLED display, a 20 megapixel camera and the Windows 10 for mobile.
Though the build quality of Lumia phone is always good, accidents do happen. Wonder how to replace the Microsoft Lumia 950 XL shattered/cracked/broken screen? Here we will walk you through a step by step guide.

Tools Needed:
Torx 5 Screwdriver
Plastic Pry Tool

Step 1.
Shut down the phone and then remove the battery door and battery.
 
Step 2.
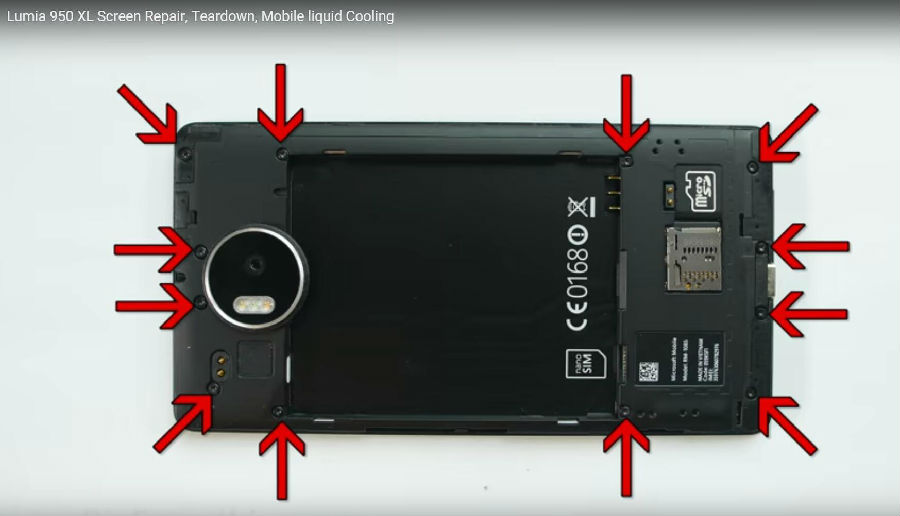
Use T5 screwdriver to remove 12 screws holding the rear housing of Lumia 950XL.
 
Step 3.
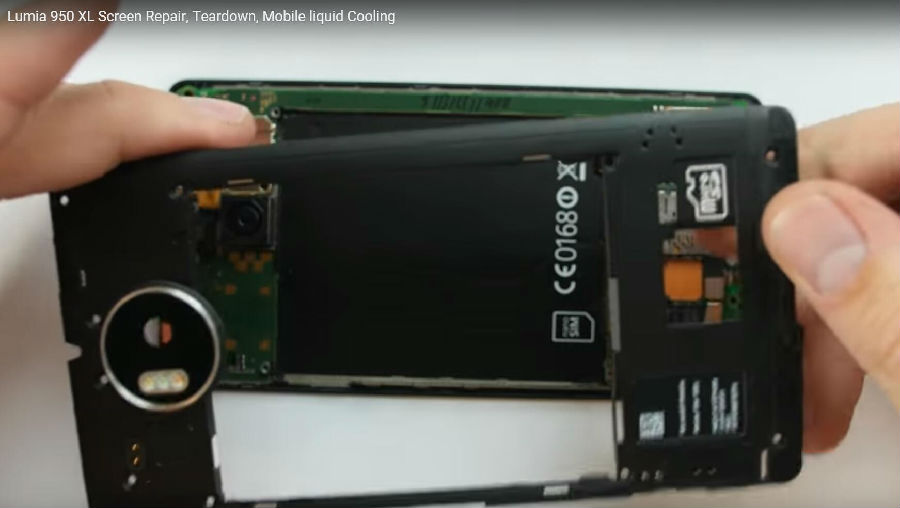
Remove the rear housing.
 
Step 4.
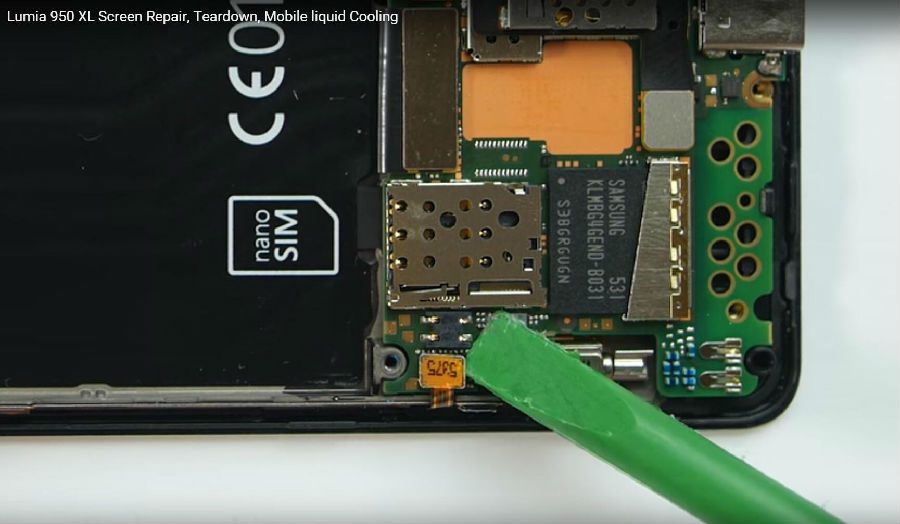
Disconnect 3 connectors.
 
Step 5.
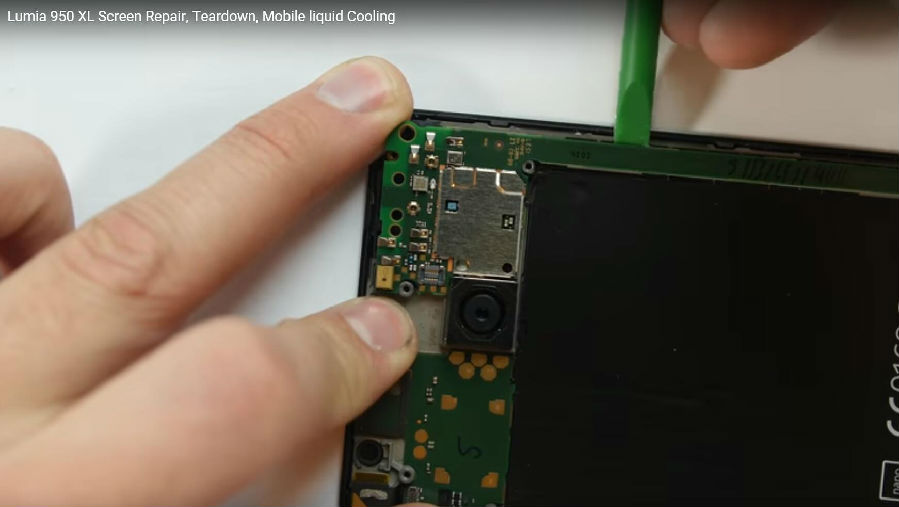
Undo clips behind the motherboard.
 
Step 6.
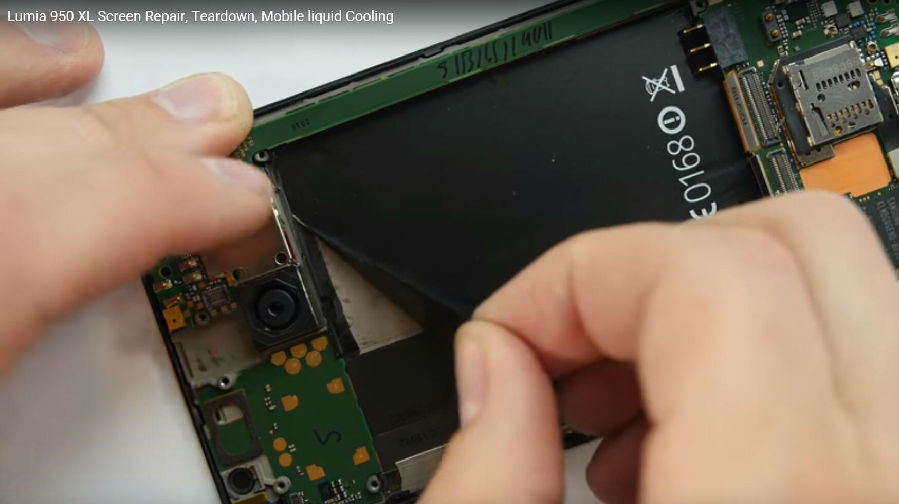
Remove the black sticker underneath the battery because there is still a ribbon cable behind.
 
Step 7.
Disconnect the ribbon connector at the back of motherboard to release it.
Step 8
Now you can replace the Lumia 950XL screen with frame then put back all other components back on. 

Why Galaxy S4 Stopped Charging and Auto Powered off After Replacing a New Charging Port Flex?

Recently, some of our customers reported that the Galaxy S4 popped up a “Low/High Temperature” warning and the charging symbol on the homepage kept twinkling, then the device stopped charging and auto shut off after replacing anew charging port flex cable ribbon.

After careful analysis and examination, we found that the temperature/humidity sensor was the main cause. The sensor is used to detect temperature and humidity, pass relative information to the motherboard so as it will react accordingly. For example, the motherboard will command and act a “Stop Charging” order after the sensor reflects that temperature is over high or over low.


Well, the loose connection between charging port flex ribbon and motherboard during the installation will also result in this annoying problem.

To fix this problem, here are the solutions we’ve verified:
1. Make sure the hole in the center of the temperature/humidity sensor is not stuck.
2. Check if the sensor is still in well shape and test the charging port flex before starting a replacement work.
3. Connect the charging port and motherboard tightly and correctly.

How To Fix iPhone 6S Auto Shutdown When It Still Has Battery?

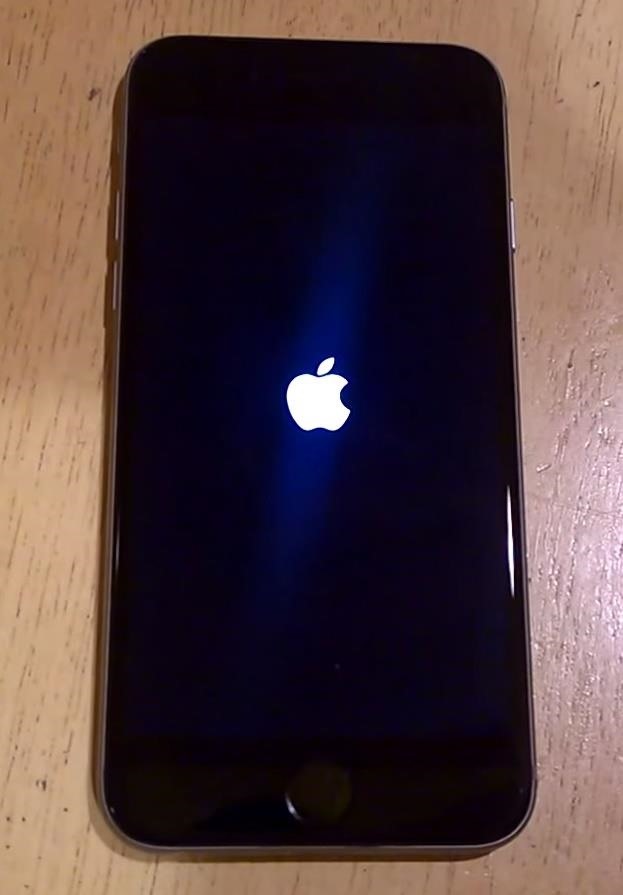
Recently, some users reported that their iPhone 6S or iPhone 6S Plus shut off randomly even it still had 40% or more battery remaining. Apple admitted it’s a bug the battery status did not update. After a series of investigation, they came to a conclusion that the time zone or clock setting seemed to be the culprit.

So when you’re unfortunately suffering from this issue, first is to reboot your device and go to Settings > General > Time and Date to set it as auto-setting mode.

If the problem still exists, try following tips before sending in Apple for repair.
1. iOS Update
Update your iOS to the latest version to see if it works.

2. DFU Restore
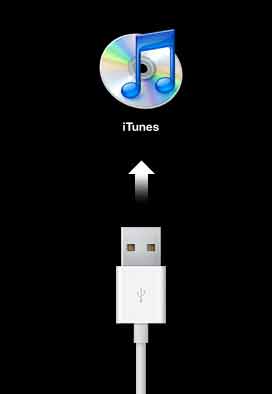
A “DFU Restore” (DFU is short for Device Firmware Update) is an even deeper restore mode than the recovery mode according to Apple’s description on their website. You can DFU restore your device with following instructions:
 Plug your iPhone 6S/6S+ into a computer and open iTunes.
 Press and hold the Power Button and Home Button together for 8 seconds.
 After 8 seconds, release the Power Button but continue to hold the Home Button until iTunes says “iTunes has detected an iPhone in recovery mode.”
 Let go of the Home Button. Your iPhone 6S will go black completely if you’ve successfully entered DFU mode. If it’s not, try again from the beginning.
 Restore your iPhone 6S using iTunes.

3. Battery Calibration
Your iPhone 6S may need a battery calibration, learn how to calibrate an iPhone 6S battery here:
▶ Run your iPhone 6S battery down to 0% and auto power off.
▶ Charge your device till it reaches 100%, do not unplug or use it during the charging.
▶ Leave your iPhone 6S on charge for one more hour although it has reached 100%.
▶ Use your device as normal to drain the battery till zero, do not charge it during this usage.
▶ Charge your iPhone 6S to 100% again and charge another hour to make sure it’s fully and completely charged.
Now your iPhone 6S’s battery is calibrated.

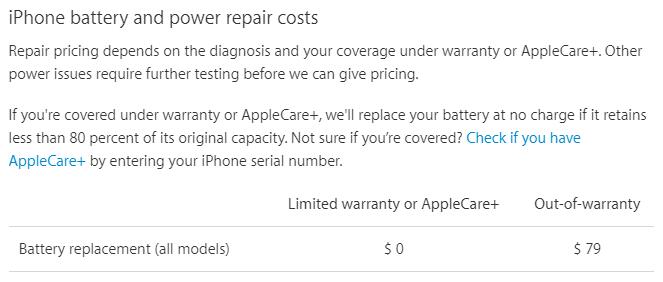
If one of above tips you work, possibly it’s a faulty battery, please consult your local Apple Service for a replacement. Apple will not charge you anything to replace a battery if your iPhone 6S is still under AppleCare+.


However, if you’re not covered with the warranty or AppleCare+, at least $79 will be charged to get your iPhone 6S battery replaced. Compared with that, to buy an iPhone 6S battery at an approximate cost of $40 and have it replaced by someone else or by yourself would be cheaper. Please note that you run your own risk and the warranty will be voided if you’re going to replace your iPhone 6S battery by third parties. As you may need, here is a tutorial guide about How to Replace an iPhone 6S’ Battery for your reference.

Why the Moto Droid Turbo 2 Has the Best Shatter Proof Screen

Back in Oct, 2015, Moto has announced the Droid Turbo 2 which features the shatter proof screen. Many videos & articles have done the durability tests for it and only in some extreme cases, the screen will get cracked. So what’s make the Moto Droid Turbo 2 screen shatter proof? Will other manufacturers adopt this technology in the future?

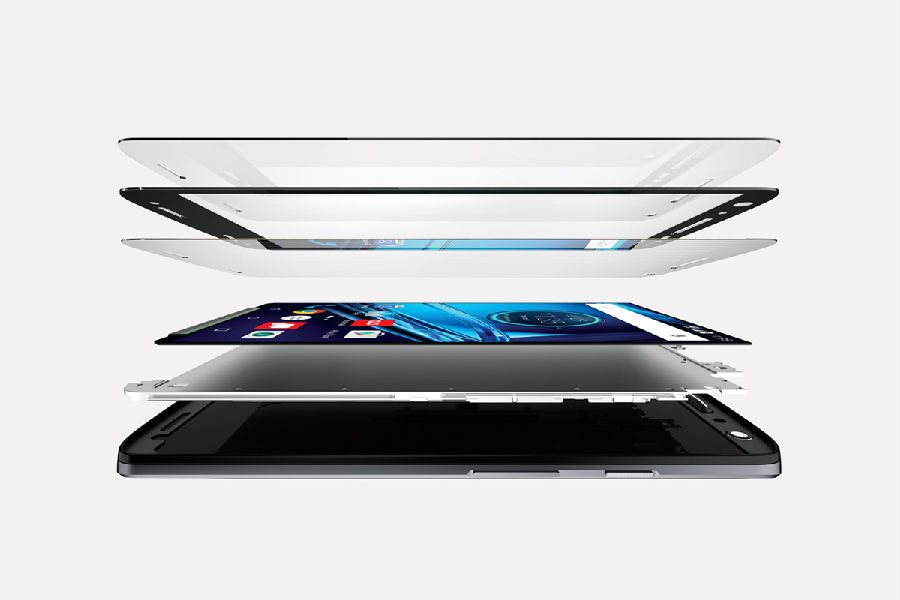
Let’s first see the inner structure of the “Shatter Proof Display”. 
 
From top to bottom, there are “Moto ShatterShield Lens”(replaceable), “Plastic Cover Lens”, “2 side Touch Panel”, “AMOLED screen”, “Aluminum Chassis” and body of the phone. 

The main reason why Moto Droid Turbo 2 is shatter proof is due to the materials used. Unlike other phones using Corning Gorilla Glass, Moto has adopted plastic to build the cover screen (Though feels like glass).

These two materials have totally different features.
For Glass: fragile, but not easy to be deformed by forces, hard, not easy to be scratched;
For Plastic: flexible, not easy to be cracked, but soft, easy to be scratched;

For the outer cover, sure the plastic screen can survive impacts, however, it will get scratches during daily uses. The replaceable cover lens is the perfect solution for it. The users can easily replace the cover lens when it scratched, just like a screen protector. 
Though the first two layers can survive the impacts, what about the touch screen and display?
In order to make the touch panel “shatter proof”, Moto has put a dual-layer touch system as a backup in case the first layer is damaged. For the display, flexible AMOLED screen is a much better choice which will bend but not break.

The edges of the screen are covered by the Aluminum Chassis, which help to protect the phone from side impacts. 

So will more and more manufacturers adopt this technology to build their phones? 
Personally, I think, no.

There are 3 reasons:
1. Only few phones can use OLED screen. Still, Samsung is the only manufacturer supplying OLED screens for phones which means it’s still in short supply.
2. Compare with “shatter proof”, people care more about other features. “Shatter Proof” is not a killing feature to trigger customers interests.
3. 3D Touch/Force Touch requires glass instead of plastic screen. No doubt the 3D Touch/Force Touch function will become more and more popular, but this function needs to calculate very tiny deformation of the glass. 

How Well Do You Know About Waterproof Cellphones

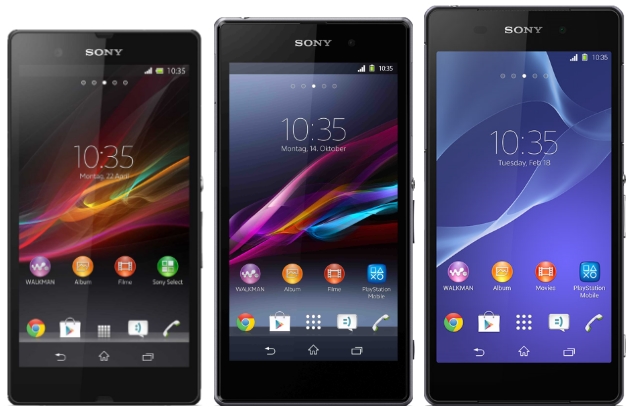
As it’s widely known that one of the significant features of Sony Xperia Z series phones is the waterproofness, there’s even a report showing 90% ~ 95% of the cellphones are waterproof in Japan since Japanese young women are fond of using smartphones in bath. However, many users complaint their devices were not that waterproof as expected under our post of Sony Official Reveals the Waterproof Cellphone Repair Process. Well, do you know the difference between waterproof and water-resistant? How much you have known about waterproof devices? Check below explanation to get more information:

1. Waterproof Level
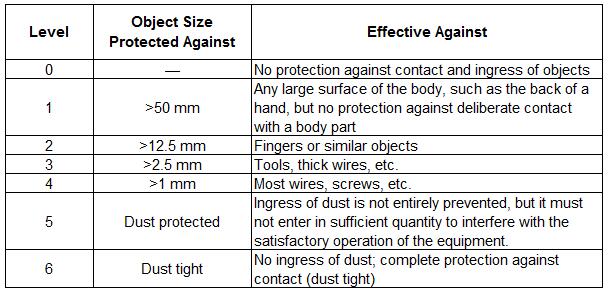
The waterproofness is rated by IPXX (International Protection), i.e. the Sony Xperia Z5 is IP68 certified. The first number indicates the solid particle protection level while the latter number represents the liquid ingress protection level. Here in below are the further explanations.

Solid Particle Protection Level

Liquid Ingress Protection Level
(Charts from Wikipedia)

2. Waterproof Types
The waterproof phones are divided into two categories: professional waterproof phones and consumptive waterproof phones. Phones rated at IP68 or higher usually cannot meet the demands of consumers due to the big size and heavy weight. For ordinary consumers, IP56 or IP57 is waterproof enough in daily use.

Among the consumptive waterproof phones, Sony Xperia Z phones are the most famous because they are IP58 ~ IP68 waterproof as well as fashion and light.

As for the major cellphone manufacturers, it’s really hard to make a phone waterproof and beautiful at the same time since waterproofness is a systematic project, every single component requires special handling considering the sealability of buttonsbattery compartments, connectors etc. The thickness and cost will certainly increase to cover rubbers inside a phone to make it waterproof.

3. Waterproof Technologies
Apart from covering rubbers on the parts of a phone, some third party manufactures have developed other waterproof technologies.

 Waterproof Spray
Impervious is a waterproof spray that can be sprayed on both the interior and exterior of a device, making it to be waterproof after the spray forms into a super thin water-resistant film.

 Waterproof Coating
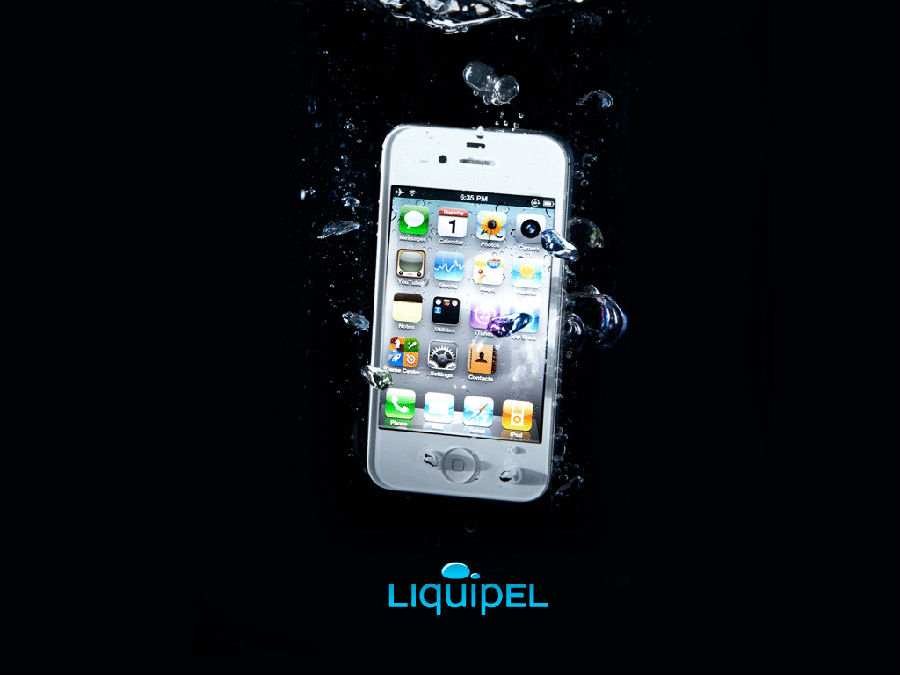
Watersafe is a waterproof coating technology invented by Liquipel. They use a proprietary machine to pump down to create a vacuum and then eject the Liquipel formulation which turns a liquid into a gas as it enters the chamber. After that, they introduce plasma which decomposes the liquid repellent molecules polymerizing them to themselves. Once the chamber comes back to atmospheric pressure, they remove the water damaged device with no cure time and the process is complete.
 

Another similar waterproof coating technology is the Nano-coating waterproof technology such as: P2i.

 Waterproof Film
HZO technology solutions make electronics waterproof and resistant to corrosion. By applying a thin-film material directly to pcb boards, sensors and other components during manufacturing, HZO can protect electronics from accidental splashes, sweat, humidity, industrial liquids, and even full submersion.
 

4. Waterproof Tips
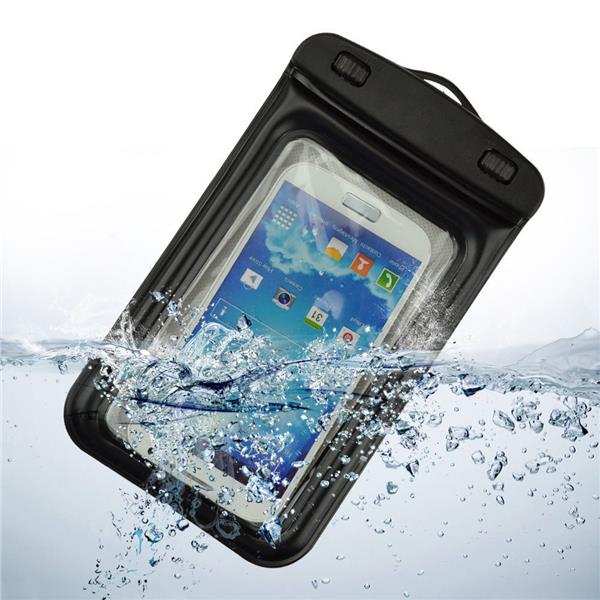
The above-mentioned waterproof technologies are not common for ordinary consumers, thus, what can we do to protect our phones against water damage? Well, to dress your cellphone in a waterproof case can help to prevent your device being water-damaged. Some waterproof cases are expensive, if you’re looking for a cheap but useful way to keep your phone away from water damage, perhaps a waterproof bag is the best choice.
 

If unfortunately your phone is suffering from water damage, do not power it on at once, read below blog about Insider Tips to Save Your Water-damaged Device.