2015年6月30日星期二

How To Fix iPhone 6/iPhone 6 Plus Camera Problems

Recently, many users reported that their iPhone 6 or iPhone 6 Plus were experiencing camera problems like: black images or the camera locks up (closed lens). Here are some tips and tricks to help you solve these issues.
 
Tip 1. Make sure your iPhone 6 camera lens is not blocked by anything whether it’s a phone case or dusts. In many situations the simplest solution works the best.

Tip 2. Always update iOS to the latest version. It may repair some technical bugs that prevented the camera from working properly.

Tip 3. Restart your iPhone 6/iPhone 6 Plus. If the device locks up and cannot be powered off by the power button, press the sleep/wake button and home button at the same time to force restart it.

Tip 4. Force quit the camera app, then open it again. To do this, press the home button twice, and you will see a list of apps you have been using lately. Find the camera, and swipe up to close it.

Tip 5. Reset the settings by going to Settings > General > Reset > Reset All Settings.

If none of the above 5 tips or tricks worked, you may want to go to Apple’s Official Service for help.
If it’s a hardware problem then the camera will have to be replaced, buying an iPhone 6 camera replacementand DIY is much cheaper than sending the phone to a repair shop or Apple Services.

2015年6月29日星期一

Nokia Lumia 1020 Reassembly Guide


Here is the guide for reassembling your torn apart Nokia Lumia 1020. By Following this step by step guide, you can quickly rebuild your phone.
Click here to see how to take apart the Nokia Lumia 1020
Step 1:
Put back the motherboard to the rear housing assembly.
Nokia Lumia 1020 reassembly 1
Step 2:
Put back 2 Torx screws on the bottom of the motherboard.
Nokia Lumia 1020 reassembly 2
Step 3:
Reconnect the microphone connector.
Nokia Lumia 1020 reassembly 3
Step 4:
Fasten these 2 screws.
Nokia Lumia 1020 reassembly 4
Step 5:
Fasten the Small Phillips Screw on the top.
Nokia Lumia 1020 reassembly 5
Step 6:
Connect the side key flex cable.
Nokia Lumia 1020 reassembly 6
Step 7:
Connect the rear facing camera.
Nokia Lumia 1020 reassembly 7
Step 8:
Put the rear facing camera back to its position.
Nokia Lumia 1020 reassembly 8
Step 9:
Reassemble the battery
Nokia Lumia 1020 reassembly 9
Step 10:
Put back the camera and battery retaining bracket.
Nokia Lumia 1020 reassembly 10
Step 11:
Fasten it with 3 screws.
Nokia Lumia 1020 reassembly 11
Step 12:
Put back the screen locking mechanism.
12
Step 13:
Connect the main screen connector.
Nokia Lumia 1020 reassembly 13
Step 14:
Reconnect the proximity and front facing camera flex cable.
Nokia Lumia 1020 reassembly 14
Step 15:
Put the screen into the frame from side.
Nokia Lumia 1020 reassembly 15
Step 16:
Plug the battery connector.
Nokia Lumia 1020 reassembly 16
Step 17:
Fasten the screw.
Nokia Lumia 1020 reassembly 17

2015年6月28日星期日

iPhone 5 LCD Screen Assembly Small Parts List


Every smartphone is built with a laundry list of parts like LCD screen, digitizer, glass lens and cameras, but there are many other small parts we need to pay attention to, without those small parts, we can't put together a working phone. 

Below we show you the iPhone 5's LCD Screen Assembly with frame and home button assembly for example. We want to show you why buying assemblies will save you both time and money!

Have a look at the pic below first, check it out how many small parts there are.

Here is the list of the parts:


Some repair shop owner may think it's more economical to just get the parts they need, and recycle the damaged phone part, which oftentimes ends up costing more. They neglect to add value to the labor needed to perform this apparently easy but cumbersome job. Many repair shops who do this neglect to put value on opportunity, and how many other repair jobs they could take on if they optimized their time.

Our engineers have stated that it takes technicians around 30 minutes to complete the assembly of an iPhone 5 LCD Screen Assembly with all the small components. Generally speaking, iPhones are the most commonly damaged phones sent to a repair shop, and if a shop receives 8 iPhone 5s in need of a screen replacement. Roughly 4 hours can be saved by using an assembly as opposed to piecing the device together themselves. That is 4 hours more that can be dedicated to finding more customers and building more of a rapport. Time is more valuable than money. Don't work harder work smarter.

2015年6月27日星期六

How To Disassemble/Tear Down HTC One M9


HTC One M9 was released in March of 2015. As the successor to HTC One M8, they both look so much alike at first sight. What about innards? Let’s take apart the device and see.

Tools Needed:
Hair Drier/Heat Gun

Step 1: Power off the HTC One M9, then take out the SIM card tray and SD card tray with an ejector pin or tweezers.


Step 2: Pry up the top rail, undo the 2 screws with a T5 Torx screwdriver.

Step 3: Pry up to separate the LCD assembly and frame from the rear housing.

Step 4: Undo the screws, pry up the adhesive shield, then pry up the connectors to release the motherboard.

Step 5: Remove the bottom loudspeaker assembly.

Step 6: Remove the charging port assembly  and the two signal cables.

Step 7: Release the main board flex.

Step 8:  Undo the screws and then pry up the connector to release the daughter board.

Step 9: Release the rear facing camerafront facing camera and upper loudspeaker assembly.
 

Step 10: Pry up the side key flex ribbon and then the battery carefully.


Step 12: Heat up the screen to soften the adhesive. Then insert a case opening tool to separate the LCD assembly from front frame.
(Notice: keep the heat source moving, don’t heat any one side for to long, and heat for no longer than 1 minute.)

You’ve now successfully disassembled the HTC One M9.

2015年6月25日星期四

The Cost Of Repairing A Cracked Nexus 6 Screen


Even the Motorola Nexus 6 features an AMOLED capacitive touchscreen and is protected by Corning Gorilla Glass 3, but a cracked screen is still possible if the device is dropped by accident. Here we estimate the cost of repairing a broken Nexus 6 screen for your reference.
Nexus 6 Cracked Screen
If your Nexus 6 still responses and displays like nothing else happened despite the annoying cracked screen, then the Nexus 6’s glass screen was damaged and needs to be replaced. It doesn’t that much, $10 is more than enough to buy a replacement Motorola Nexus 6 Glass Lens.

If the Nexus 6 is unable to display anything but you can hear and feel the vibration when starting up the phone, then the LCD screen was damaged. Or if your Nexus 6 touch is not responsive but displays normally, then the touch screen was damaged. The worst-case scenario is the Nexus 6 screen is totally out of commission after being dropped. In this case, whether you send your device to the Motorola center or visit a repair shop, they will charge you no less than $300 as the whole LCD assembly needs to be replaced.

However, if you’d like to repair it by yourself, the damage to your wallet is not that bad. A replacement Motorola Nexus 6 LCD Touch Screen Assembly costs about $220 at present. The separation work between LCD Assembly and frame is difficult, and we’d suggest you to replace the Motorola Nexus 6 LCD Touch Screen with Frame if you do not want to take that risk. Along with the lower risk is a higher cost, which is about $280.

Here is a link to our repair guide: How To Repair A Nexus 6 Cracked Screen.
Here we also provide a video tutorial about How to Teardown Nexus 6.

2015年6月24日星期三

How to Save Your Water Damaged Phone


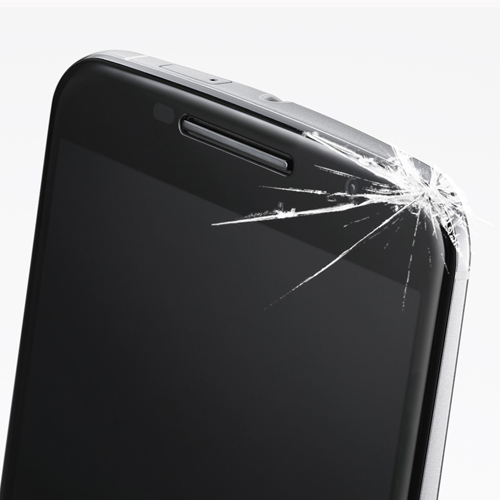
If you happen to drop your phone in water, immediately get it out and power it off, then what do you do to help save your poor phone? Put it into a bag of rice to dry it? 
In fact, rice won't do too much to dry your phone. It's better to wipe the parts with a clean cloth and lay the parts in a drafty place; however, after the parts dry what do you do about the water damage. Here we have submerged an iPhone 5 to show you the steps to diagnose your wet phone and how to save it.

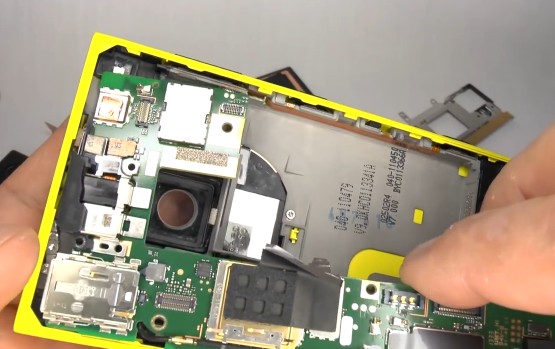
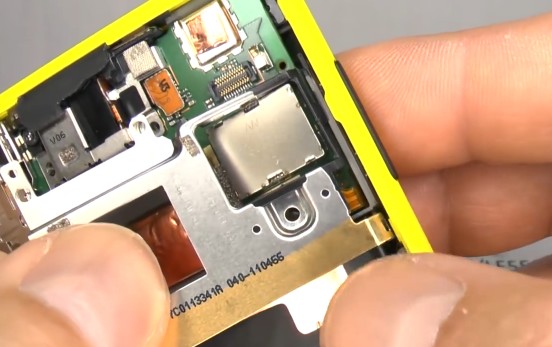
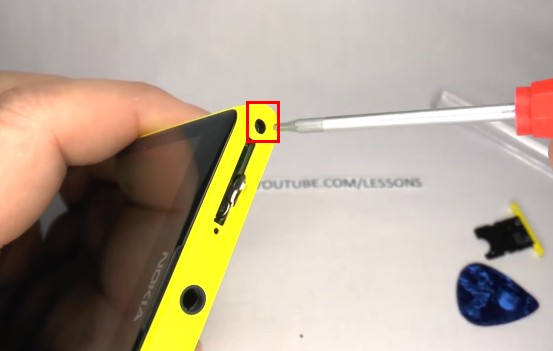
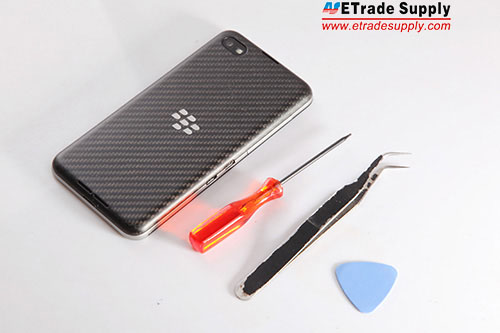
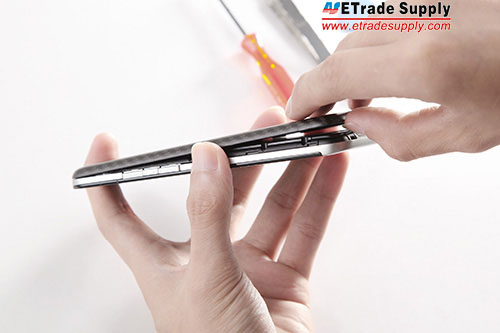
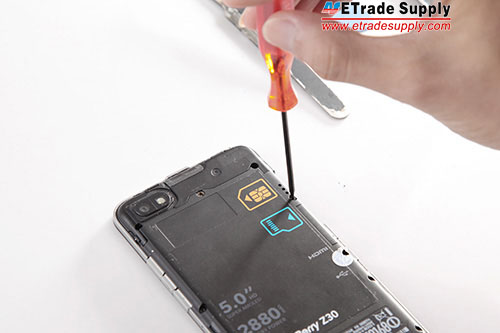
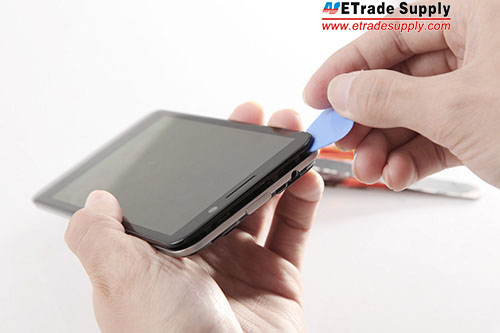
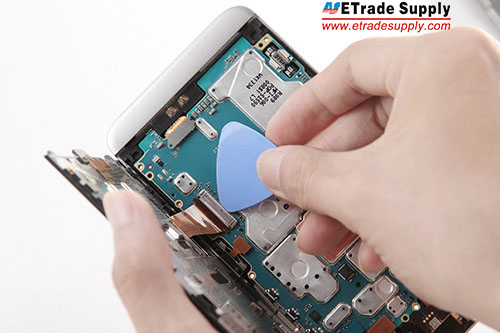
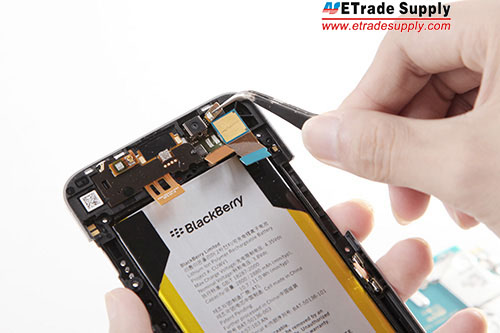
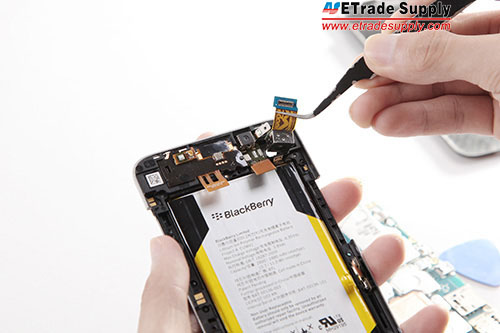
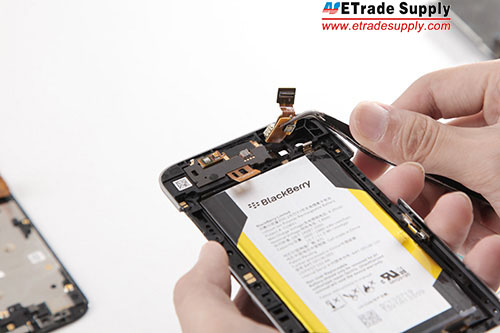
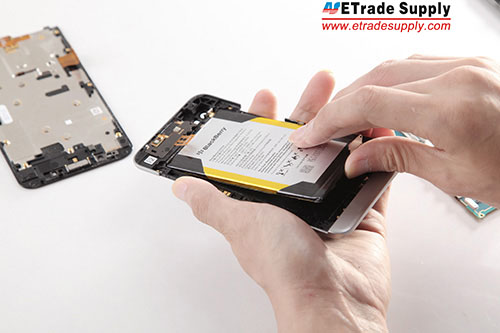
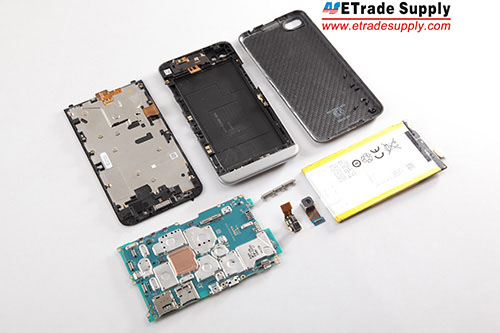
Step 1, Disassemble your phone.

After the phone has been retrieved it should be wiped completely dry to remove any extra liquid, and then you'll have to tear down your phone so you can assess the damage. However, special tools and skills are required to tear down a phone, and we always recommend a qualified person to do this job. If you are experienced in repair work, you can follow our video tutorial for your phone.

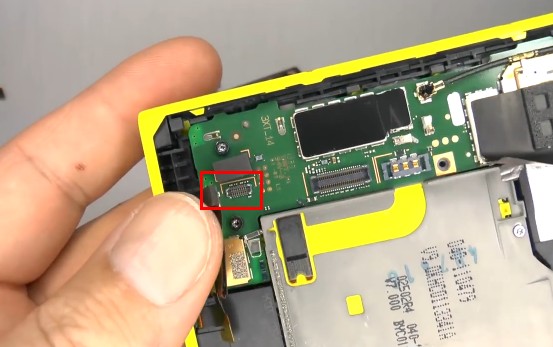
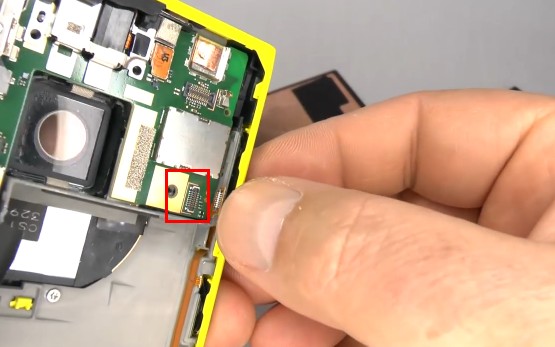
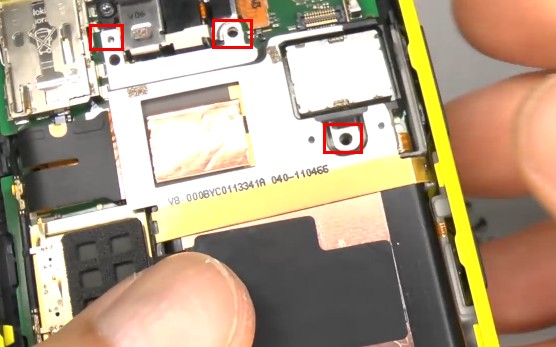
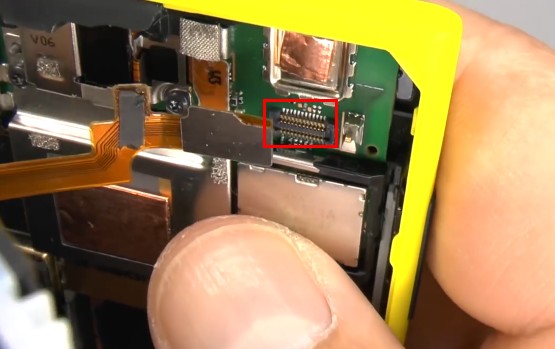
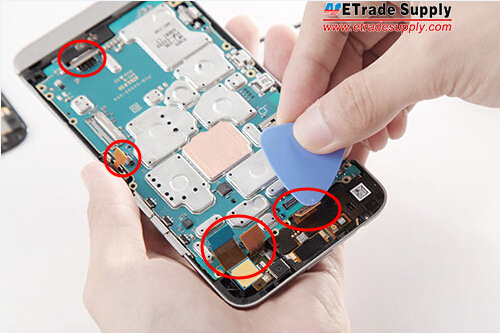
Step 2, Check if there is any erosion or debris in the connectors/other metal contacts.

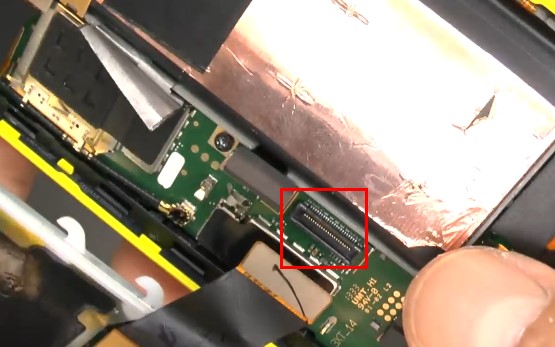
Generally speaking, there will probably be some erosion on the connectors or residue stuck on the board. Submerge the logic board in isopropyl alcohol, and allow it to soak long enough to loosen any hardened residue, and to displace any remaining water or other liquid. Use a soft ESD brush to remove visible corrosion and residue. 

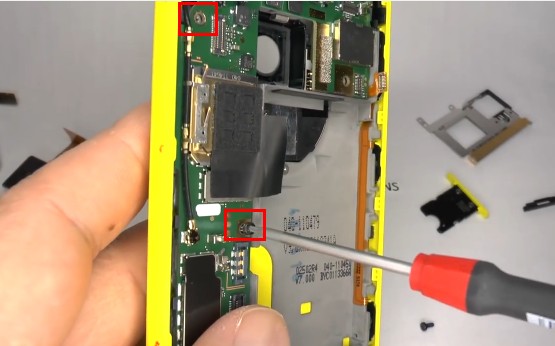
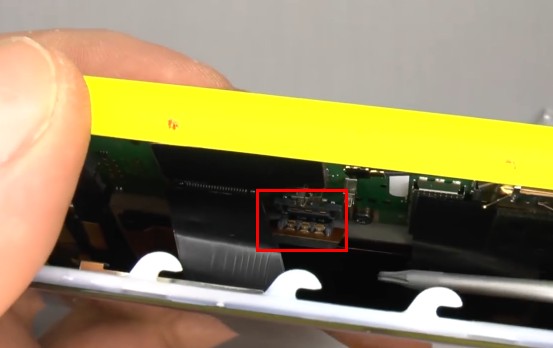
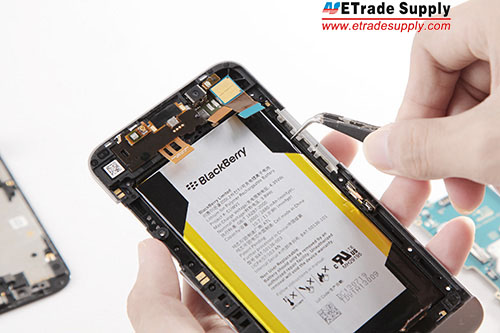
Step 3, Check whether the device is short circuited or not.

Even after phone parts have been wiped and dried, some liquid may still be left in inside, which will result in a short circuit. First of all, you can use a multimeter to test if the battery is bad. In most cases batteries are one of the first things to go. So you may need to replace the battery. If the battery works fine you'll have to check all the parts 1 by 1 to find the short.

Step 4, Check whether the LCD screen is dead or not.

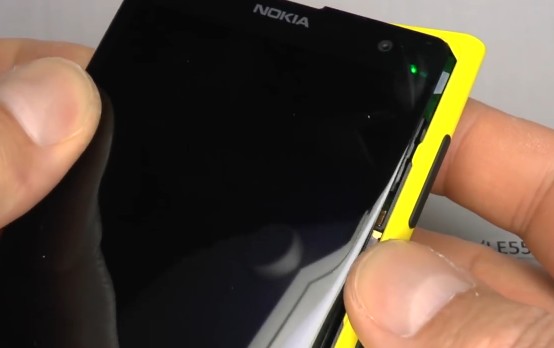
Before you install the new battery we recommend reconnecting the LCD screen and plugging in the charger in to see if the LCD screen still functions. If the LCD screen is dead, it must have been damaged by the liquid and can't be fixed by hand. The only way to fix the phone would be to replace the LCD assembly. The problem could also be caused by damage on the mainboard, so we recommend testing the new LCD with the board before reassembling everything.

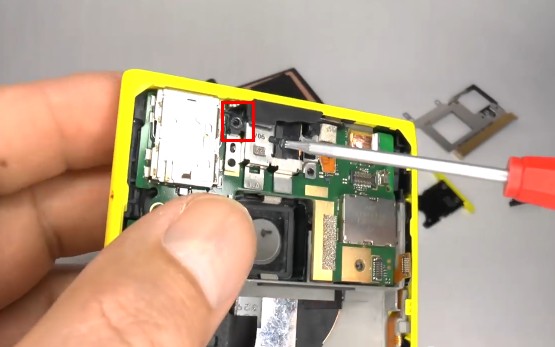
Step 5, Reassemble all the parts and power on the device for testing.

Small parts with metal contacts are easily damaged by water, i.e. the ear speaker. Once you've reassembled everything you should carefully test smaller parts like the ear speaker and camera.

Water damage is a common issue users experience, especially when summer comes around, know how to diagnose and repair your water-damaged phone will definitely raise your chances to save it. Any questions, feel free to contact us directly or just comment below. 

2015年6月22日星期一

BlackBerry Z30 Disassembly/Tear Down/Tear Apart

BlackBerry Z30 Disassembly/Tear Down/Tear Apart

Tools needed:
            1. T4 Philip screwdriver
            2. Tweezers
            3.  Case opening tool
tools needed

1.  Pry up the battery door cover.
remove the cover

2.Undo the 10 screws that securing the rear housing.
undo screws

3.Pry up the screen with the case opening tool. (Notice: handle carefully as there’s a flex cable connecting to the logic board.)
pry up screen

4.Pry up the clip, remove the flex cable carefully for its fragility.
disconnect flex cable

5.Pry up the connectors that securing the logic board, then take out the motherboard.
pry up flex cables and remove logic board

6.Remove the volume button and power button retaining bracket.
remove volume retaining bracket

7.Pry up the flashlight flex cable.
pry up flashlight flex cable

8.Remove the rear facing camera.
take out rear camera

9.Remove the flashlight flex cable from the rear housing slot.
remove flashlight flex cable

10.Take out the battery.
take out battery

11.Then, the BlackBerry Z30 has been disassembled.
the disassembly finished

We show you how to reassemble BlackBerry Z30 step by step.
we hope it  is helpful by watching  our tutorial to fix your broken cellphone.