As the successor to Xperia Z3+ (aka Xperia Z4), the Xperia Z5 was unveiled in September, 2015, along with the Xperia Z5 Premium and Xperia Z5 Compact. Similar to its predecessor though, Xperia Z5 is Sony’s first device featuring with fingerprint sensor. What about the repairability? Here is a tutorial guide showing how to disassemble Xperia Z5 for screen replacement.
Tools Needed:
Hair drier/Heat gunCase opening tool
Suction cup tool
Spudger
Tweezers
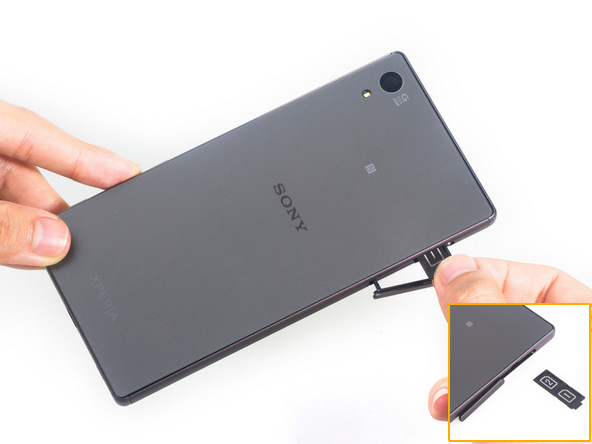
1. Power off the Xperia Z5, open the card cap and then remove the card tray.
Hair drier/Heat gunCase opening tool
Suction cup tool
Spudger
Tweezers
1. Power off the Xperia Z5, open the card cap and then remove the card tray.
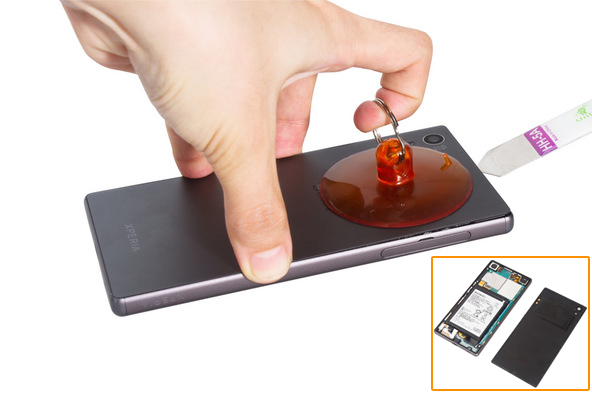
2. Heat up around the edges of back cover to soften the battery door adhesive underneath, gently pull up the back cover until a gap then insert the opening tool and guitar picks in between, running around the edges to release theXperia Z5 back cover.
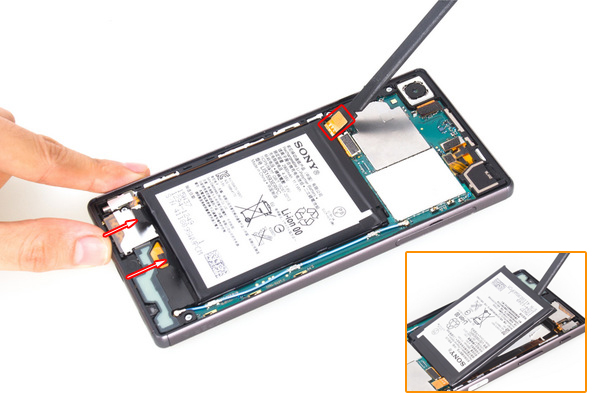
3. Pry up the battery flex ribbon connector, pull up the 2 battery adhesive and then gently up to release the Xperia Z5 battery.
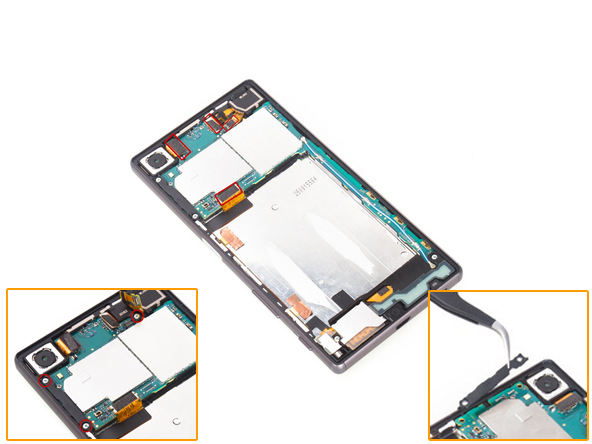
4. Pry up the 4 flex ribbon connectors, undo the 3 screws and then remove the plastic bracket.
5. Remove the metal bracket covering the loudspeaker, undo the 2 screws then gently remove the loudspeaker module. Be careful not to damage the fragile flex cable ribbon.
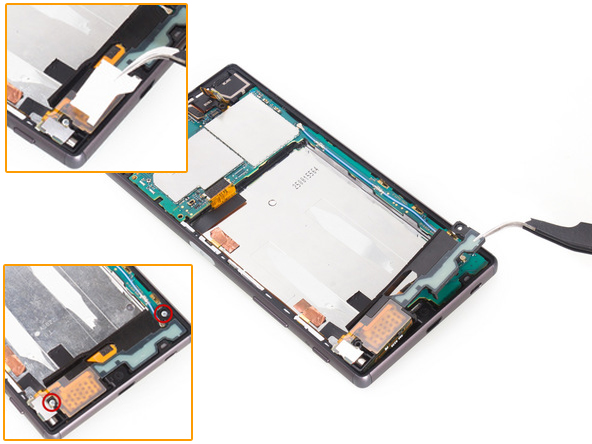
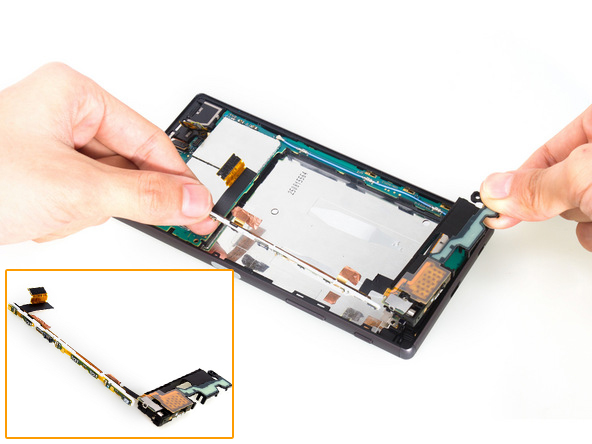
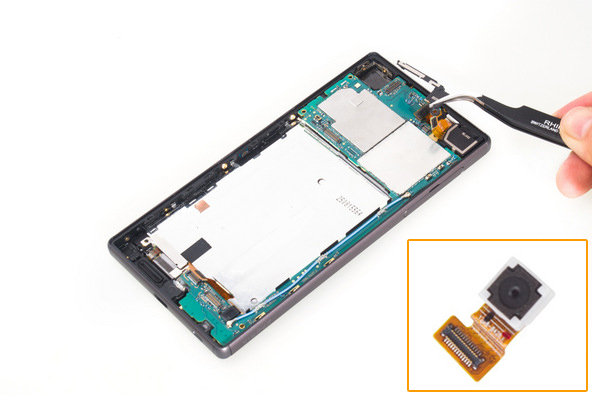
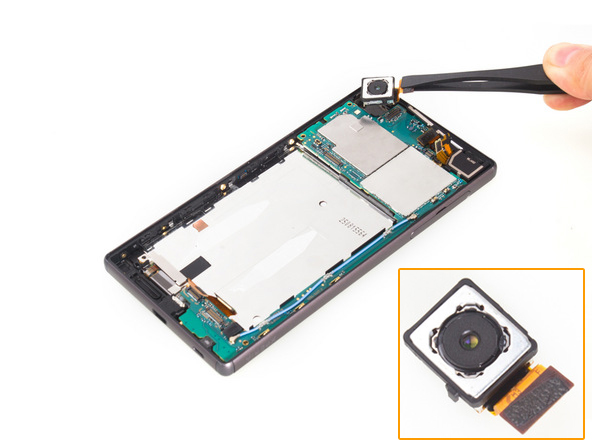
8. Pry up the 3 flex ribbon connectors to release the Xperia Z5 logic board.
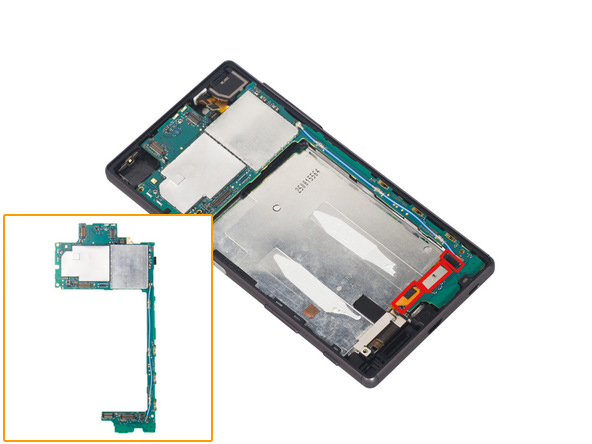
9. Remove the bracket cover and then remove the Xperia Z5 earphone jack with flex cable ribbon.
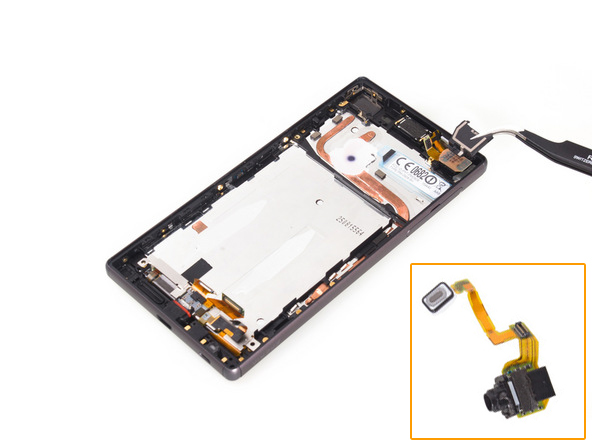
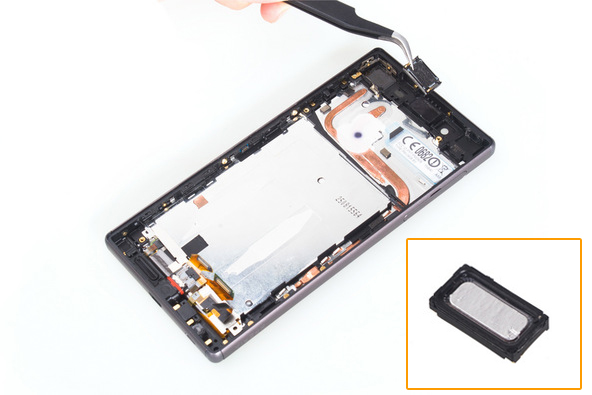
10. Remove the Xperia Z5 ear speaker.
11. Remove the Xperia Z5 charging port module.
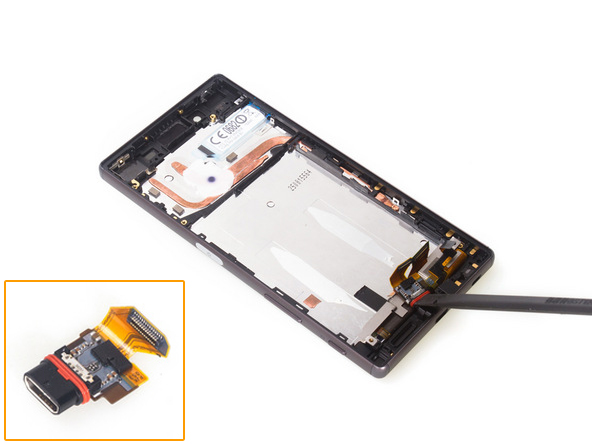
12. Remove the Xperia Z5 microphone.
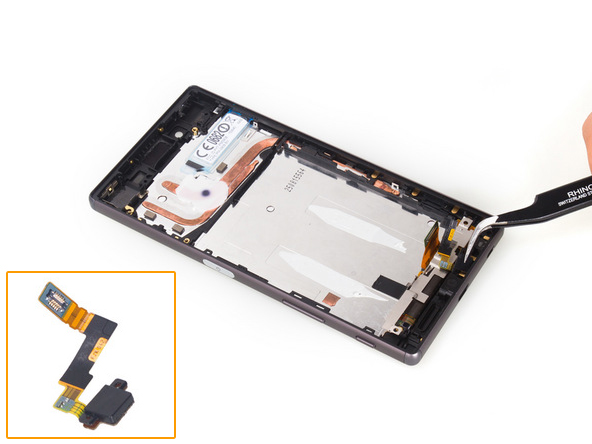
(Picture source: iFixit)
Now, the Xperia Z5 was disassembled, replace it with a new Xperia Z5 LCD and digitizer with frame replacement in reverse orders.