2015年7月30日星期四

Reason and Solution behind Ghost Touch Issues on iPad Air Digitizer


The repair community has reported to us that many of them have been experiencing some weird issues. From their description, after they have replaced the digitizer on the iPad Air they experience random ghost touches even though the screen is not being used. However, if the screen is tested before being set into the frame everything seems to work fine. Very Strange! Not long ago, we helped you guys figure out some reasons why iPad and iPad Mini digitizers functions were affected by their inner magnets. In this case, it's similar to the above description. The iPad Mini's digitizer functions well before installation, while after installation users experience random touch issues and an unlit display.

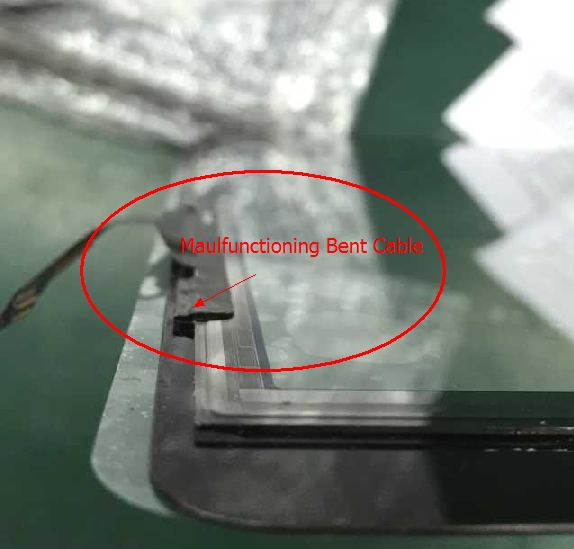
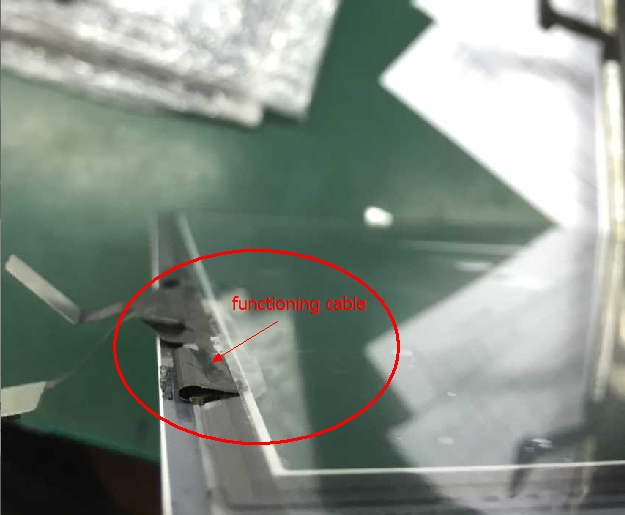
Though the issues may seem similar the causes behind them are not the same. After inspection and analysis, we think this issue is caused by an overly folded flex cable.

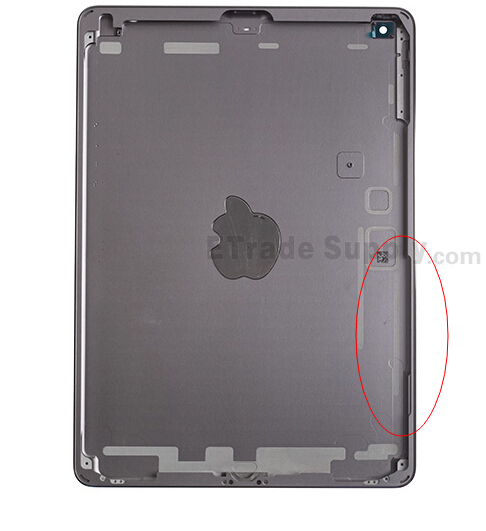
You can see the difference in the pictures below:

There are circuits in the flex cable for transmitting signals to the board so that users can interact with device. However, we don't usually pay much attention to the flex ribbon on the device. From now on, repair community, we should always be more careful when handling flex cables since they fragile like the IC's on the iPad Minis, or have your techs not bend the cable while installing the touch panels either and see if the situation improves.

Additionally, Apple even designed a special area on rear housing for the cables to sit, which prevent the cable from bending.
We hope this analysis and these tips will help you out. If you have any questions, please feel free to contact us at service@etradesupply.com or just comment below. 
We are glad to see you in our repair community. For super high quality parts, please contact sales@etradesupply.com. 

2015年7月29日星期三

Calibrating Your Battery to Reinvigorate Your Phone


High battery drain upsets a lot of people. It seems that even though our batteries have a large capacity, the battery drains so quickly that it doesn’t seem to match with its capacity. 

Why does this happen? It seems that brand new phones may also have this issue, even after being fully charged. Why is this?

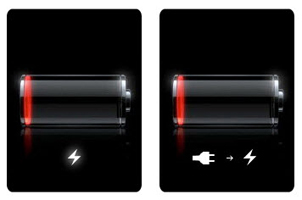
The Li-on battery has no memory. In some cases, we use power banks, 3rd party chargers, connect the phone to our computers and charge through USB or we completely drain the battery before charging the device. All of these actions may lead to a chemical imbalance inside the battery, which will have a direct effect on the battery’s capacity. For example, your phone shows the battery to have 100% after being charged, but several minutes later, it may jump down to 60%, so in fact, the phone was not fully charged. What’s more, it may be charged in 2 or 3 hours but the power wasn’t properly stored. 

When you find your phone’s battery draining quickly, it may be the battery has become defective, damaged or it may a result of the aforementioned chemical imbalance inside the battery. Whatever the cause is, when you encounter this situation, you’d better calibrate your phone’s battery first. Unlike replacing the battery it may save you a lot time and money just by following the steps below, we will show you how to calibrate your android phone’s battery.

For unrooted Android Phones:
1.      Keep your phone running and use the original charger to charge it.
2.      When the LED light turns green (battery is at 100%) unplug the charger.
3.      Power off the phone and charge it again the display shows a full charge.
4.      When it is fully charged, unplug the charger.
5.     Power on your phone and shut it down immediately after the system launches.
6.   Charge the powered off phone with the original charger, then wait for several minutes until the display shows a full battery.
7.    Then, you can disconnect the charger. The battery calibration is completed.

For the rooted phones:
1.    When you have used up your phone’s battery, leave it on till it completely discharges itself and shuts down.
2.    Connect the charger to charge the phone while it is powered off. Let the phone charge continuously (nonstop) for 12 hours. If you have to stop the charge before 12 hours, then you’ll have to start over
3.   Power on your phone while it is charging. Then you need to use RE Explorer or a similar APP to delete the /data/system/batterystats.bin file. After you have deleted the file, just unplug the charger and restart the phone.
4.    Try to use up the phone’s battery through regular use and then charge it. You should find that your battery works better than before.

If you don't want to install RE Explorer or another similar APP to do the same process, you can try the steps below:
1.      Charge your phone with the original charger while it’s on.
2.      Disconnect the charger when it is fully charged.
3.      Shut your phone down and charge it again to full, then unplug the charger.
4.      Power on the phone and shut it down immediately after the system launches.
5.      Connect your charger to the phone wait for full charge, and disconnect the charger.
6.      Start your phone and enter recovery mode by pressing back and the power button at the same time. Then what you need to do is to choose wipe battery status in the menu.

After step 6, you can just enter recovery mode and choose the advanced menu, then find the option “wipe battery status”. Select it then you can restart your phone.

It won’t take you more than 10 minutes to follow the steps above, but you should get more life out of your battery.

 NOTES:
*The file /data/system/batterystats.bin is used to record all the battery information including battery voltage embedded in the system. If you have deleted the file, the system will rerecord the battery usage information. Likewise, “wipe battery status” is also used to delete the file. Letting your phone recreate the file with a full battery will in essence reset how your phone reads the battery.

*Battery calibration won’t help you fix a defective battery, so if your battery still has problems afterwards you’ll need to get a new one. 
2015年7月28日星期二

Apple’s Touch ID and You


Apple's Touch ID was big news when it was first released on the iPhone 5S, but it brought with it a few complications to the repair community. 

Here are some things that you should know about Apple's Touch ID before you go to repair or change the home button.    
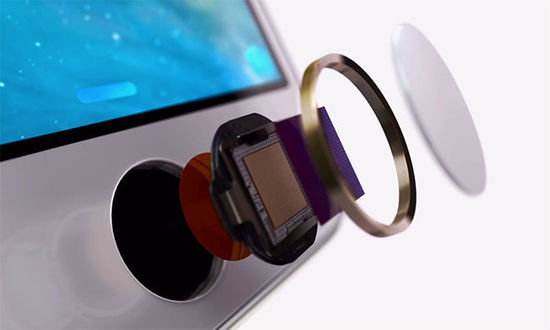
First off let's talk a little about the Touch ID. Apple took great care when designing and creating it. They even went as far as to uniquely pair every Touch ID IC with each motherboard. What does this mean for you? Well it means that if you ever have to change the home button you will lose Touch ID functions, and the only way to get it back is to take the device to Apple.

Many of you with iPhone 5S and up may think this isn't so big of a problem. Sure you'll lose so features, but nothing to important, wrong. For the iPhone 5S you may not have too much to fear, but if you have an iPhone 6 oriPhone 6 Plus you lose out on some important abilities.

First you won't be able to reset your device. This is kind of big as you may run into a situation where you want to start over clean or even sell your phone, but now you won't be able to. The biggest loss though for the 6 and 6 Plus is your ability to update your phone. Without Touch ID your iPhone will error out whenever you try to update it. This is big since Apple may patch some huge security flaw that your phone will be forever vulnerable to, not to mention all the new features you will miss out on. 

The home button is notorious for being one of the first things to go on the iPhone, and now you'll be forced to take the device to Apple to change the part; which can be costly. Keep in mind too that if you replace the part yourself anyways, Apple may refuse to restore the feature for you. So you want to make sure to hold onto your old Home Button for when you replace the front assembly.

Rumor iPhone 6S Glass Lens Leaked


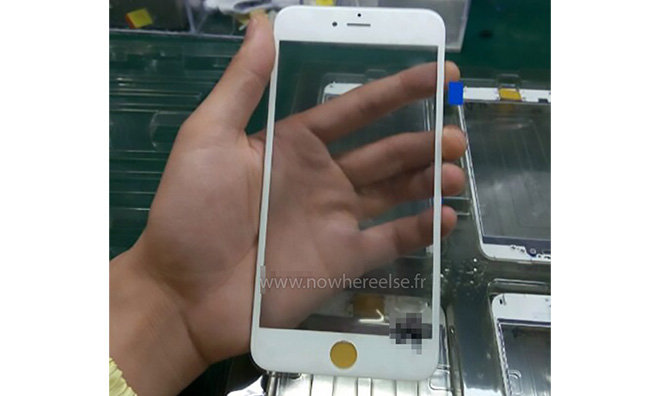
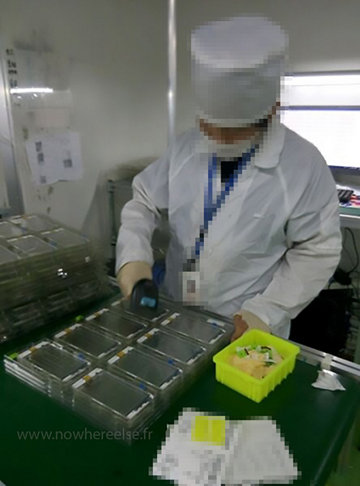
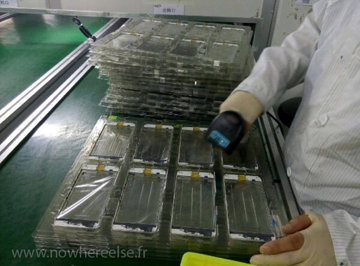
As the release date of the newest generation of iPhone is approaching, more and more rumors about the “iPhone 6S” are getting leaked. Just a week ago, some pictures of a gold iPhone 6S’ rear housing were leaked, which looked identical to the iPhone 6 rear housing. Yesterday, a French website Nowhereelseexposed some pictures claimed to be the iPhone 6S’ front glass panel.

The first picture suggested that the leaked “iPhone 6S” glass panel looked very much like the current iPhone 6. However, the source cannot confirm whether it’s made by sapphire or Corning Gorilla Glass. Sounds like Apple didn’t change too much on this new iPhone.

From the other pictures, we can see that the glass lens is rolling off the production line, suggesting that mass manufacturing of the “iPhone 6S” has already begun.

However, I really doubt the legitimacy of these pictures. The leaked lens looks just like a glass replacement for iPhone 6. And look at the background, it’s more like a small factory rather than a famous international foundry. True or not, let’s wait and see.

2015年7月23日星期四

How To Fix Slow Or Unable To Charge Problems

Whether you have an iOS device like an iPhone, iPad or an Android device like the Galaxy S6 Edge, charging problems like slow charging or not charging at all are commonly reported in forums after frequent use sometimes even after only a few days. Generally, when charging problems appear, the first step is to check the charger and USB port, however, in many cases solutions maybe more complex than simply replacing a charger, let’s look at some other possible solutions.

Solution 1: Check if the connection between the USB port and the charger is loose. If so, reconnect the cables to make sure everything is connected correctly.

Solution 2: Check if your charger is in good shape, if not, you may want to replace it with a new one. Always use an original charger, which will lower the risk of damaging the device and battery.

Solution 3: Double check the USB charger port on your device.
If it’s not in good shape, you might want to contemplate replacing it with a brand new charging port. It’ll cost you roughly $1 ~ $2 to buy a new replacement online.
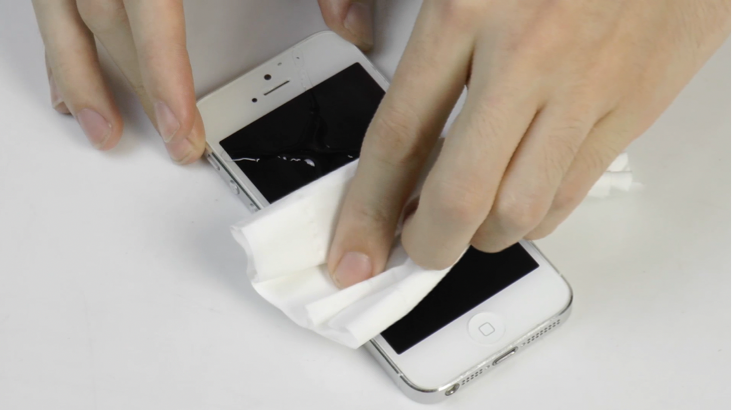
If the USB connectors or ports are dirty/oxidized, you can clean them with anhydrous alcohol. Remember to wear gloves to protect your hands while cleaning.

Solution 4: Check the battery to see if it’s aging or bulging. If you find that your battery is bulging or showing other wear then a new battery is definitely necessary. Be careful not to buy a fake one. Check out how to identify an original vs a fake cellphone battery.

Solution 5: Disassemble your phone to check if the battery contacts are in good condition. Sometimes, slow charging or an inability to charge is caused by a loose connection between the battery contacts and the motherboard.

Solution 6: Check the resistance with a multimeter to confirm everything is working normally. You can Google it or ask a repair shop to give teach you how to use a multimeter to test the battery resistance.

Solution 7: Check if the U2 IC chip is inveraciously soldered or damaged. If not, re-soldering or replacing the IC chip will help. Also, you can Google it or send it to a repair shop to fix it if you have no idea what you are doing. Or you may check out how to change IC via this Youtube channel: Ashfaq Tech.

2015年7月21日星期二

How To Fix Vertical Lines On An iPhone Screen After Replacement

Zebra lines or blue vertical stripes on a display is a common problem many users report after iPhone screen replacement. Usually, it’s not caused by a defective screen, then what the culprit might be? Here are some possible causes and solutions.

1. Bad Connection
Reason: first thing you should do is check the connection between the flex cables and the logic board. If the connectors are obstructed by dust or debris, try to clear them away with a brush and rubbing alcohol. If the connectors are damaged or the flex ribbon is bent over 90°, well, a replacement is needed. After checking those, reconnect the flex cables to the motherboard, making sure the connectors are properly connected.
Solutions: do not force the connectors together until you are sure they are properly lined up; do not bend the flex ribbons during testing and installation.

2. Static Charge
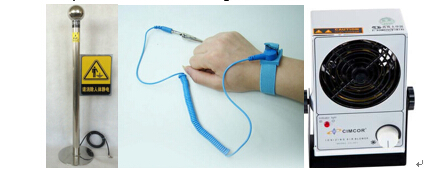
Reason: aside from a bad connection between flex ribbons and the logic board, ESD (Electro-Static Discharge) is another big cause of vertical lines. Too much ESD produced by either the product itself or by human during the test or installation.
Solutions: reduce any static charge by using a body static remover (or touching a ground) before proceeding with any testing or installation. Wear an anti-static bracelet and keep an ion fan on during the repair job.
 
3. Damaged IC
Reason: possibly the IC on the display is damaged if both of the above methods don’t help. Check the part on the top left and right corners in particular. If there’s any damage, or one of them has been crushed or the IC has been damaged then your part is defective. You’ll have to replace the screen with a new one.
Solution: the screen has to be replaced if the IC was broken. Do not squeeze the IC to avoid damaging it.

Lastly, be sure to use an extension flex to test the screen before reassembly to prevent unnecessarily folding of the flex ribbons, as well as to prevent damage to the fragile connectors.

2015年7月20日星期一

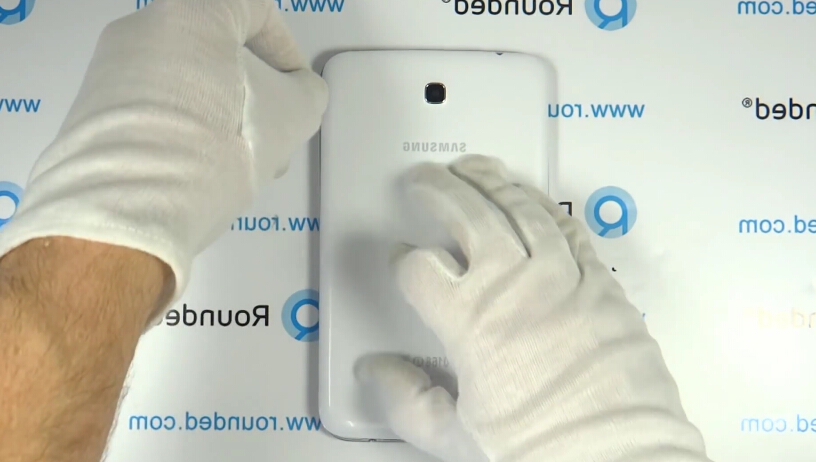
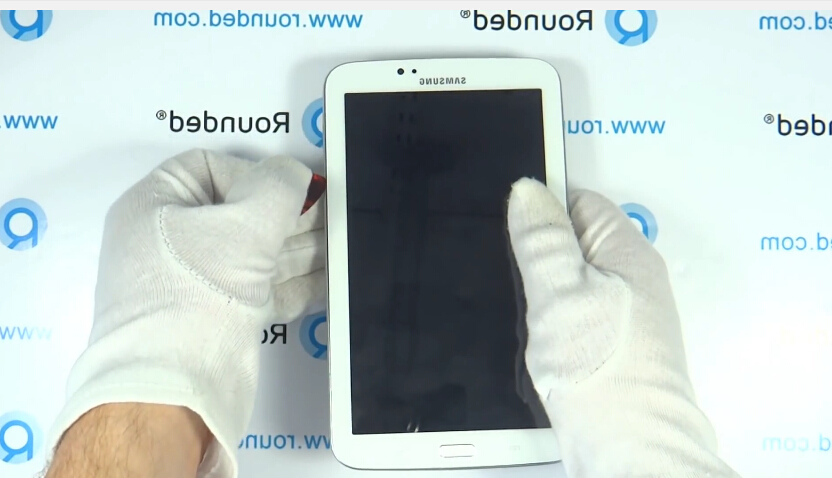
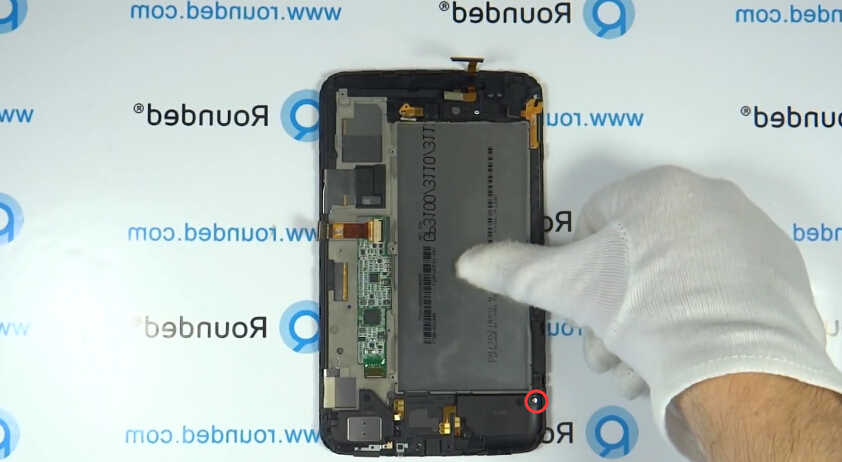
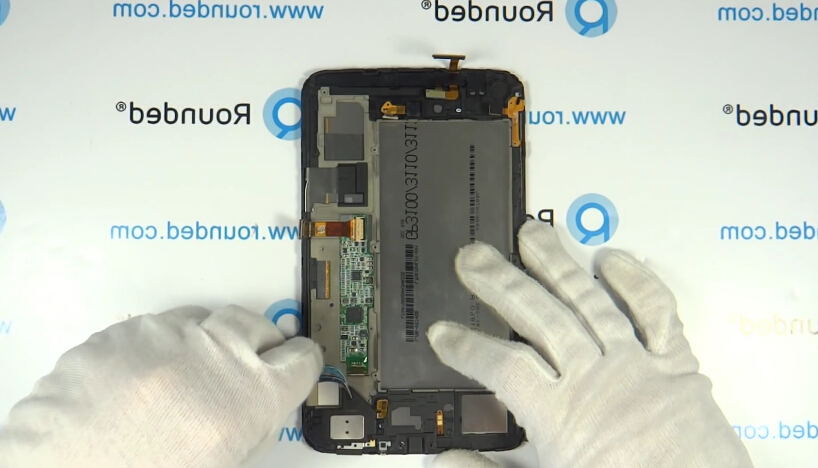
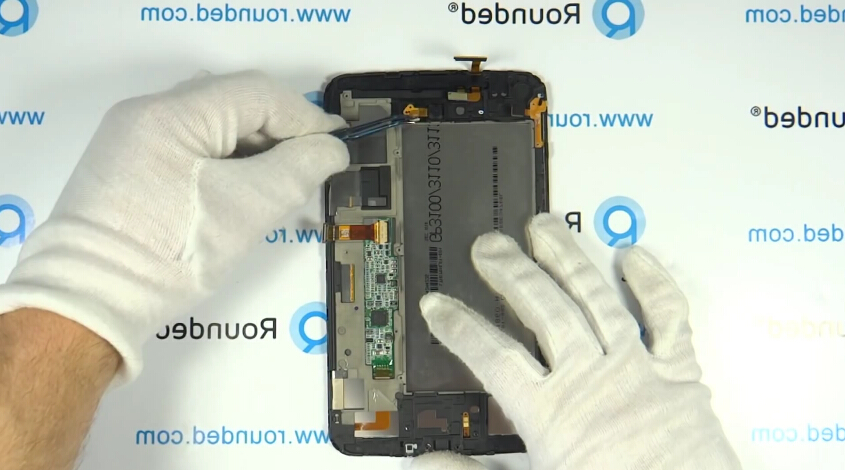
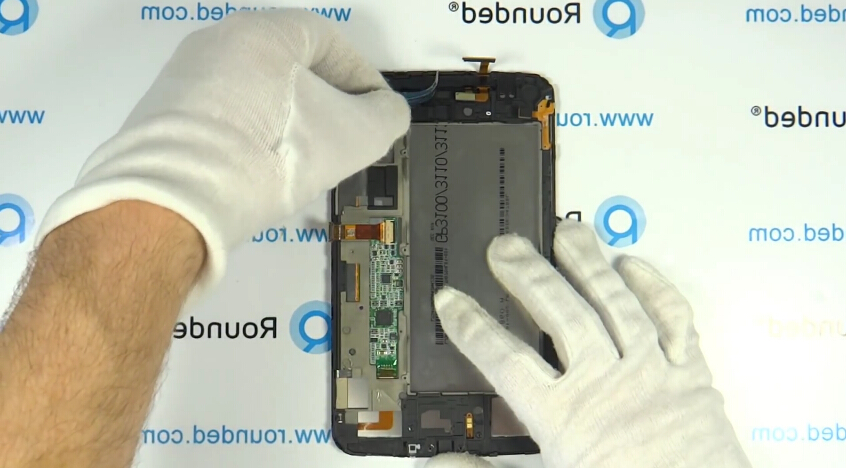
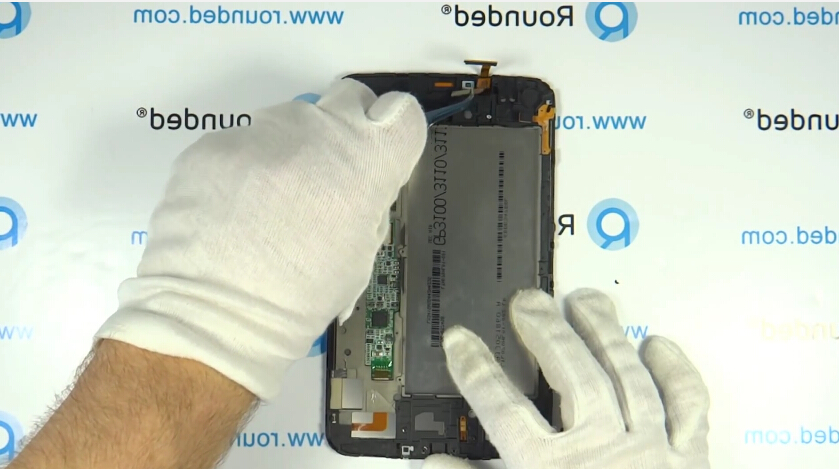
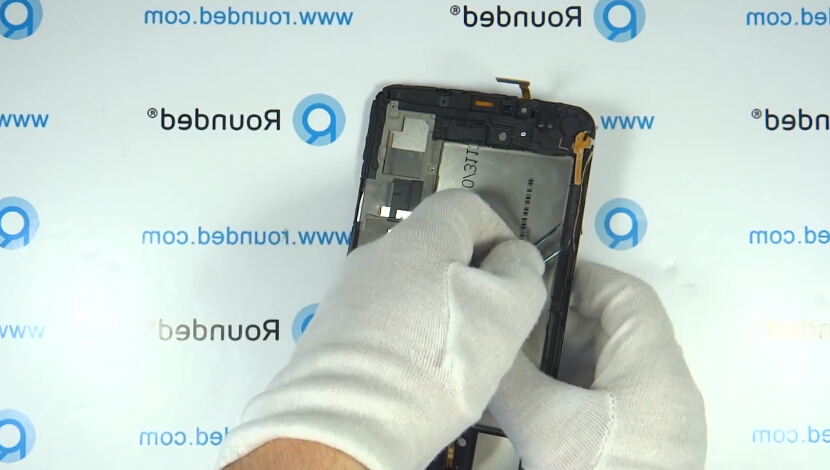
How to Replace Samsung Galaxy Tab 3 7.0 SM-T210 Digitizer/Screen Replacement guide

The Samsung Galaxy Tab 3 7.0 was released in the second half of 2013, which is a cheaper and slightly smaller version of Tab 3 8.0. If your Tab 3 7.0 is still working fine with only a broken digitizer and you don’t have the budget to upgrade it with the new version. The most economical way is to replace the cracked screen/digitizer. Here we’ll walk you through a step by step guide of how to replace the Samsung Galaxy Tab 3 7.0 digitizer.

Tools Needed:
  
Step 1:
Remove the battery door.
 
Step 2:
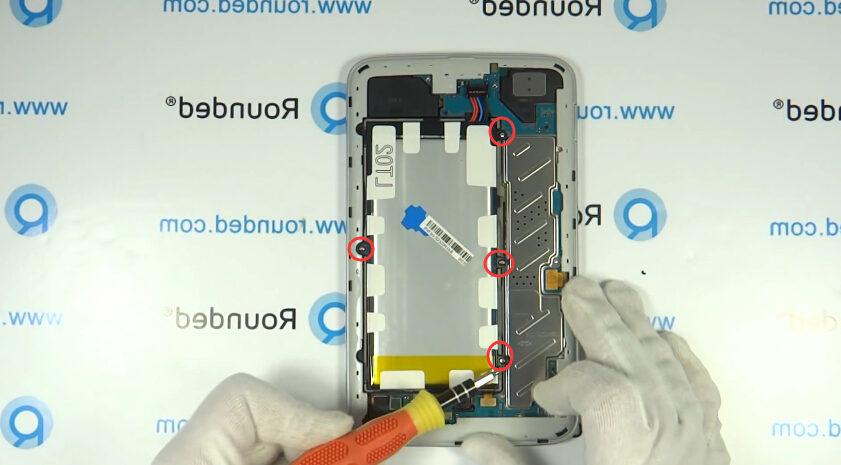
Remove 4 screws as showed in the picture.
 
Step 3:
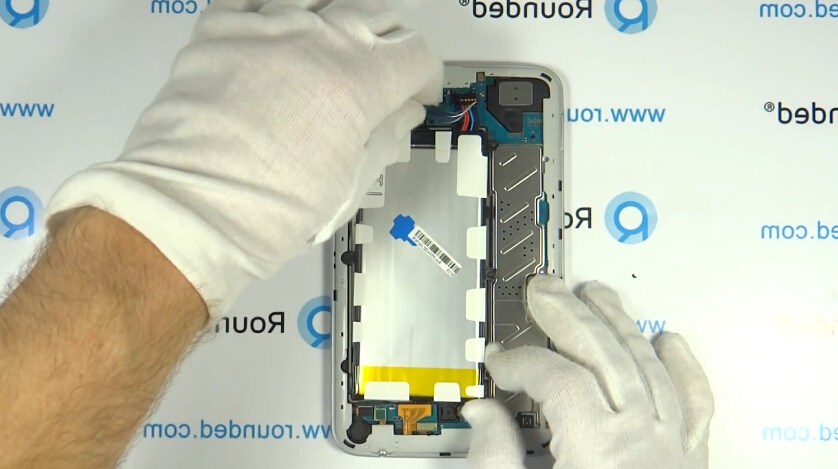
Disconnect the battery clip and then remove the battery.
 
Step 4:
Insert a plastic pry tool to release the rear housing.
 
Step 5:
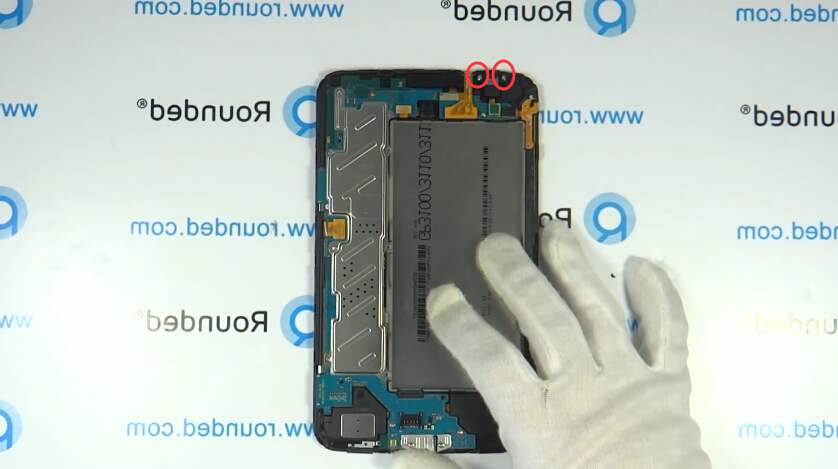
Undo 2 screws as showed.
 
Step 6:
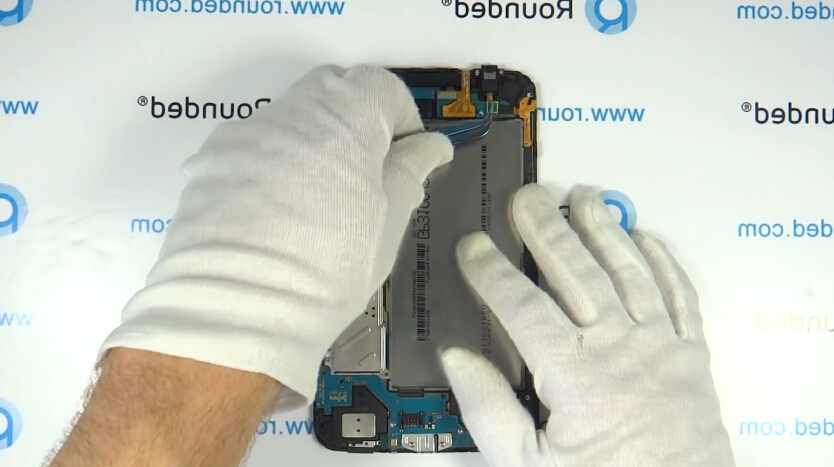
Disconnect and remove the headphone jack.
 
Step 7:
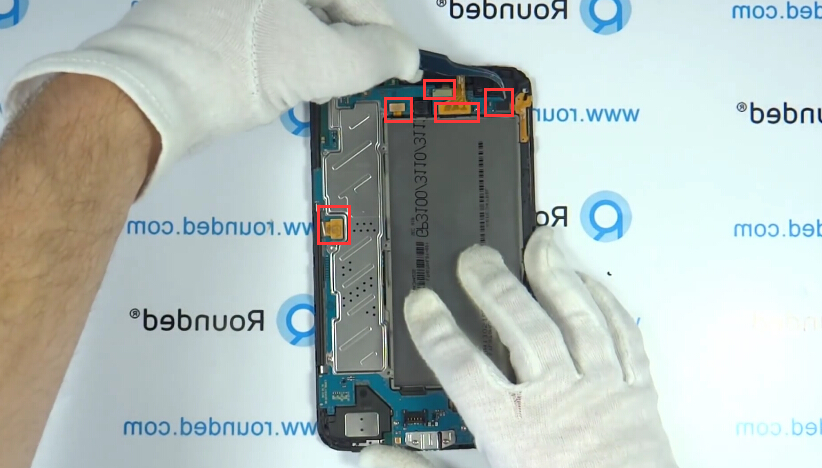
Disconnect the 5 connectors.
 
Step 8:
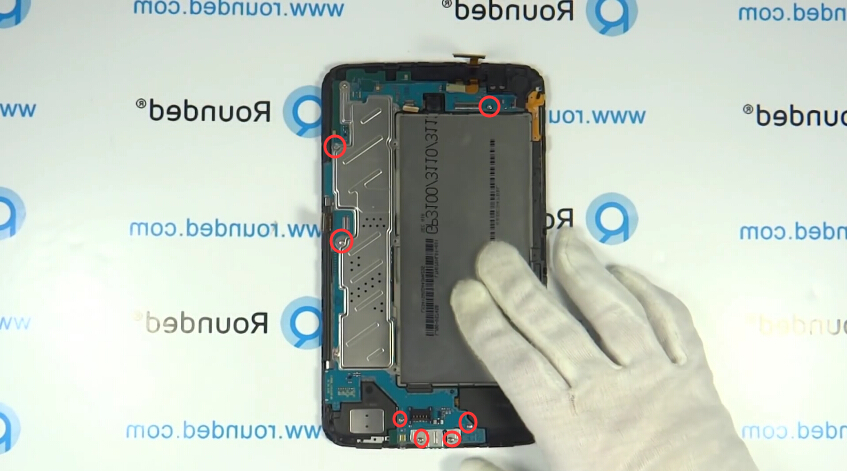
Undo the 7 screws on the motherboard then release it.
 
Step 9:
Remove the screw and then the antenna.
 
Step 10:
Use tweezers to remove the loud speaker module.
 
Step 11:
Use tweezers to pick up the rear camera.
Step 12:
Use tweezers to pick up the plastic bracket.
 
Step 13:
Remove the front facing camera with proximity sensor.
 
Step 14:
Remove the power button flex cable.

2015年7月19日星期日

Our Glass Repair Solution


Here at ETrade Supply our goal has always been to supply those who otherwise lack the tools, knowledge, and parts to repair their smartphones (and other devices). Since the beginning we have endeavored to find ways at making the most common repair jobs easier. Today we are very excited to announce we have nearly solved a very common smartphone problem that many users experience each and every day, a broken screen.


We are very proud to introduce you to our latest product Glass Repair Solution (GRS). Together with our partners and through hundreds of tests we finally have a LOCA based solution that is able to repair broken glass without the need of a replacement. GRS just needs to be applied to the cracks of a broken screen and allowed roughly 10minutes to dry. Once it has had a chance to dry the screen will look as good as new.
GRS works by binding to and filling in the cracks. It then contracts ever so slightly as it dries to prevent the crack from growing or “running”. But GRS isn’t an end all solution as it only repairs the glass. It will not fix a broken screen or an OGS screen where the touch is no longer functioning.
We made GRS primarily to fix cracked screens, but we are also looking into all the alternative uses it could have.
Please note: That due to the difficultly in producing GRS we currently have very limited quantities.

– Notice:
A special glue to magically fix your broken phone glass? You knew it was too good to be true, April Fools!
This magic glue may not exist yet, but while you wait check out some of our real solutions to fixing cracked glass.

2015年7月17日星期五

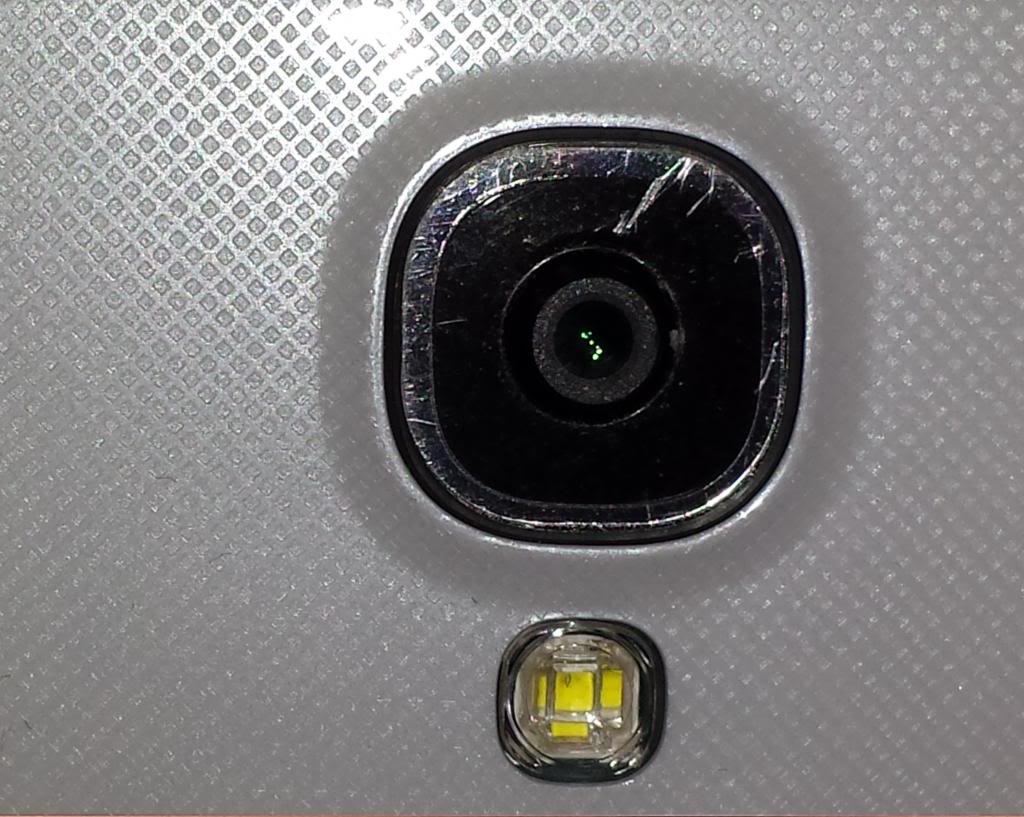
5 Tips to Fix iPhone or Samsung Scratched Camera Lens

Whether it’s an iPhone 6 Plus or a Galaxy S6 Edge, whether it’s made of plastic or glass, whether it’s well protected or naked, inevitably, camera lenses will get some scratches after constant use. The only safe way to fix a scratch on your camera lens is to have it replaced. However, before getting a replacement for your scratched camera lens, below we give you some easy and helpful DIY tips that are worthy of a shot, and might save you time and money.
Tip 1: Toothpaste
Toothpaste (not tooth gels) is the top recommended solution among all DIY methods to remove scratches. Simply apply some toothpaste on the camera lens. Then use a Q-tip to spread it evenly on the surface and wipe it in a clockwise direction for 5 minutes. Keep wiping sounds boring and stupid, but you’ll thank yourself for it later. After your done wiping use a microfiber cloth with a drop of water to clean off any residue. Depending on the depth of the scratch, it may be necessary to repeat these steps more than once to produce ideal results.

Tip 2: Pencil Eraser
A soft, clean, and unused pencil eraser is required for this method. Gently move the eraser over the scratches. Move the eraser along the scratch, and keep rubbing it in one direction (not back and forth) until the scratch disappears.

Tip 3: Rubbing Alcohol
Mix 1 part rubbing alcohol with 20 parts water to dilute it, and dip a new, clean microfiber cloth in the diluted alcohol. Then gently rub the scratched lens. Repeat this four times, you will see the scratches disappear bit by bit.

Tip 4: Vaseline
Cover the entire scratched lens with Vaseline by the help of your finger. Gently wipe off the Vaseline with a microfiber cloth. Make sure your finger and the microfiber cloth are clean.

Tip 5: Scratch Remover
Apply some screen polisher or scratch remover to the scratched camera lens. Polish the scratched areas with heavy pressure for 2-3 minutes with a soft clean cotton cloth. Repeat the application as necessary for deep scratches. Screen polisher or scratch remover can be found on eBay or Amazon.

2015年7月13日星期一

The Causes and Analysis of Why Digitizer Touch Assemblies/LCD Display Assemblies or Nokia Lumia 520 Separate from the Frame after Installation


Background Info:
Some of the assembled screen combos work perfectly during quality inspection, however, after installation/being used for a certain period of time, the assemblies begin to separate from the frame, which affects customer satisfaction.

Potential Reasons:

The main reasons can be classified into two categories:
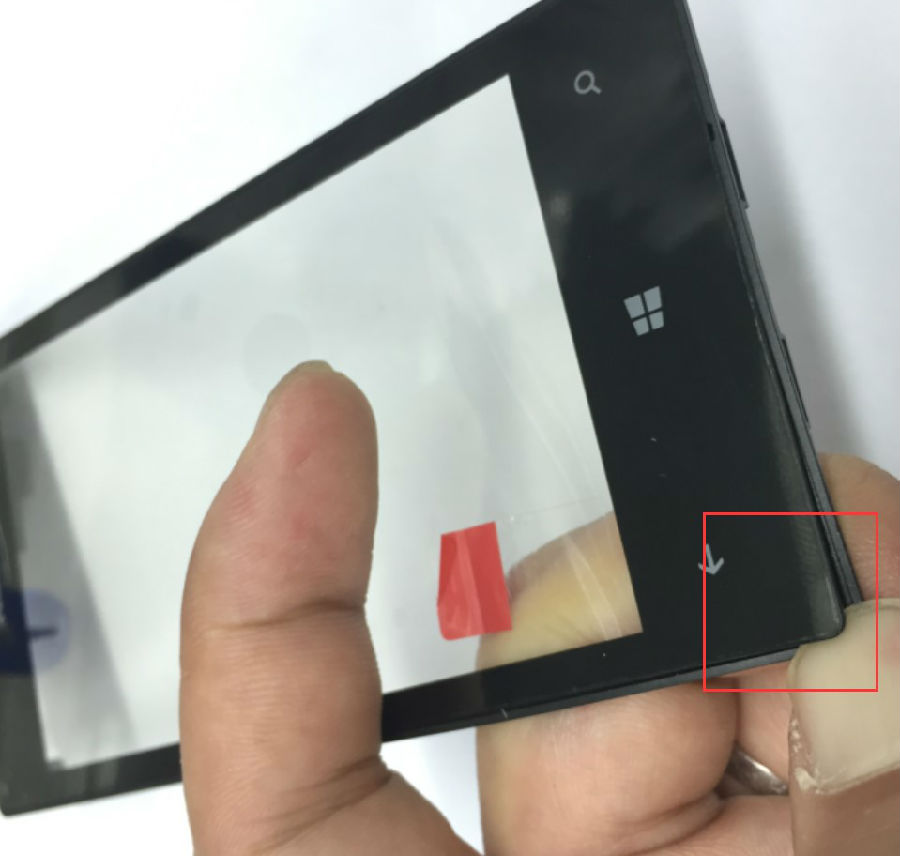
There are a few differences between Genuine OEM parts and high copy/OEM assembled parts. Although high copy products use OEM parts one as their mold, there are still possibilities that the OEM and high copy parts aren’t equal in terms of materials being used or manufacturing techniques. Because of these differences, high copy parts can potentially cause deformation of the front frame; which will cause other potential problems such as preventing screen assemblies from being able to be installed, gaps between the frame and the assembly or the screen assembly separating from the frame.

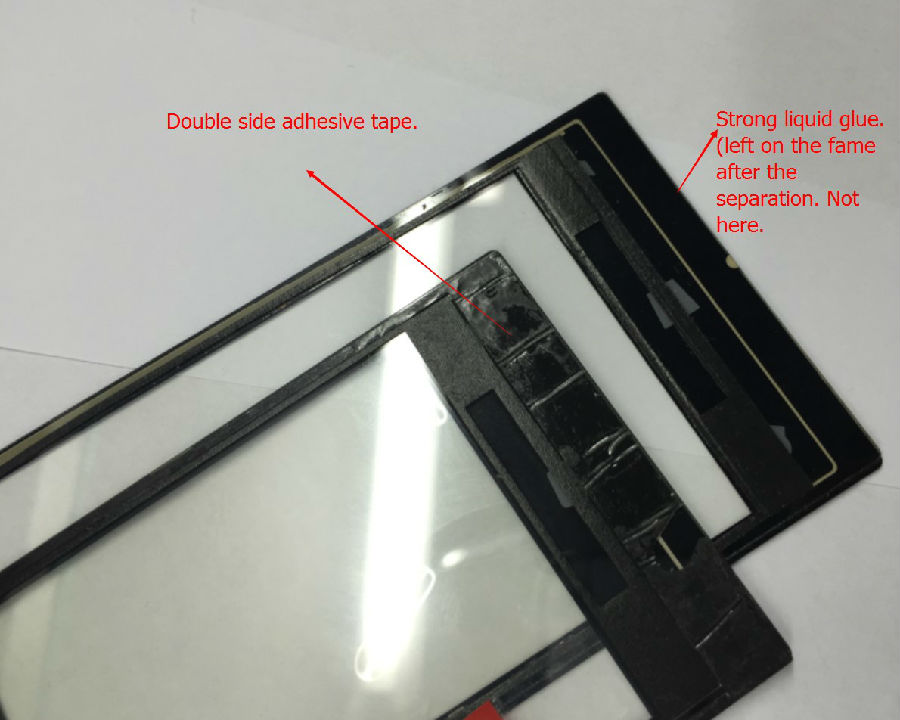
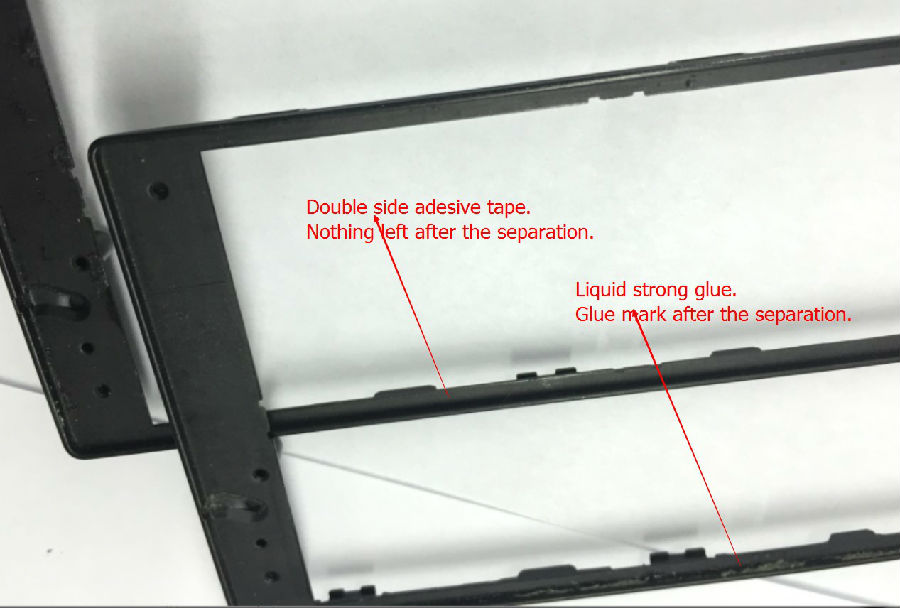
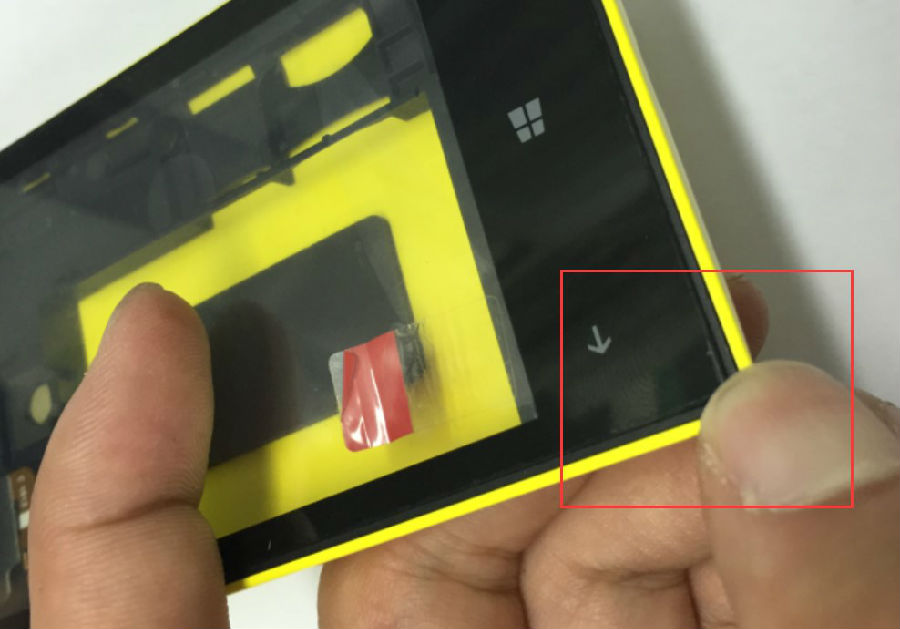
Let’s take the Nokia Lumia 520 OEM assembled touch screen assemblies for example. The digitizer and front frame of these assemblies are OEM parts, but the OEM factories use liquid adhesive applied by an adhesive dispenser instead of average 3M adhesive, which third party factories commonly use. There aren't any visible or functional differences in the two assemblies, but after installation you will find small gaps between the OEM assembled assemblies and the front frame. After a period of use, the assemblies tend to separate from the frame.


Though this issue is often ignored not only during quality inspection but also during installation, it could potentially affect customer satisfaction.
These phones are the same model but different versions, and though these versions look the same in appearance there may be slight differences in some of the inner components, especially in the screen and the front frame. If you don't know the parts compatibility in advance, you’re likely to get the wrong assembly.


ETS Solutions:

When ETS tests any of the following parts including digitizers with front frames, digitizer assemblies with front frames or digitizers and LCD screen assemblies with front frames, the requirements are as follows:

   For assembly combos we buy directly from the factories, the adhesive applied and materials used for these assemblies are tested in order to avoid any issues.
   For assembly combos we’ve manufactured, high viscosity adhesive is applied by an adhesive dispenser.

How to Replace Sony Xperia Z3+ Screen/Screen Replacement Guide

Though the Sony Xperia Z3+ is still an IP65/68 device, that doesn’t mean it can survive some kind of accidents, such as dropping from your hand when you are holding it to call your friends.
In this article, we’ll walk you through a step by step guide of how to replace the broken Sony Xperia Z3+ screen, but keep in mind:
1.       This process will void your warranty;
2.       We do suggest professionals or people with basic skills/experience to try this;
3.       ETrade Supply will not be responsible for any damage happened in this process;

Tools Needed:
Hair drier/Heat gun

Step 1.
 
Shut down your Sony Xperia Z3+, remove the SIM card tray.

Step 2.
 
Use the Heat Gun to heat up the back cover then insert the Case opening tool to remove it.
(Please note that the back cover is adhered to the rear housing tightly and once the back cover is opened, the IP 68 waterproof feature won’t exist anymore)

Step 3.
Pry up the battery, microphone and charging port flex connectors to release the battery. (Pay special attention when you are prying up the battery, because it has been glued firmly. Don’t bend the battery too much in order to avoid explosion of the battery)
 
Step 4.
Remove the 4 screws holding the motherboard, disconnect the camera flex connectors and signal cable connectors to release the motherboard.
 
Step 5.
Remove the front and rear facing cameras, ear speaker, earphone jack and the retaining brackets.
 
Step 6.
Remove the charging port flex ribbon, microphone flex, vibrating motor and retaining brackets.
Step 7.
Install the new Sony Xperia Z3+ replacement screen on and then reassemble other parts.