2015年12月29日星期二

Reasons Behind Third Party Assembled iPhone 6S & 6S+’s Unstable 3D Touch Function

Recently, some repair technicians has come across the unresponsive/malfunction 3D touch on some of the “OEM” iPhone 6S/6S+ screen assemblies. We ETS have done several researches to find out the reasons behind this issue.

How 3D Touch works:
3D Touch is the main updating feature of iPhone 6S/6S+, which brought a brand new user interaction way to the phone. Before, users can only interact with the iPhone in 2 dimensions, however, for the 6S/6S+, vertical force can be sensed & calculated, and different feedback will be showed up. Bellowed are two main components which contributes to the 3D touch function:

a.       Strain Sensor:
Right under the LCD backlight, is the 8X12 strain sensors. When the users press down the cover glass lens, there would be slightly deformation of the glass, which will shorten the distance between the glass and the Strain Sensors behind. When one Strain Sensor receive the signal that the distance in between has been changed, the system will compare the signal received nearby to calculate where the touch happened and how much strength the user used, then to recognize it as “Peek” or “Pop”.
b.       Taptic Engine:
The new Taptic Engine is designed for a better response to the vertical force touch. If the touch is recognized as “Peek”, the Taptic Engine will make a 10 millisecond “Minitap”; if the touch is recognized as “Pop”, the Taptic Engine will make a 15 millisecond “Fulltap”, which makes the user feel like a real touch.

The Inner Structure of 6S/6S+:
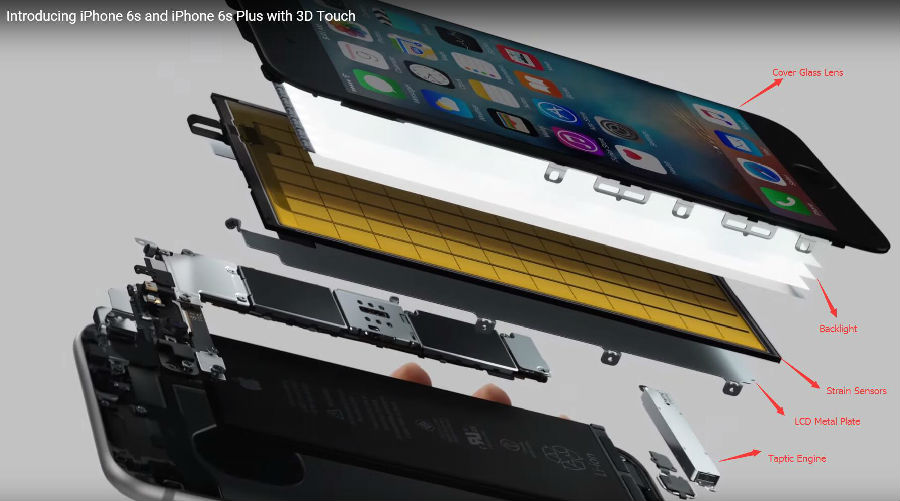
                                               
How 3D Touch Works:

Possible Reasons Why This Issue Happened
Now on the market, there are two kinds of screen assemblies. One is OEM screen assembly, the other one is screen assembly which made of OEM materials but assembled by the third party factories. After test, 9/10 screen assemblies which assembled by the third party factories are experiencing malfunctioning 3D touch function.

a)       First we thought the problem may be happened in the 3D touch layer (Strain Sensors), whether because it may not be OEM or because of the way it was assembled. However, after transferring the 3D touch layer which we disassembled from the third party factories to the OEM screen assembly, we found the 3D Touch functions as usual without any problems; however, the OEM 3D touch layer cannot solve the malfunctioning screen assemblies assembled by third party factories.
b)       The reasons should be the way how screen assembly been assembled. Then we disassembled the screen assembly into pieces to find out.
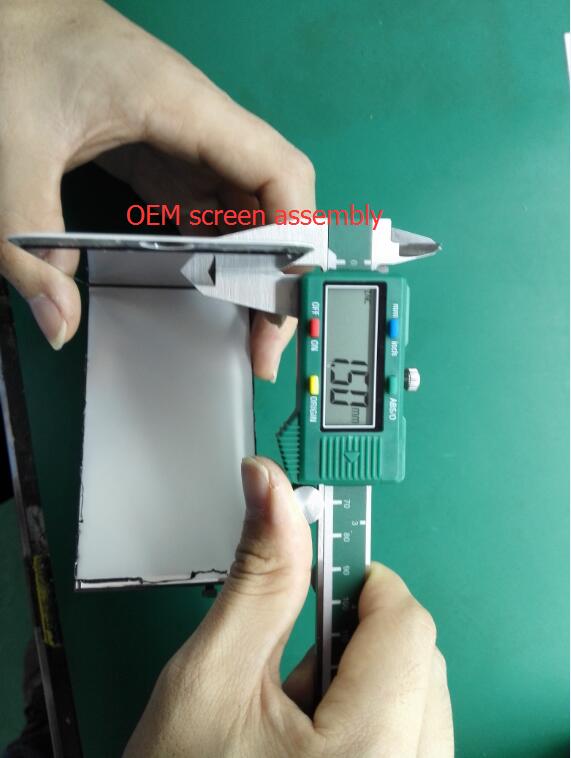
After measure, the thickness of third party assembled screen assembly is 1.59mm, while the OEM one is 1.50mm.
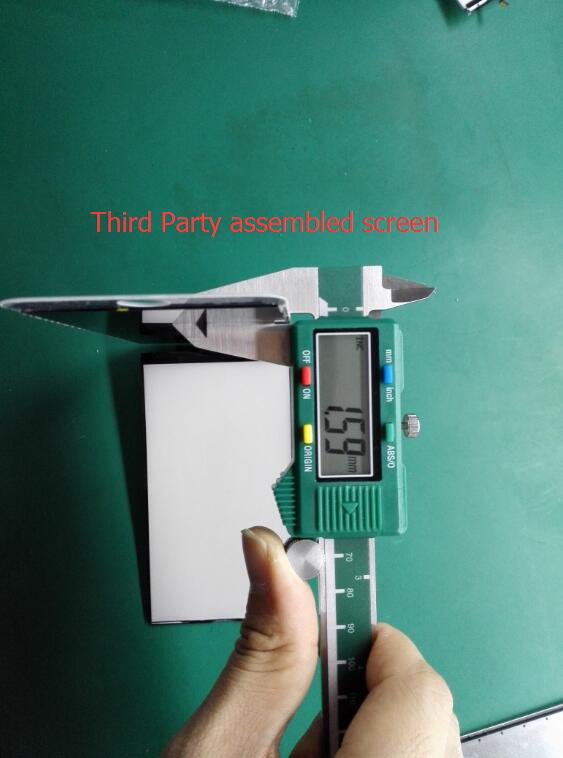
The cover glass lens of both these two screen assemblies are 0.84mm.
As there are no copied LCDs available for 6S/6S+, how could the difference in thickness from?
The answer is the adhesive. For OEM screen assembly, the manufacturers uses OCA (Optical Clear Adhesive), while for third party factories assembled one, in order to cut the cost to make more profit, they have adopted LOCA (Liquid Optical Clear Adhesive) glue instead of OCA.
 
   Why would LOCA glue affect the 3D Touch function?
As we stated before, the 3D Touch function is based on the slightly deformation of the cover glass which will be detected by Strain Sensors through the distance change between the cover glass and the sensors. However, LOCA glue is not solid, which means if you press down the screen, some of the glue behind will be squeezed nearby which will affect the detection of the distance. This will cause the malfunction of the 3D Touch function.  

Conclusion:
As far as we know, all third party assembled 6S/6S+ screens have used LOCA to bond the glass currently. We do recommend you buy OEM 6S/6S+ screen assemblies at the moment. Once there are assembled screens using OCA glue which can pass the QC test, third party assembled screen will be a choice for you. If you are in the screen refurbishing business, don’t use LOCA for 6S/6S+ screen refurbishing. If you have any questions, any comments will be welcomed.  
2015年12月27日星期日

What Are the 4 Microphones on iPhone 6S/6S+ for?

One of our technician has a small but interesting found about iPhone 6S & 6S+. Apple has added one more micro phone compared with 3 microphones on the iPhone 6 & 6+. Is it necessary to have 4 microphones? What are these used for? Let’s find it out.

Compared with iPhone 6/6+, the one more microphone is on the right bottom of the 6S/6S+.

Why there are multi microphones in a phone?
The main task for those microphones is for voice collection and noise reduction. However, in different apps, different microphones would be used for different functions. These 4 microphones will work together under the control of the CPU to provide the best voice quality.

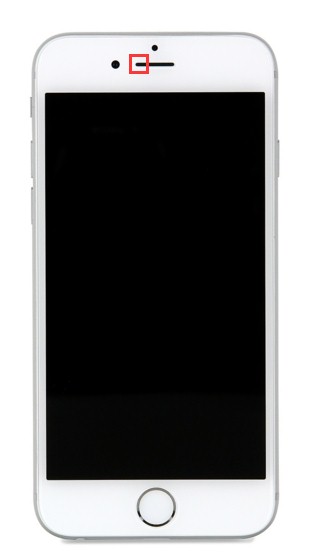
The first microphone is on the power and volume button flex cable which is used for voice collection during video recording using the rear facing camera.
 

While for video recording using the front facing camera, microphone on the sensor flex cable with front camera will work to collect voice.
 

At the bottom of the iPhone 6S/6S+, there are two microphones. During the call, the microphone on the bottom left of the phone will be used for voice collection while the bottom right microphone will be used for noise reduction. However, for voice message, the situation is vice versa.

If your microphones are not working fine, you could check the function of these four according our guide; if you are replacing these cables where microphones located, we suggest you to test their functions after installation.

5 Tips To Protect Your Smartphone

Smartphones such as iPhones, Samsung Galaxy phones is updating in a rapid speed than ever before. For those who use smartphones as FMCG (fast-moving consumer goods), upgrading to the latest smart devices is a good way to keep up with the technology development. However, most users will choose to keep a smartphone working as long as it can. There is the question, how to prevent your smartphone from physical damages and work till the last day it could? Check out below tips:

Tip 1: Wear a Protective Case and Screen Guard.
To dress your phone in a screen protector and protective case can greatly reduce the damage when a drop or a scratch happens. Here we’d like to recommend the tempered glass screen protectors and soft silicone cases rather than the ordinary screen guards and hard cases.
Tip 2: Keep away from Overheating, Overcooling, Humid and Oily Areas.
Using or storing it in a super heating or super cooling area would do great harm to the smart devices, esp. to thebatteries. Problems such as shorten battery life, no powering on will happen after the device is being placed on these areas for a long time. As for the humid or oily areas, vapor or oil will seep into and corrode the PCB board to cause short circuit.


Tip 3: Take Good Care of the USB Charger Port.
Gently plug and unplug the charging cable every time so as not to hurt the USB charger port. Keep it clean is also important.


Tip 4: Stay away from Magnetic Fields.
Magnetic field interrupts the small magnetic components inside a smart device, causing permanent damages to the components or even making the device out of service.
Besides, the ear speakers and loud speakers in smartphones are magnetic, which may absorb tiny magnetic pieces, stuck in the sound holes and lead to low volumes or even no volumes of speakers.
 

Tip 5: Use Original Chargers and Data Cables.
Non-original chargers, charging docks as well as USB data cables cannot provide stable electricity current as original ones, which will result in irreversible damages to the electricity parts or even causing the phone to explode after a long time use.

The Cost of Repairing a Cracked Galaxy S6, S6 Edge Screen

The Galaxy S6 and Galaxy S6 Edge were released in this March as Samsung's mobile phone flagships of 2015. Protected by Corning Gorilla Glass 4 though, cracked screen could still happen in a sudden drop. And then where or how much to repair a cracked screen will be the top concern puzzling the most of victims. Well, here is an estimate report on the cost of repairing a broken Galaxy S6, S6 Edge screen, hope it helps.

Repaired by Samsung Service Center
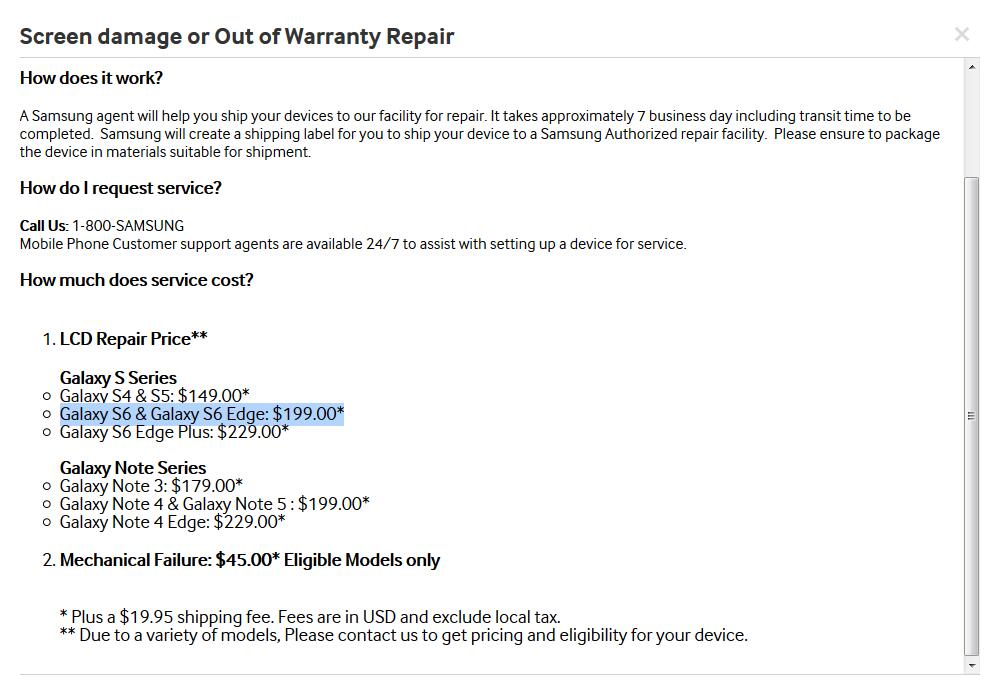
It costs almost $220 ($199 LCD Repair Cost + $19.95 Shipping Cost) and about 7 working days to get a damaged Galaxy S6 or Galaxy S6 Edge screen repaired by Samsung.
Pros: 100% trusted OEM parts and repair quality.
Cons: Long repair period and over-pricing for a glass only repair.

Repaired by Repair Shop
Having a broken Galaxy S6, S6 Edge repaired by a repair shop will be cheaper than by an official Samsung service center. Most repair shops will quote an estimated cost after diagnosing what exactly needed be fixed. The ever-changing prices of Galaxy S6 replacement screen or Galaxy S6 Edge replacement screen is another major factor that will influence the repair cost quotation.
Pros: Shorter repair period and lower price than repaired by Samsung Service Center.
Cons: Not always 100% trusted parts or repair quality and warranty will be voided.

Repaired by the Self
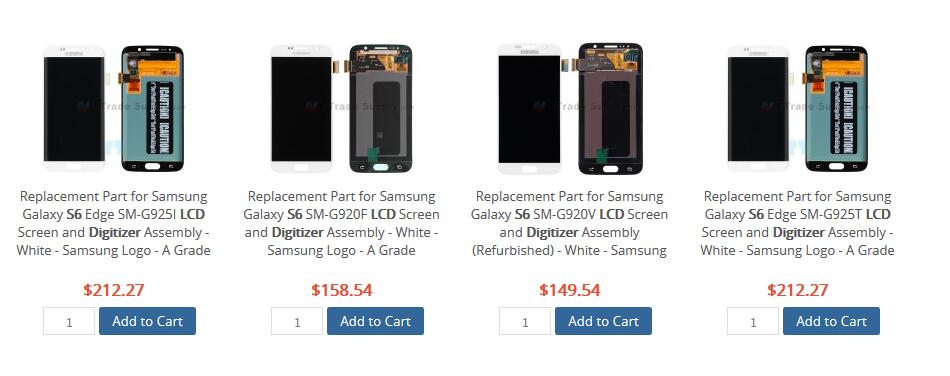
For those who have experience in cellphone repair, to DIY replace a cracked Galaxy S6 screen would be a decent choice. It costs about $155 to buy a Galaxy S6 LCD and digitizer replacement online. Since the quality is various, be careful of the fraud replacements. If you have no idea where to get a trustworthy supplier for high quality and brand new parts, you can give ETrade Supply a try.
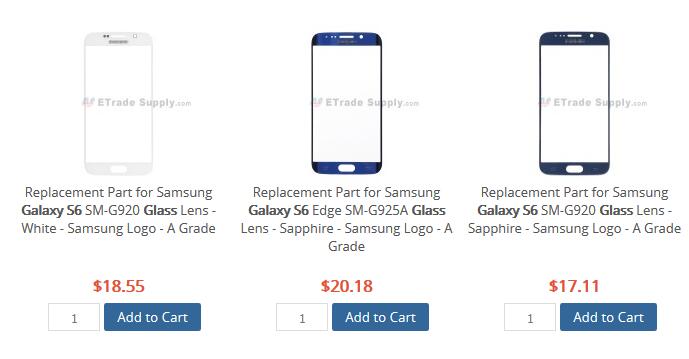
If your Galaxy S6 displays incorrect colors or lines, touchscreen is unresponsive or glass is cracked after a drop, the whole LCD assembly should be replaced. However, if your Galaxy S6 front screen gets damaged but the display and touchscreen still work, while you know how to separate the glass from an LCD, then replace the glass only will be the best choice. It costs you less than $20 to get a Galaxy S6 replacement glass online. 
As for those who are new to cellphone repair or who would like to make repair work easier and less risky, we recommend you get an LCD and digitizer assembly instead of the glass only.
Pros: Lowest price.
Cons: Warranty will be voided and may cause further damage to the device.

How to Disassemble iPhone 6S LCD for Glass Screen Replacement

As we all know, cracked screen replacement is among the most common repair cases for whichever smartphone devices. With 3D Touch as the significant feature, will the iPhone 6S and iPhone 6S Plus still work fine after the screen is replaced? Will the 3D Touch Layer making it harder to replace a screen? Will it feasible to replace the glass only on an iPhone 6S? Let’s teardown the iPhone 6S LCD assembly and have a closer look at what it has.

Check it out for How to Disassemble the iPhone 6S for Screen Replacement if needed. Replacing an iPhone 6S glass only requires strong repair skills as well as professional tools, those who are inexperienced or unskillful in cellphone repair are not recommended giving it a try. Other than that, disassembling an iPhone will void the warranty. ETrade Supply takes no responsible for any hardware or warranty damage caused during your repair. OK now let's begin.

Part and Tools Required:
3. Razor Blade
4. Hot Plate
6. Polarizer Remover Machine
7. Heat Gun

 Remove Digitizer Frame
Heat up around the screen edges to soften the adhesive between frame and glass screen. Gently pry up to release theiPhone 6S digitizer frame.

 Remove Metal Back Plate Assembly
Insert the case opening tools in between, running around to separate the iPhone 6S LCD metal back plate assembly from the screen.

 Remove 3D Touch Layer
Peel off the reflective film covering the 3D Touch Layer. The iPhone 6S home button extension flex cable ribbon is attached to the 3D Touch Layer, be careful not to damage the capacitive sensor as well as the flex ribbon.
Notice: this process is an extra explanation about 3D Touch Layer, it’s not necessary and please skip to next step directly if you’re going to replace the glass only on an iPhone 6S.

 Remove Glass Lens
Put the iPhone 6S LCD and glass assembly on the hot plate to soften the OCA (Optical Clear Adhesive). The machine uses a vacuum to secure the iPhone 6S glass lens to a particular fixed heated surface. Wedge the molybdenum string between the LCD display and glass, hold both ends and gently pull it through to separate the LCD from glass.
Now the glass lens and LCD were separated, replace a new iPhone 6S glass lens in reverse orders to finish the glass only replacement for iPhone 6S.

Following are further details about iPhone 6S LCD disassembly.
 Remove Polarizer Film
Put the iPhone 6S LCD on a Polarizer Remover Machine to peel off the sticky polarizer film.
 
 Remove Backlight Film
Gently peel off the iPhone 6S backlight film with the help of a case opening tool.
Now the iPhone 6S LCD assembly was completely torn down.

Self-Healing Water-Proof Port Cover Might Be Applied on iPhone 7

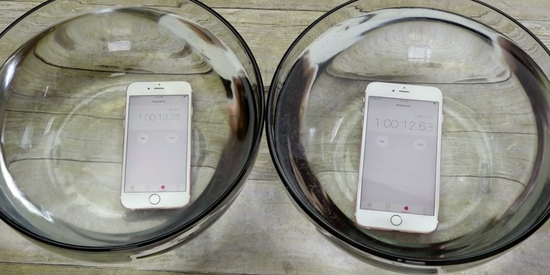
self-healing waterproof port cover might be applied on iPhone 7, meanwhile it will also allow connecting Lightning charger and headphone jack temporarily. Yesterday, Apple submitted a patent application which was aimed at providing water resistance on iPhone’s ports. In fact, it’s not surprising that Apple is working on it, since one of the most common issues for iPhone is the water damage. Even though iPhone 6 & 6Sare not marked with water resistance, they perform well as many other water-proof smartphones. People have tested their iPhone 6 and 6S by putting the phone under water for 1 hour. Fortunately, the iPhone can still work. 

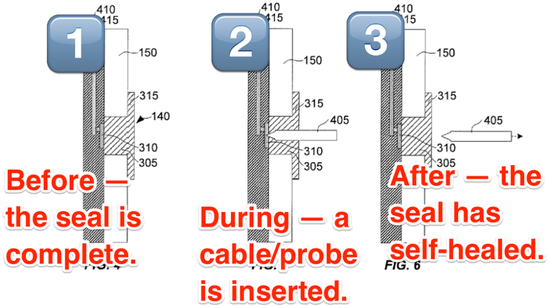
However, water can still go into the phone through Lightning port and headphone jack. Apple’s new patent is aimed to solve it with the self-healing elastomer, which allow temporarily access to the phone cross the holes. According to the patent description files, when the headphone jack or the USB cable get out of the device, the cover will self-heal to the original shape to prevent water and dust.

9 Important Tips to Prevent Motherboard Issues during Repair iPhone 5

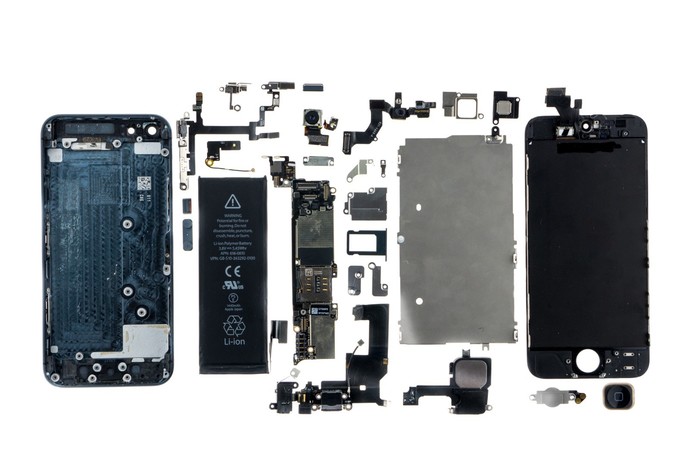
iPhone 5 has been released for 3 years till now, many users may have come across issues on iPhone 5. It’s easy to replace the iPhone 5 LCD screen assembly but when it comes to issues on motherboard, many people even technicians will  feel they are hard to work out. In this blog, we show you the 10 common motherboard issues caused during repair job, which should be prevented.

1. Battery Connector
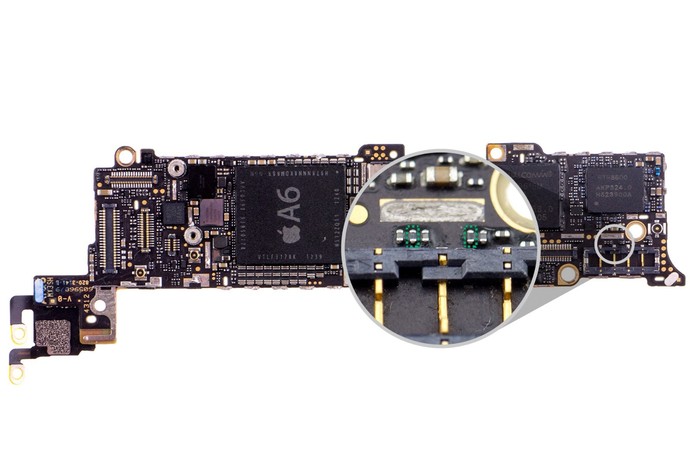
When you pry up the battery connector on the motherboard, Attention should also be paid on the small components besides the connector. Otherwise, if the components get damaged, the battery data circuit will also be affected, which the device will not be charged and may restart randomly. 

2.LCD screen assembly connector.
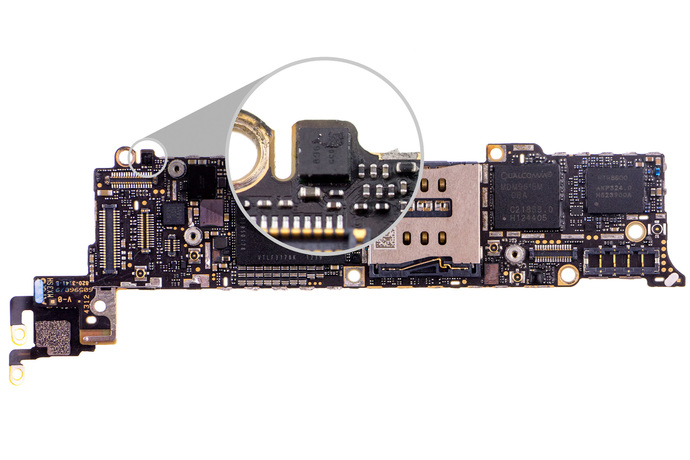
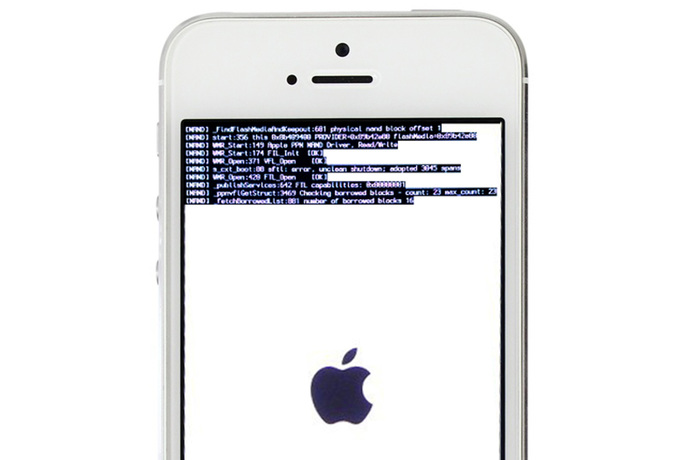
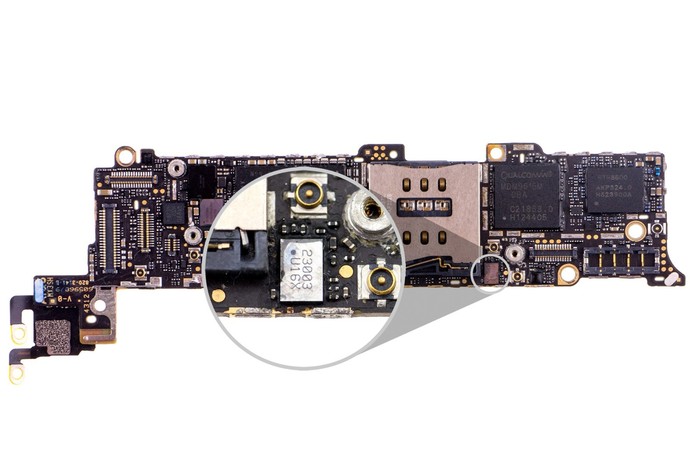
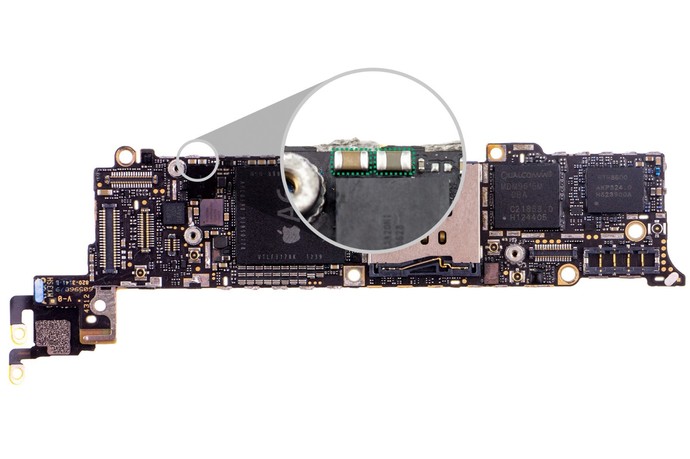
Just like the first tip, when remove the iPhone 5 LCD screen Assembly, you should take care of the small components next to the connector. If the tiny part is damaged, the LCD screen may not display anything. In the 2 o’clock direction, there is a geomagnetic sensor. When the sensor get damaged by water or breaks during teardown, you device will (not) load the system with warning displayed on the screen.

      3.Baseband Chip.
When you remove the RF antenna connector, the baseband chip should be prevented to be damaged. Otherwise, once the chip is out of work, the mobile communication will not be available in your device, what’s more, the damage is irreversible. To fix the issue, you need to replace the whole baseband chip, while the repair work is complicate.

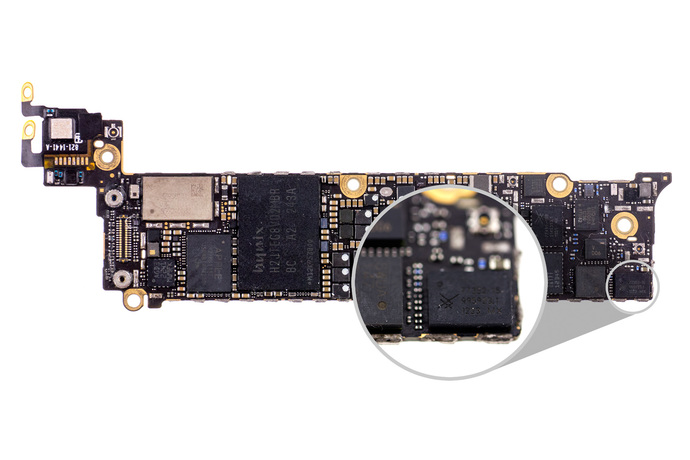
4. USB Control Chip.
The USB control chip is assembled in the bottom of the CPU chipset, so it would be in high risk to dry joint on CPU during the USB control chip repair. However, it is much possible to result to damage on the USB control chip, if people use their phone frequently when charged. Usually, if the chip goes bad, device will not be charged or can’t be powered on. Another situation is that the current is too high for the device when it get started. To fix the problem, the USB control chip need to be replaced. 

5Wi-Fi issue Based on Chip Short Circuit.
*Short circuit here will result in digitizer failure

*Short circuit here will result in Wi-Fi failure
When iPhone 5 drop into water or the top of the device got wet, it leads to short circuit on different ICs, which may lead to different issues.  


6. ResistancShort circuit on Baseband circuit. 
If the bottom of iPhone 5 get wet, it’s possible that the resistance on the baseband power-up circuit go dead. While the baseband is out of work, the mobile communication will not be available again. However, the solution to the issue is very easy. A thin copper wire is a good substitute for the bad resistance. 

7.  Power Amplified Chip Issue.
If using the data traffic to browse internet websites and watch videos for a long time, it may lead to damage on the 2G power amplifier chip. The signal will be very weak and unstable during communication.Replacing this Chip will solve the problem.

8.  Audio chip Issue.
If sounds are available from music player while no sounds during calls, the audio chip or circuits may be damaged. To replace the chip or check the corresponding circuits to fix the issue.

9. Home Button Issue.
Home button failure, is always caused by the damaged lightning port itself. If not, the possible cause may be the gold contact on home button are bad or deformed. The solution is to correct the gold contact or replace the lightning port.
The whole iPhone family are all designed and produced with advanced technology and assembled precisely. ETrade Supply do not recommend non-professional people to tear down the iPhones or repair them. Turning to professional repair shops will be a better choice for people who are not confident to do the repair job.