2016年5月24日星期二

The Way to Distinguish OEM Flex Cable from Copy Ones on iPhone Replacement Screens

The price for the iPhone replacement screens varies from supplier to supplier, so as the quality standards. “Best quality”, “OEM”, “Best Original”, “Premium Quality”, “100% Original”, “AAA+” etc all stand for the best quality parts one supplier can offer. However, most of those screen assemblies are not 100% original. For those screen assemblies, the LCD is original, while for other part like flex cables, frame, glass lens, metal shield, many factories/suppliers tend to use high copy aftermarket one instead to earn more money(iPhone screen assembly with OEM flex cable is 3-5 USD higher in cost than those with aftermarket flex cable). Besides, Unstable touch function such as ghost touch/unresponsive touch problem is more likely to happen on aftermarket flex cables rather than OEM ones after certain time of being used. 

Here we’d like to share with you some information about how to distinguish whether the flex cable on the iPhone screen is OEM or not.

1.       Check whether there is a QR code on the back of the LCD flex cable.
For the OEM flex cable, there is a QR code right on the metal piece on the back of the connector. Peel off the gray foam covering on it then you will see.
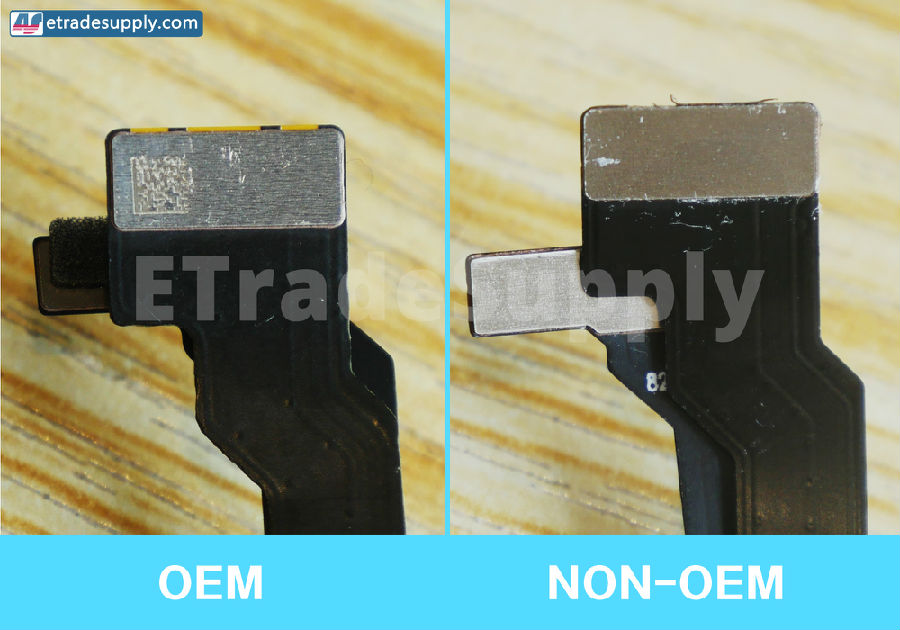
 
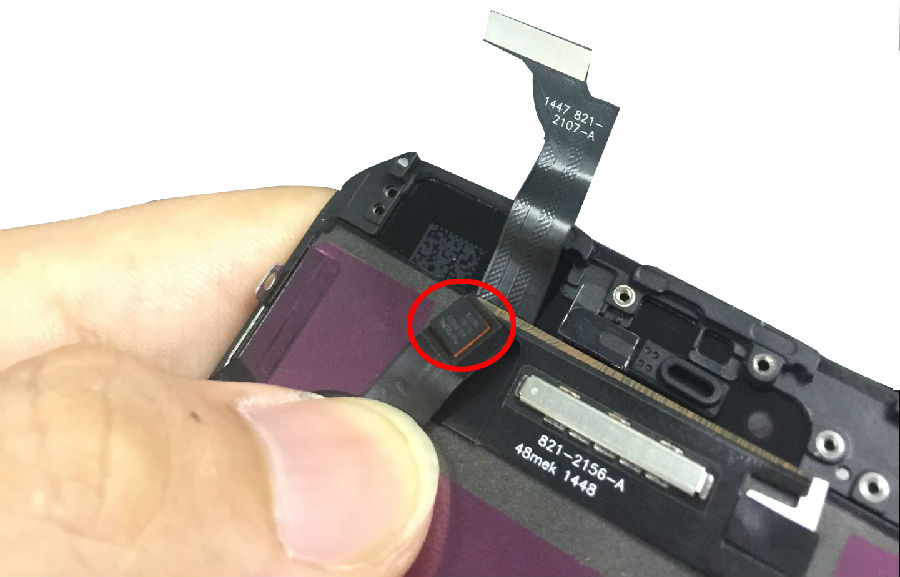
2.       Check whether there is a code on the LCD connector. This code exist on the OEM flex cable connector.
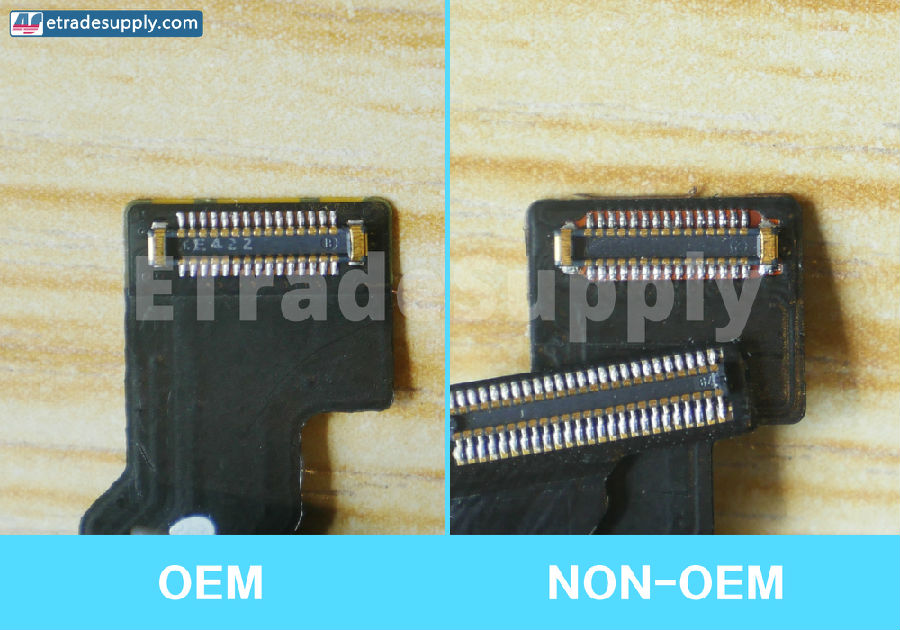
 
3.       Check the codes(with Apple logos) printed on the flex cable. The codes printed on the OEM flex cable is much clearer than the copy one.
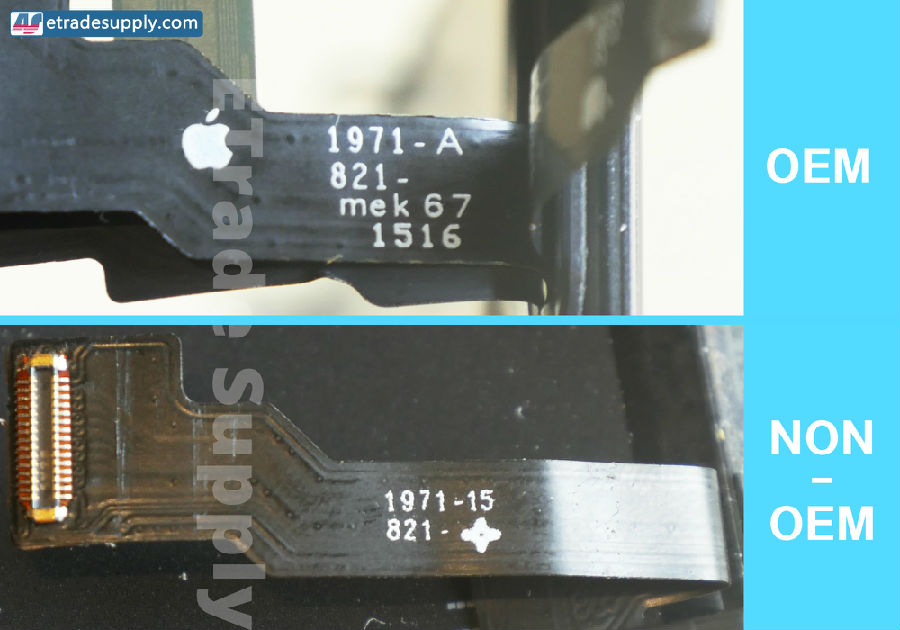
As the aftermarket flex cable is evolving all the time, the aftermarket flex cable with Apple logo do exist now. These 3 ways may not be correct as time passing by.

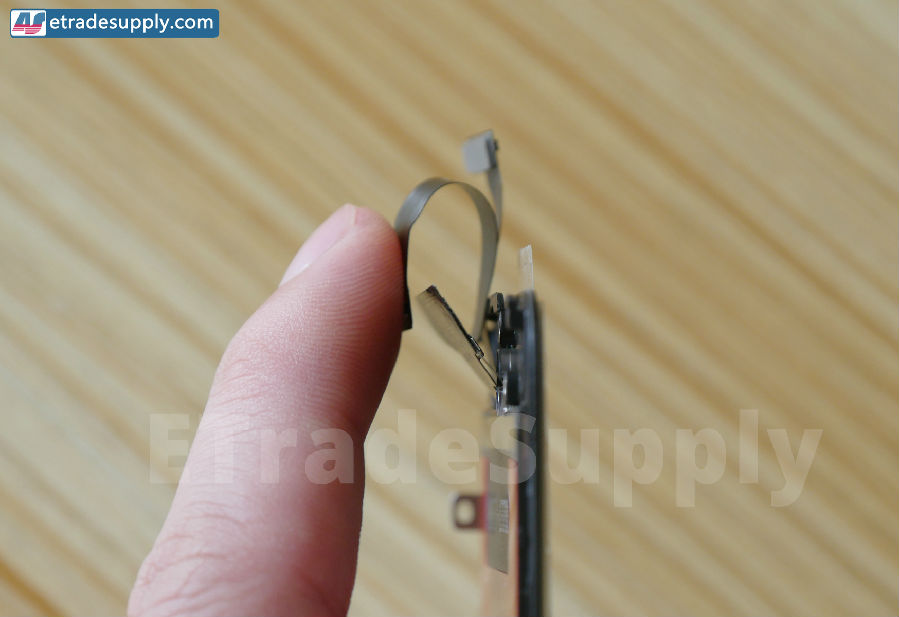
There is another way to distinguish the OEM flex cable, test the flexibility of the flex cable. When you bend the flex cable as showed in the picture, the OEM flex cable feels soft while for the aftermarket one, it feels hard and solid. 
If you have any questions regarding how to distinguish the OEM flex cable from aftermarket one on the iPhone screen, just leave your comment below!
2016年5月19日星期四

Analysis On China Made iPhone 6 Plus LCD Screen

With the lack stock of the original iPhone 5 & 6 series LCD screen, the China made LCD screens becomes more and more popular among the repair shops. As the original iPhone 6 Plus LCD screen prices are still high and not likely to fall down, plus more and more repair shops are tending to accept the China made LCD screens replacement instead, therefore, China made iPhone 6 Plus LCD screen appeared on the market naturally.
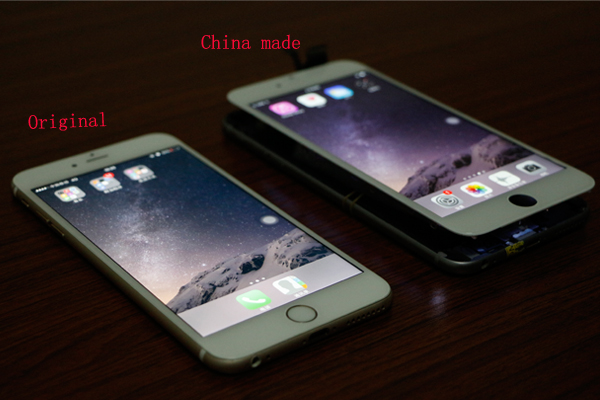
Recently we have got some samples of the China Made 6 Plus LCD screen, which have been called ‘LG 1:1 version’ on the market. We did some tests with these samples and found some differences compared to other China made LCD screens.
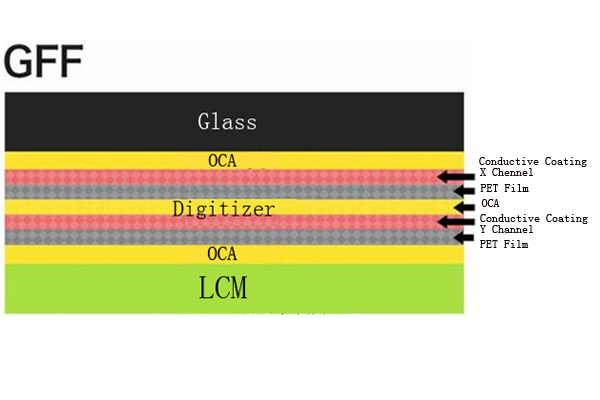
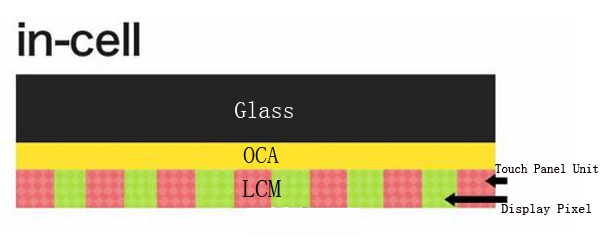
In terms of the structure, these China made iPhone 6 Plus LCD screen still features GFF technology, which is Glass lens+ OCA+ Digitizer+ OCA+ LCD.
While the original LCD screen adopted In-cell technology, the Glass lens+ OCA+ LCD.
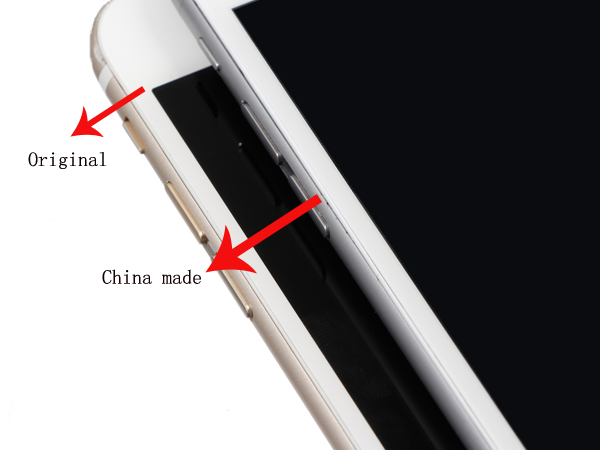
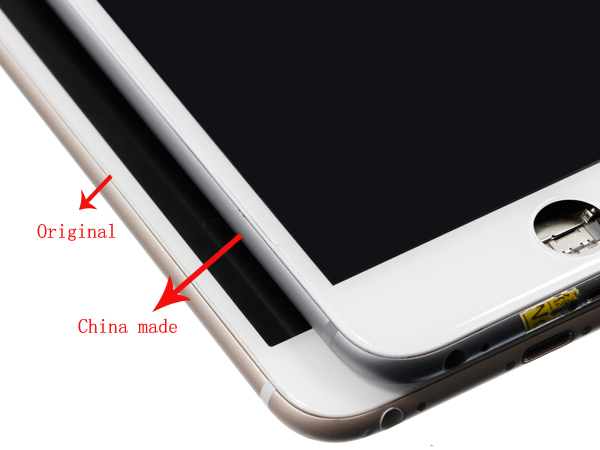
After tests, we found some differences in LCD frame height, glass screen thickness and the home button location among these 5 samples. You may wonder why these differences exist while they are sourcing from the same manufacturer?
Thus we need to learn the production process of the China made LCD screens, which was assembled by the 3rd party manufacturers, who purchased the China made LCD, LCD frameglass lensmetal shields, screen foam and digitizer from different manufacturers, which could be original or high copied ones. Since there are some differences among these glass lenses, LCD frames and so on, even though they shared the same LCD, there will still be some difference.
As for the LCD display, there are 2 types of sources;
1. The Chinese LCD manufacturer (such as LT/MT/JDF) will produce part of the LCD according to the market demands.
2. The LCDs produced for other brand/model cell phone by original LCD manufacturer like Sharp, LG, which just share the same size with iPhone.
There is no doubt that significant differences existed between these 2 kinds of LCDs whether in display effect or working stability. In pursuit of greater profits, there is no strict requirements and standards for China made LCDs production process as long as the LCDs can achieve the basic using requirements. Therefore there is quite a gap in color difference, viewing angle and working stability compared to original ones, as the LCDs which are designed for the other brand cellphones, after replacing the IC and flex cable, have been inspected strictly before flowing to the market. (Such as the Samsung Galaxy S3 LCD screen assembly which are transformed from the GiONEE phones. Due to the few original stock in availability, most of the S3 LCD screen assemblies are produced by Samsung through transforming GiONEE LCDs.
It is said that these China made iPhone 6 Plus LCD screens are transformed from the MeiZu Meilan Note LCDs (Also features 5.5 inches) which are produced by Sharp and AUO, the overall performances of these LCD screens are better than LT/MT/JDF’s. And what’s big different from the other LCD screens is that there is one more LCD drive IC on the screen flex cable.


Because of the big production MOQ and long R & D cycle, the customized China made LCD screens had some difficulties in technology improvement with the changes of the marketing demands, while the original LCD features higher quality and reliability.
Conclusion:
For these China made iPhone 6 Plus LCD screens, the LCD frame tending to pop off and LCD screens are thicker. But in display effects, China made iPhone 6 plus LCD screens are better than 5 series. Those customers who cared more about the prices will have one more choice once the improvements of the China made iPhone 6 Plus have been implemented. And we also will continue to focus on the China made iPhone 6 Plus LCD screen assembly.

2016年5月17日星期二

HTC 10 DIY Teardown for screen, charging port, battery replacement

Have you got the New HTC 10 in your hand? Unconsciously broke the screen? Accidents do happen. The official price for replacing the HTC 10 screen is up to 140 USD and the deal time is around 7-10 business days which is quite long and expensive. If you want to save money and TAT, DIY repair would be your choice. Today we’re going to teardown this controversial smart phone to see how difficult it is to repair it by yourself?
Tools needed:
Slim playing cards

Step 1 Power off the phone
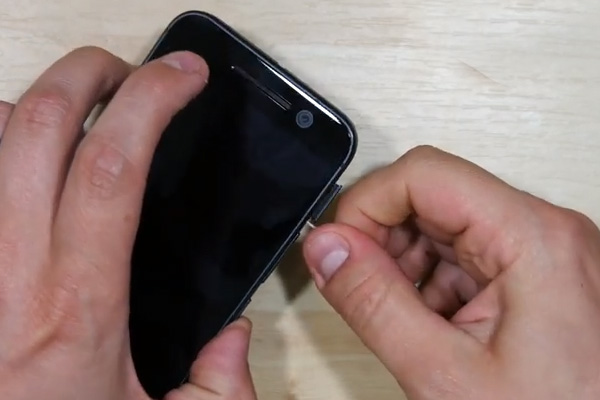
Always power off the phone and take out the SIM & SD card tray before disassembling.

Step 2 Disassemble the screen
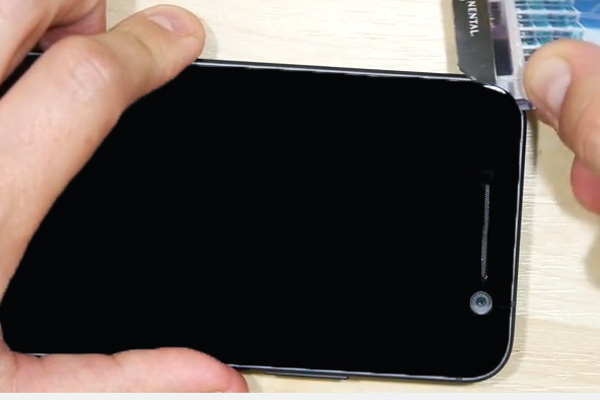
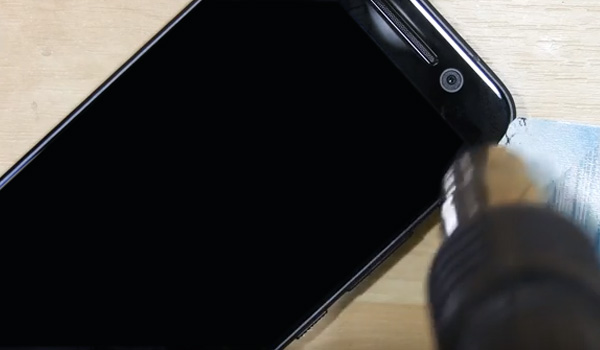
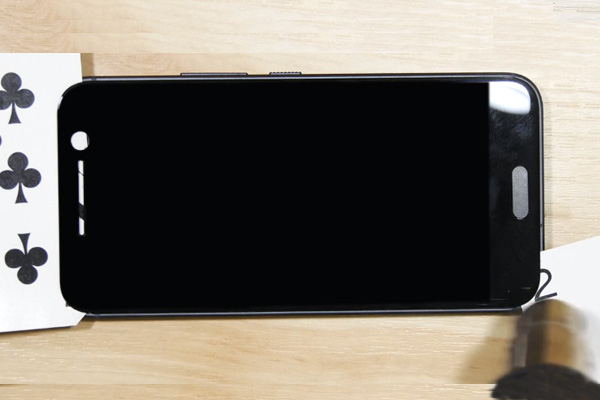
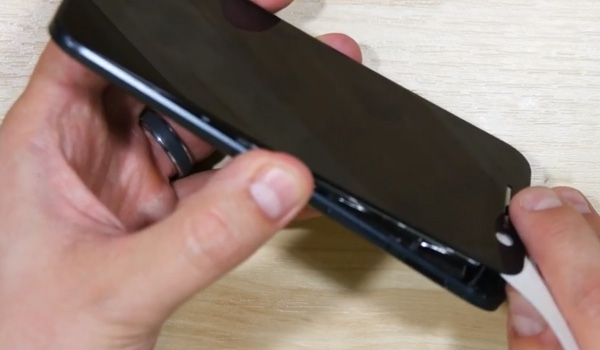
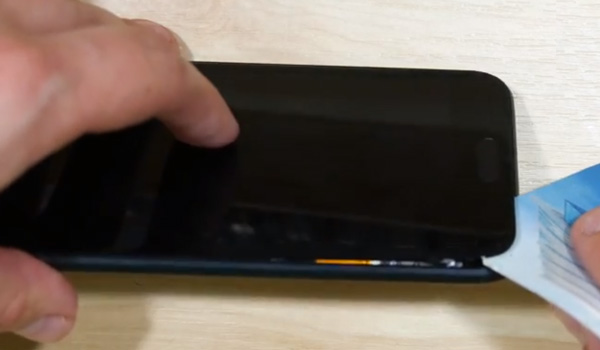
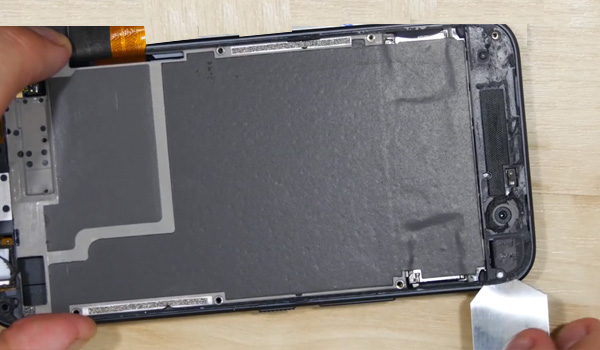
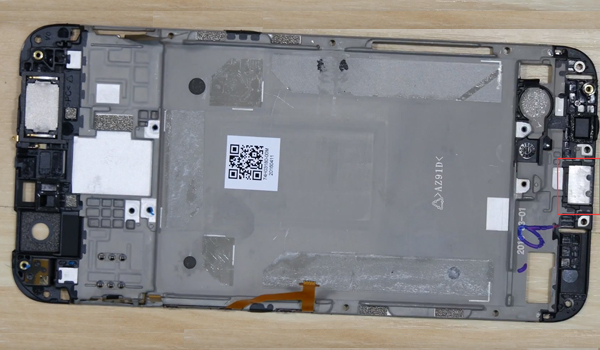
Heat up the LCD screen edges to melt the adhesives, then insert the playing card and slide along the edges to cut the LCD screen adhesives (Note: don’t slide too deep into the bottom left side, because there is a flex cable), here you may need to warm up the screen edges repeatedly.
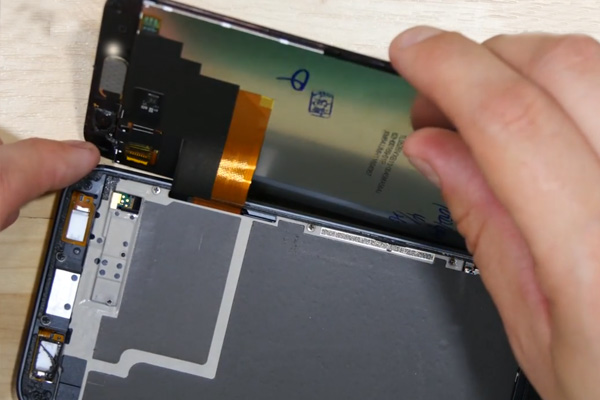
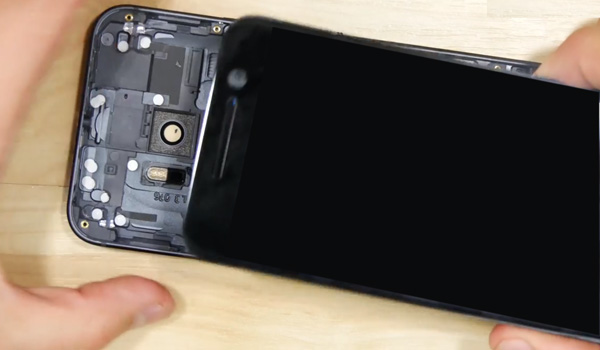
After loosening adhesives, you can pry up the LCD screen.

Step 3 Disassemble the middle plate
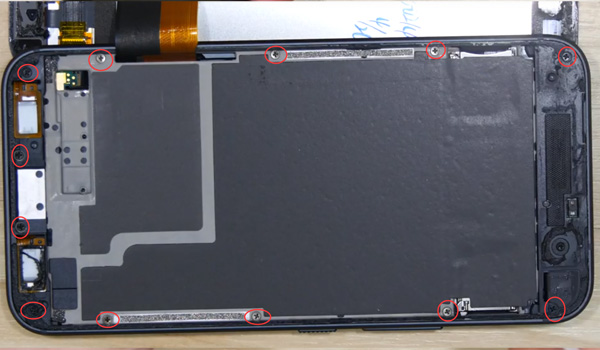
Don't think you can remove the screen right now, 12 screws are there waiting!
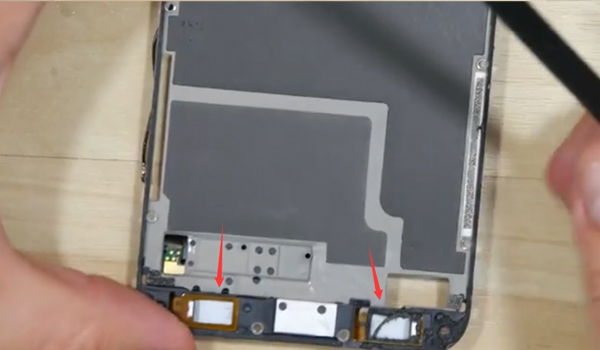
Pry up and remove the middle plate with LCD screen assembly from the rear housing now.

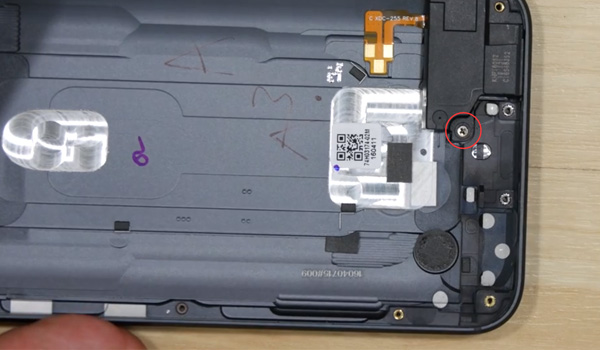
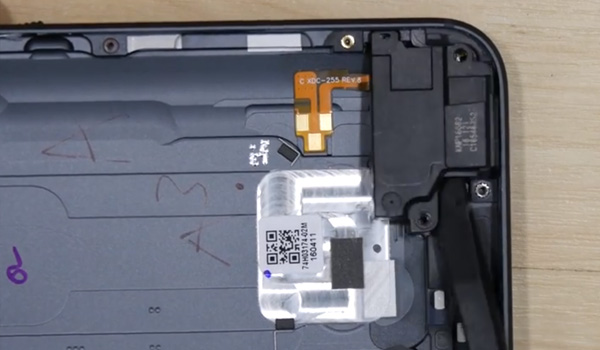
Step 4 Remove loudspeaker
By the way, we can remove the loudspeaker since the rear housing is right in front of us. Undo the screw and you can pry it up.

Step 5 Remove the LCD screen
Moving to the front housing assembly, still the HTC-style, looks complicated inside with so many adhesive tapes!
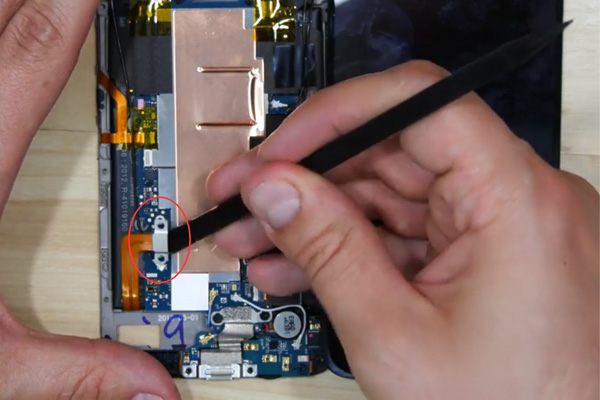
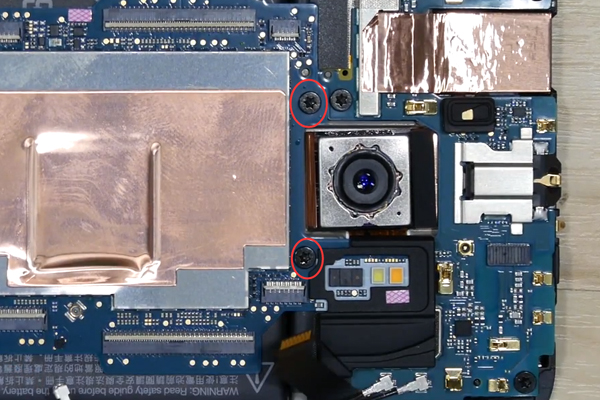
Remove 2 screws holding the battery first before pulling out the battery connector. 
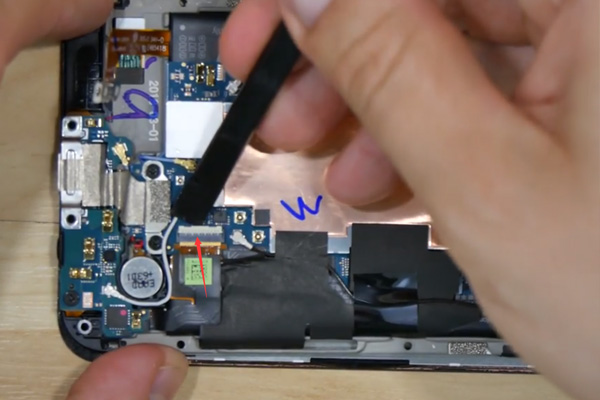
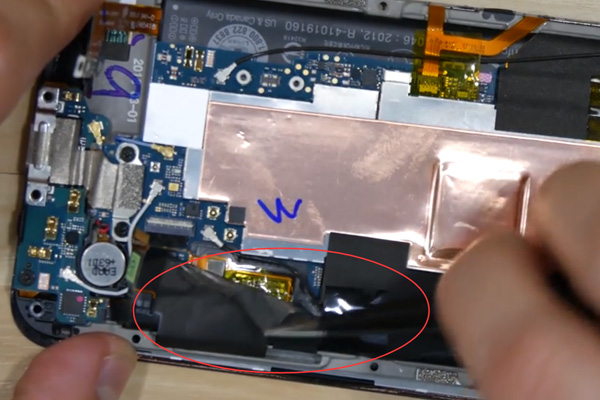
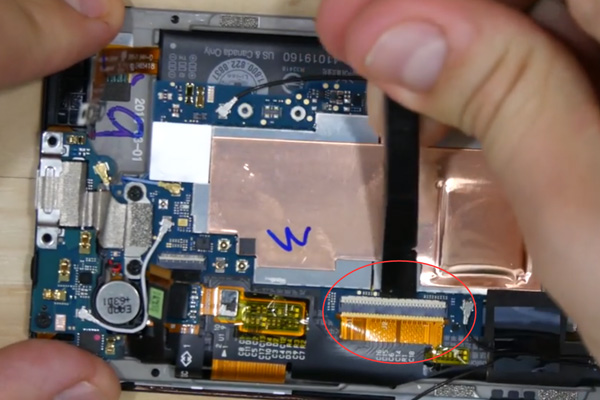
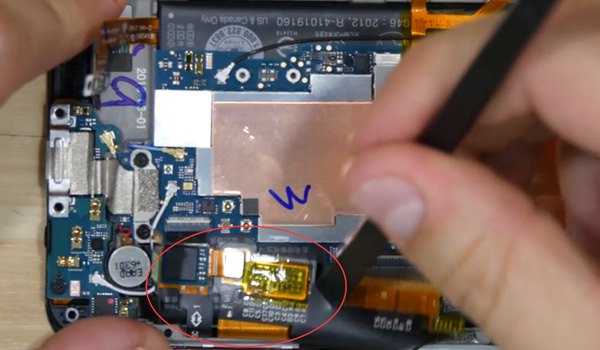
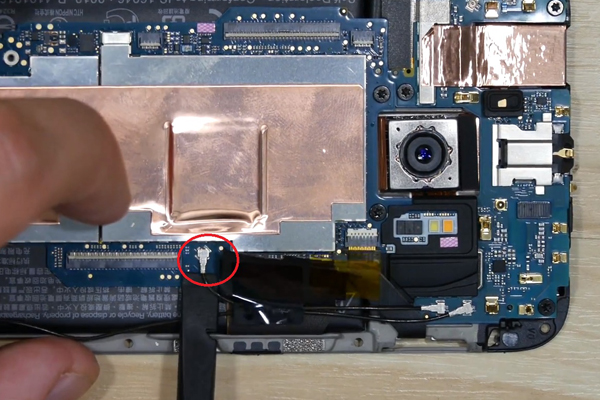
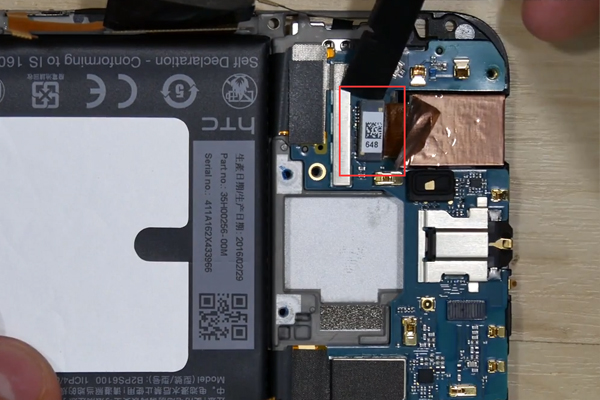
Then pull out the charge port flex connect to the main board and peel off the tape covering the LCD screen and digitizer flex cable, you can disconnect the signal cable now.
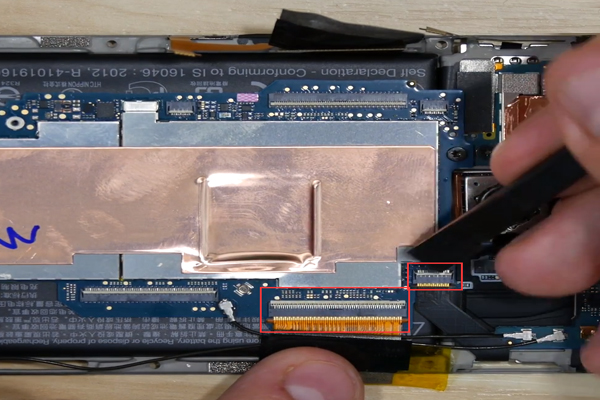
Disconnect the LCD screen flex cable connector.
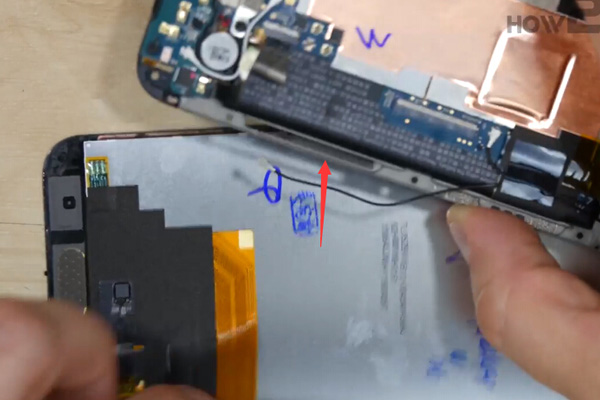
Pry up the whole LCD screen and digitizer flex cable and put it down through the slot, now we're done with separating the LCD touch screen from the middle plate assembly.
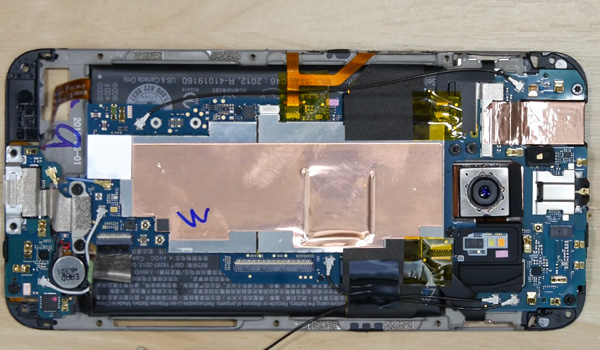
Left the middle plate assembly now.

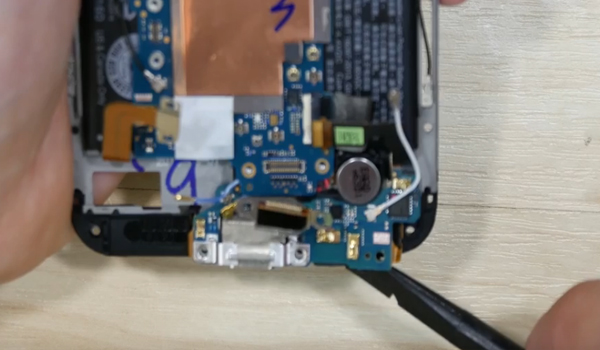
Step 6 Remove charging port flex cable.
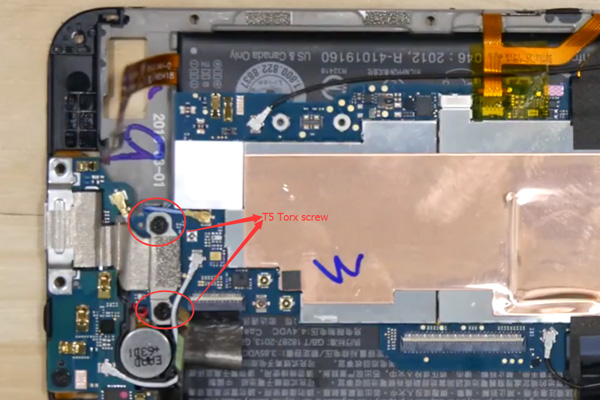
Undo the 2 T5 Torx screws holding the charging port flex.
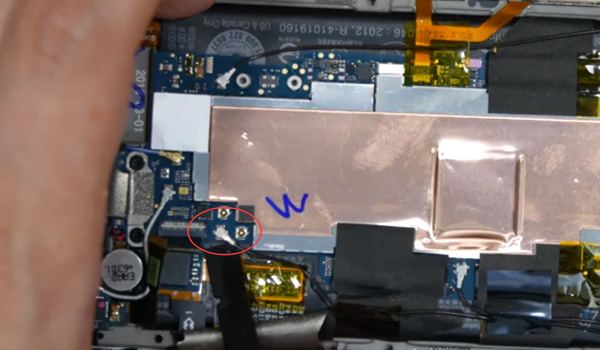
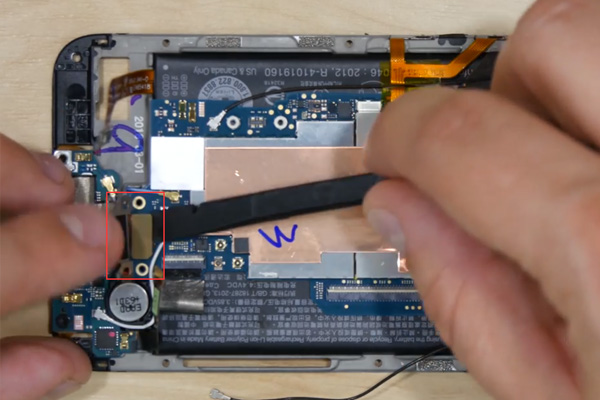
Disconnect the charging port connector.
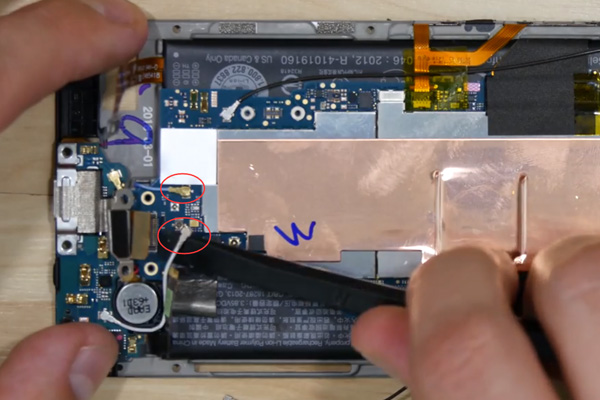
Disconnect the 2 signal cable connectors then.
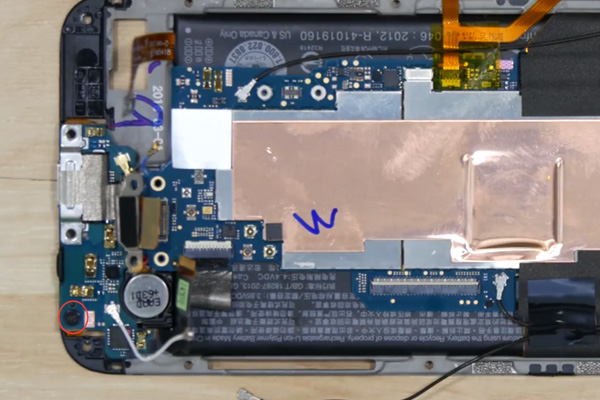
And one more screw in the corner.
Then go back and forth to pull off the touch button pads.
Now pry up charging port flex cable very carefully and slowly.

Step 7 Remove main board with rear camera
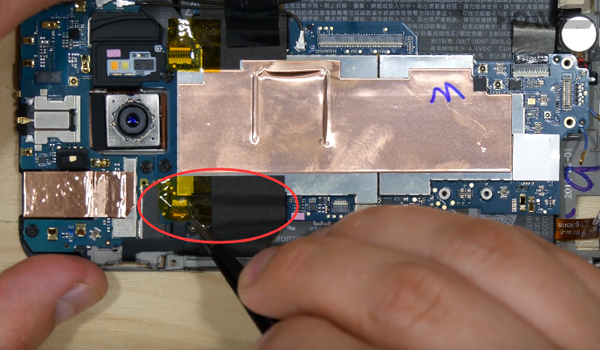
Peel off the yellow and black tape covering the connectors.
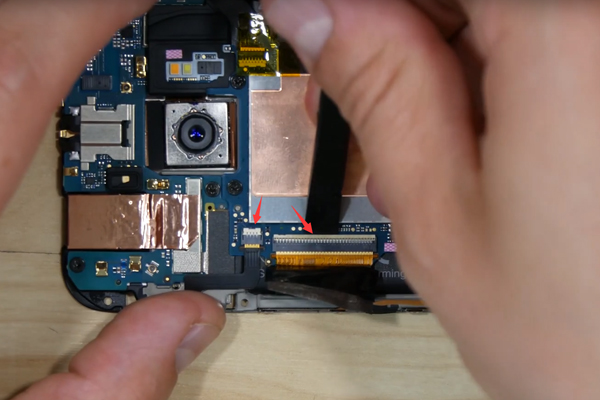
Release 2 connectors.
Also do the same to the other side after releasing one signal cable connector here.
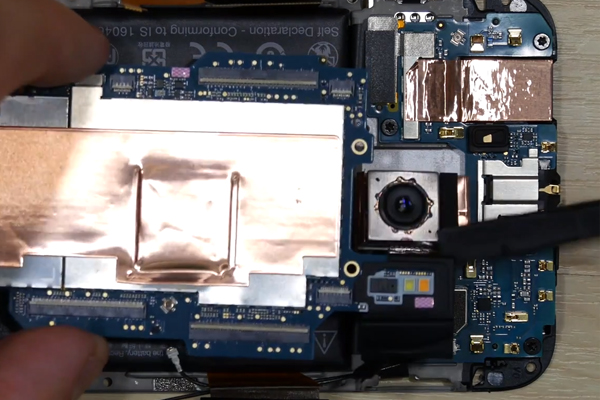
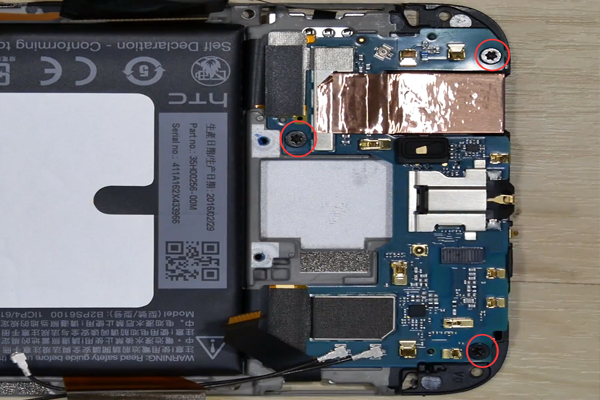
Undo 2 screws on the main board.
Pry up the main board with the rear facing camera now.
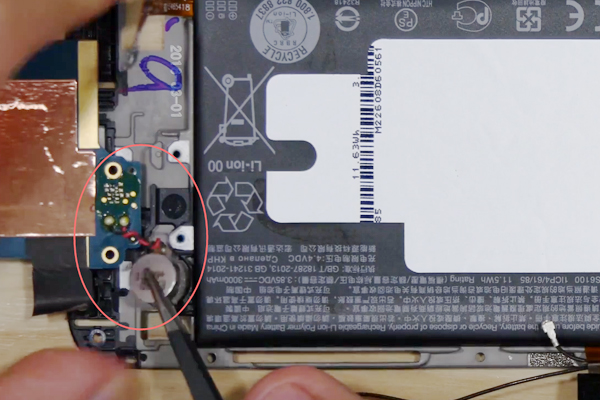
Be Careful! The vibrate motor is soldered to the main board. Remove it together.

Step 8 Remove the other logic board
Undo 3 screws first.
Remove front facing camera covering by the protective tape.
Thought of removing the logic board now. Oops, the battery covered the flex cable underneath.
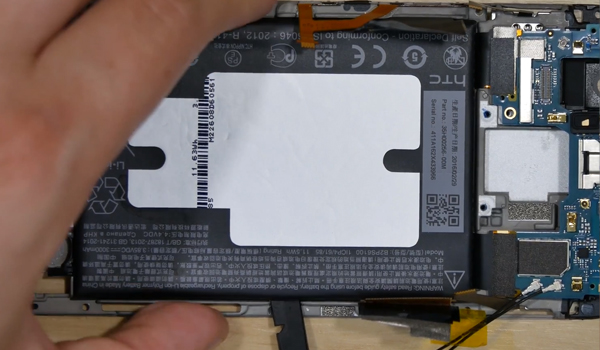
Need to take out the battery first, prepare for the strong adhesive underneath battery.
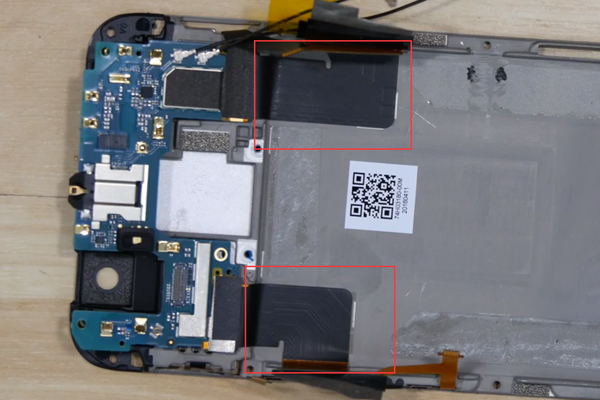
Now loosen cables adhered to the middle plate. Then the logic board can be removed finally.
Left the middle plate with the ear speaker now.
After the whole teardown, do you have any thoughts for this so HTC-styled HTC 10? If you are interested in fixing your phone by DIY work, Etrade Supply will provide you the most cost-effective replacements and repair tools. Any problems and ideas, leave a comment below to share with us!

2016年5月10日星期二

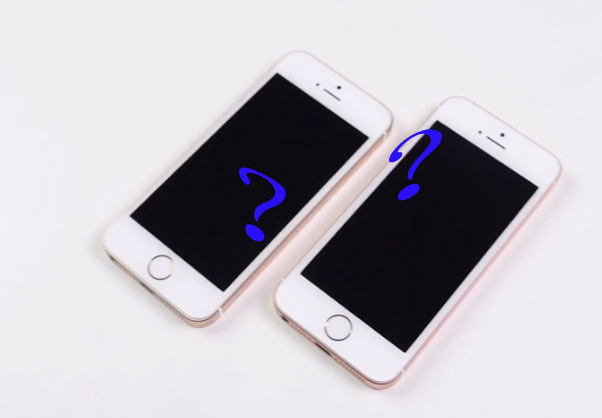
6 quick tips to distinguish between real and fake iPhone SE

On March 21, 2016, Apple released a new 4-inch cell phone – iPhone SE, which looks almost identical from its departing brother 5S in appearance while in hardware, it can be equal to the iPhone 6S (except 3D touch and fingerprint scanner), which impresses the apple fans a lot and drives great demands in the market. However, due to the extremely similarity between the SE and 5S, you may find that some fake iPhone SE which is refurbished from old iPhone 5S with lower cost has already seeping into the market.
So is there a way to distinguish between the real and fake iPhone SE? Let’s figure out a simple way!
1.     Picture pixels
As is known to all, the SE upgrades the rear camera to 12 million pixels as the iPhone 6S, while the iPhone 5S rear camera only 8 million pixels, therefore we can tell the difference by the picture’s resolution. Just take a photo and check the photo resolution.
2.     Live photos
The iPhone SE features the Live Photos function in the top position of the camera interface while 5S doesn’t have.
3.     Retina Flash function
Also iPhone SE features another function of Retina Flash, which is in the top of left corner of the camera interface.
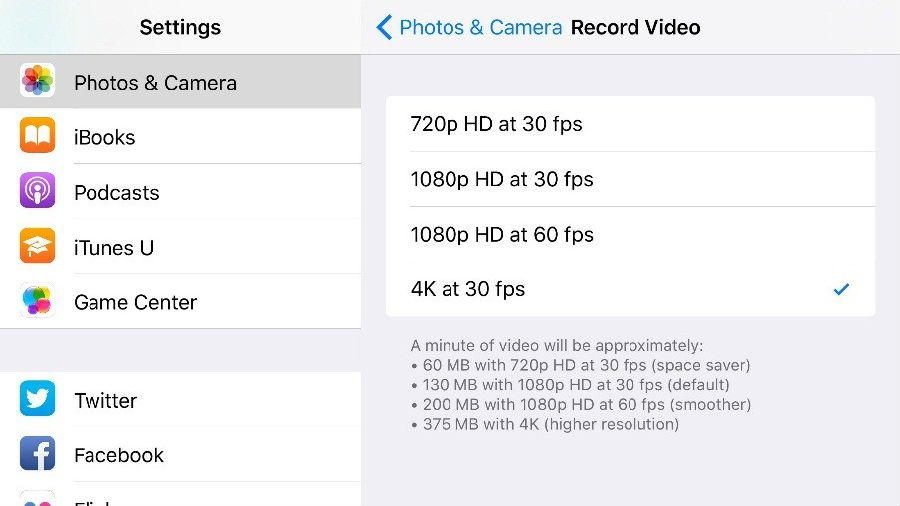
4.     4K video recording
Go to Settings> Photos and Camera to set the 4K video recording function while you can’t on iPhone 5S. Check your phone now!
5.     Apple Pay
Go to Wallet, you will find Apple Pay and Certificate function while 5S features no Apple Pay.
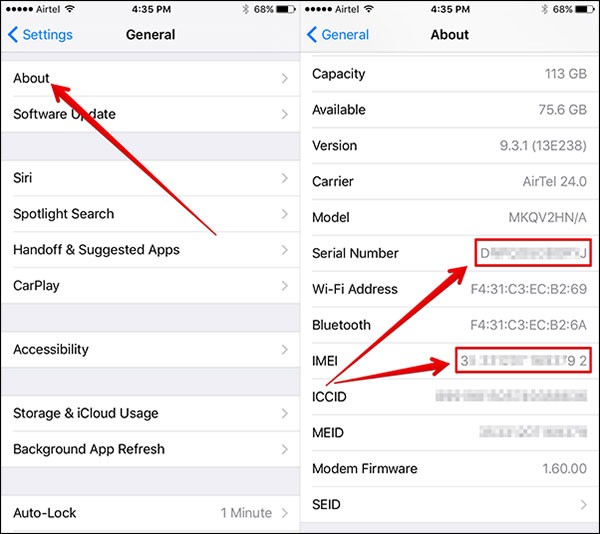
6.     Check original mobile phone IMEI code and serial number
Query the original serial number is the most effective way to tell if the phone is faked or not. First we need to operate the iTunes App and connect iPhone SE to computer, then turn the phone to recovery mode. We can see the real original serial number after getting into recovery mode, then we can tell the truth once comparing the serial number to the one in Settings menu.
Also if you are interested in the inside structure, check following video of iPhone SE full teardown comparison with iPhone 5S to know more differences between these 2 phones.
These quick and easy tips can help us distinguish whether the iPhone SE is a real or fake one in no time, check the phone carefully before buying. In a word, purchase the iPhone through official way if you don’t want to be fooled by shanzhai phones. In case you need the high-quality spare parts for your phone, Etrade Supply is always there for you!