2015年10月30日星期五

How to Tell The Copy Parts From OEM (Without Tear Down the LCD Part)

Actually, the differences between high copy parts and OEM can be found from the appearance. Here we show you guys how to tell the copy parts from OEM in 4 different ways.

Appearance

Firstly, the LCDs looks in different color. OEM parts looks more dark and gray, while the copy parts with a little bit bluish. The difference is due to the assembly technology. Light reflect more when crossing the Copy LCD.
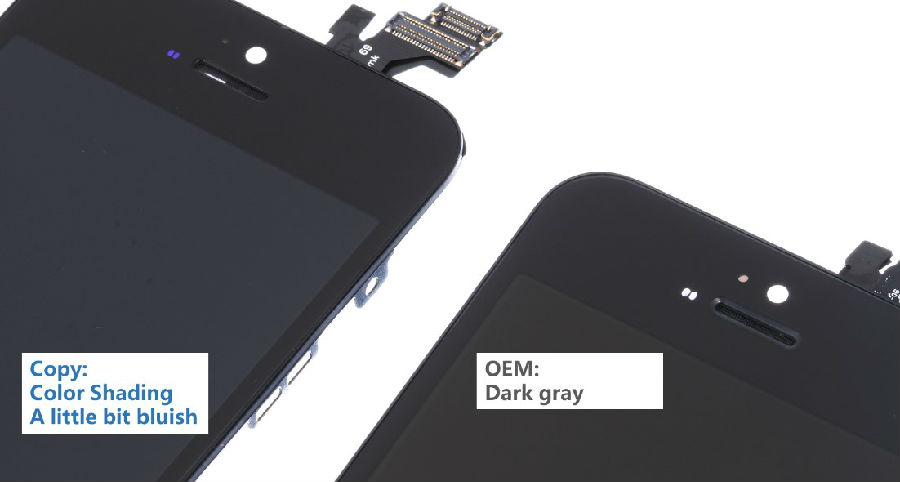
Secondly, the brightness displayed on the LCDs are different. Obviously, the copy parts are brighter. To some degree, you may feel unnormal if you pay more attention to it. While the OEM parts has been tested for thousands of times. The brightness is adjusted to the best condition.
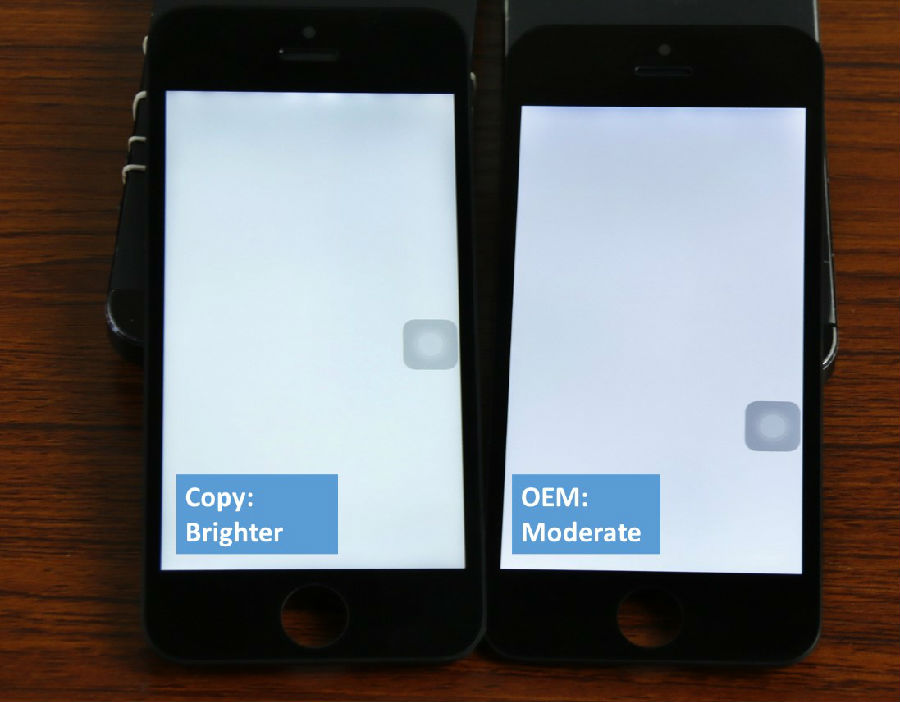
Thirdly, there are some distinctions when the LCDs display different colors. For example, in dark display, OEM LCD looks bluish, meanwhile, the copy part is more dark bluish. More details, below is the pic for you guys to check.

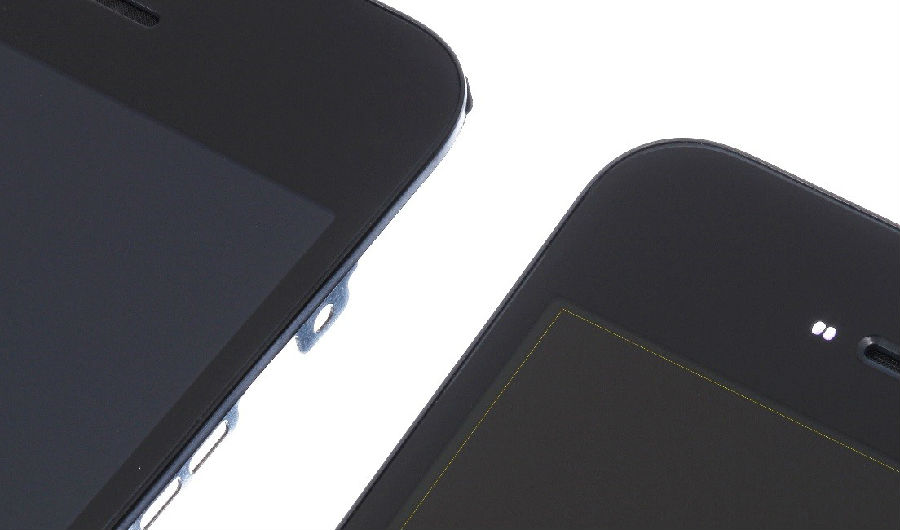
Fourthly, there has 4 legible lines in the rim of the OEM LCD. As for the copy LCD, the lines are blurry and can't be found easily. 
We will keep updating the methods we find to tell the differences. Hope the blog can help you guys get right parts which mach with their prices. Any questions, please feel free to contact us at service@etradesupply.com or just comment blow. Thanks.

Related:

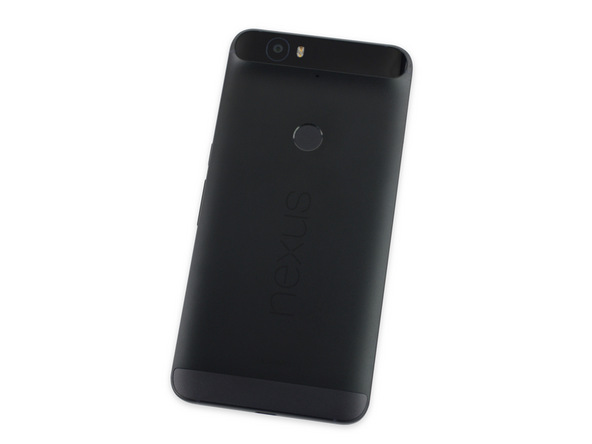
How to Replace the Huawei Nexus 6P Battery in 8 Steps

Together released with LG Nexus 5X, the Huawei Nexus 6P is targeting for people who want to enjoy bigger screen and better performance. However, every coin has two sides, bigger screen and better performance means the device will consume more energy. For Lithium battery, its full charging cycle is around 300 times which means for heavy users, they may need to get their battery replaced after one year of being used to keep the battery life working as usual.

With a non-removable built in battery, it’s not an easy job to replace its battery, but don’t worry, by following this step by step guide, you could get your Nexus 6P battery replaced by yourself.

Tools Needed:
Plastic case opening tool
Phillips #00 screwdriver
iSasemi Tool
Plastic Spudger

Step 1.
Power off the Huawei Nexus 6P and then eject the SIM card.
 
Step 2.
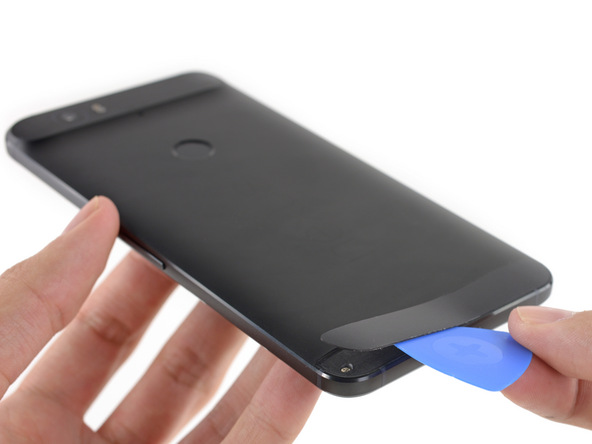
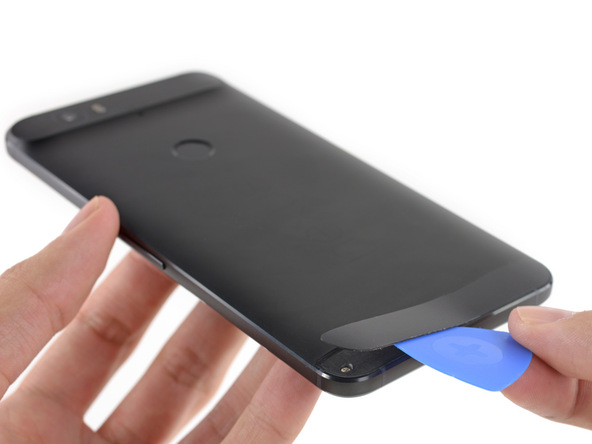
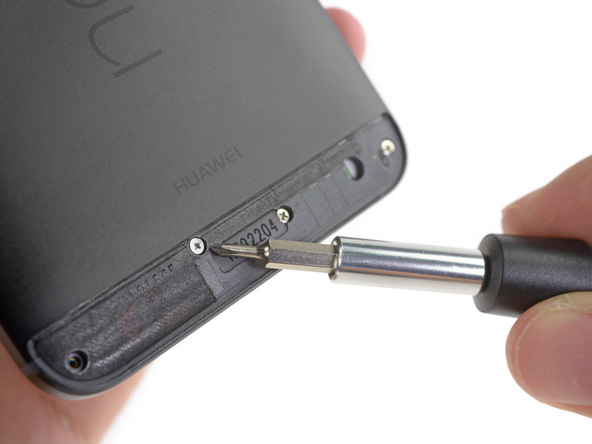
Insert the Case Opening Tool to the bottom plastic cover to peel it off. (Better heat up the plastic cover for 30 seconds first)
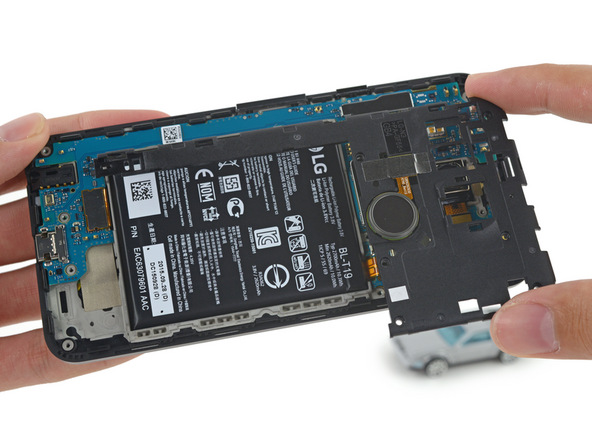
 
Step 3.
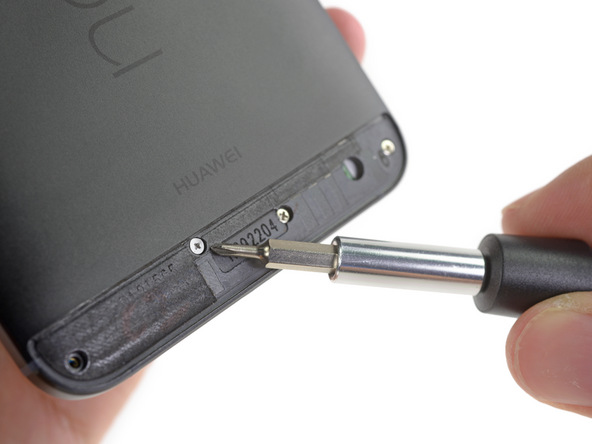
Undo 4 Phillips screws holding the middle frame.
 
Step 4.
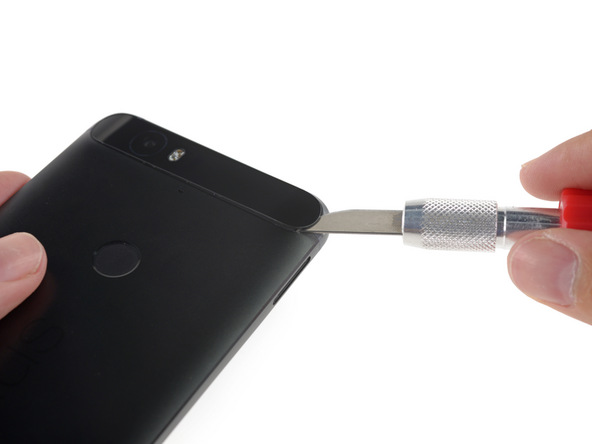
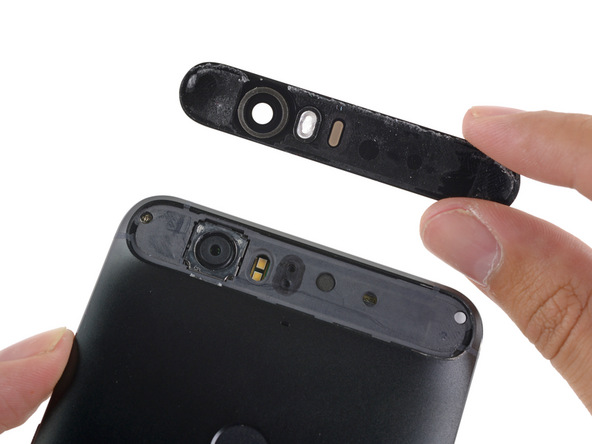
Insert the iSasemi Tool to the top glass cover then peel it off. Undo 2 screws holding the middle frame.
 
Step 5.
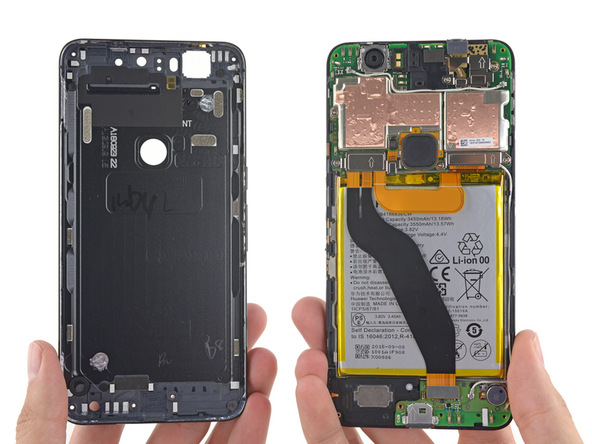
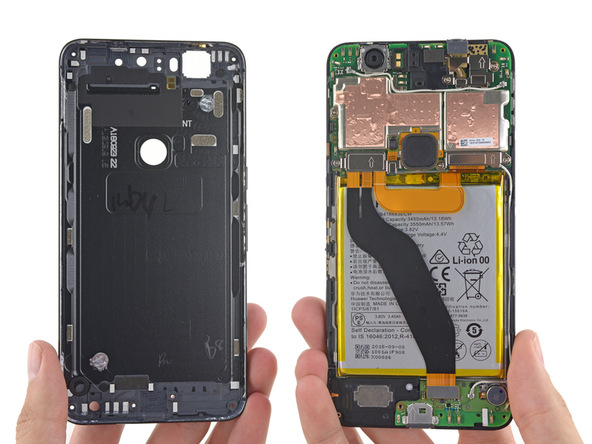
Heat up the rear housing then separate it from the rest of the phone.
 
Step 6.
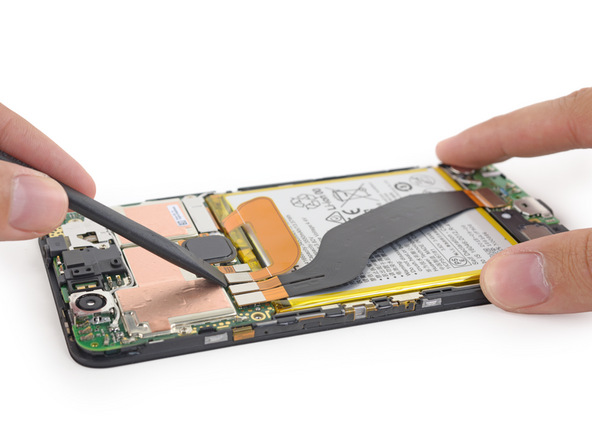
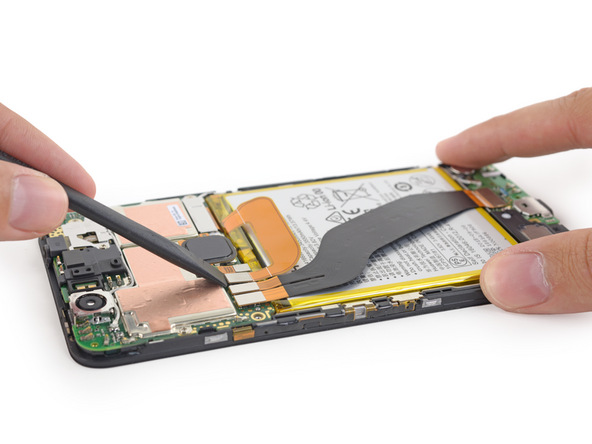
Disconnect the motherboard and daughterboard flex cable, then disconnect the battery connector.
 
Step 7.
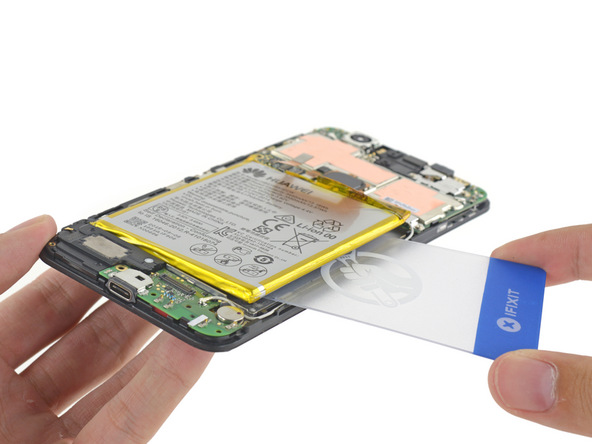
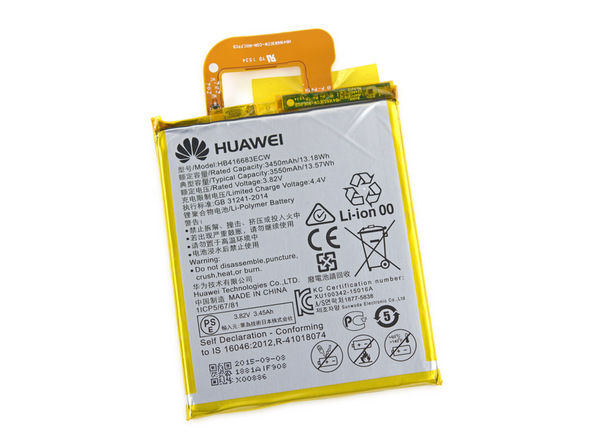
Insert the iSasemi Tool to release the adhesive attached to the battery then remove the battery.
 
Step 8.
Put your new Nexus 6P replacement battery back on then reassemble the phone vice versa. 

If you meet any difficulties during these steps, please leave a comment below, we'll try our best to help you out!

Are The Flood of New High Copy iPhone LCD Screens as Good as The OEM Ones?

As far as we know, there is complete high-copy substitute for iPhone 5 series' LCD screen assemblies available in market now, due to the iPhone LCDs' shortage. As always, this new product also has pros and cons. Obviously, the high copy parts are much cheaper than OEM ones and work well, however, we found that the quality of the new copy displays are not always stable as expected. Through a series of testing and analysis, the results show that the parts will go bad or stop working under certain circumstances, what’s more, the defective parts may damage the motherboard. It still need time for manufacturers to optimize the process and improve the quality. To prevent our friend in cellphone repair community from suffering the loss, we show you guys our analysis below and make sure you guys stay in the know.


Appearance
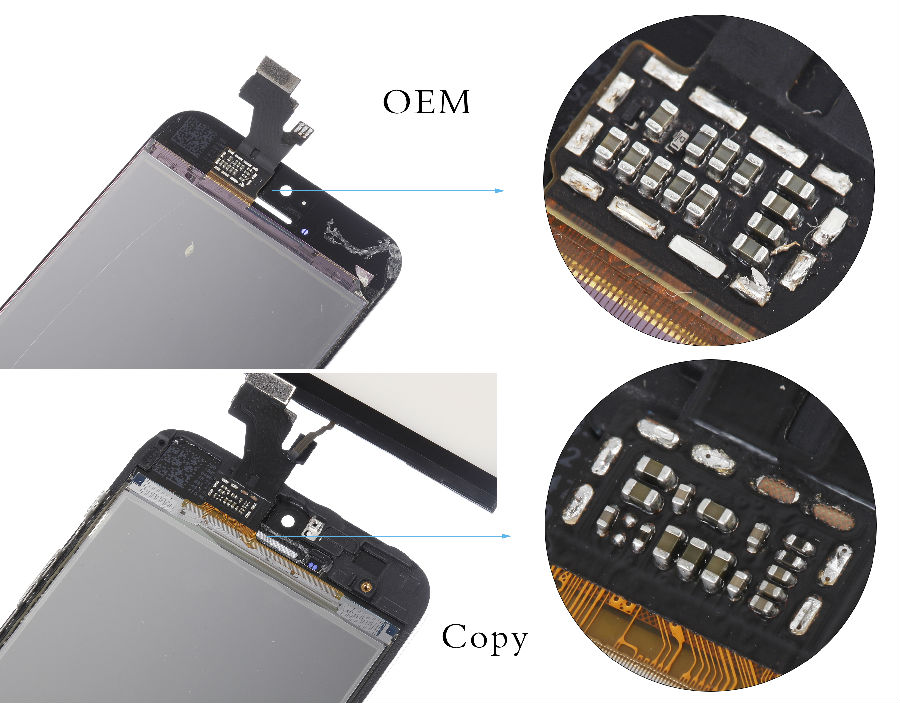
From the pictures, you can see the differences between the OEM and copy parts. There are two different points you can find easily. The first one is the IC. The IC on copy parts are smaller and not very neat lining-up.
The second difference in appearance is the flex cable. The circuits in OEM flex cable are organized perfectly and look nice, while in copy parts the flex cable texture looks complicated, which makes it hard to believe that the parts will work fine in a long time.


Display Structure
OEM iPhone series’ display use in-cell touch panels, which means the touch screen is embedded in theLCD screen. This kind of structure make sure the display thinner compared with other smartphones. Below is the 2 structures of all-copy LCDs in market. The OGS (One Glass Solution) is the technology used on previous generation smartphones. Simply, the layers in the different parts look like:
GFF touch-screen display technology, which almost make sure the same display performance like OEM, however it also cause the increase of entire thickness.
Via: REWA Technology

After testing lots of samples and compassion, we had the results of the thickness when different LCDs are installed.


Version test
We also have consulted some manufacturers, technicians and other suppliers. Some said that the 20%-30% rate of turning the iPhone to bricks was due to the Aftermarket LCD installed and burnt some of the IC chips on the motherboard, there`s also a saying that it`s because the iPhone devices has been modified or refurbished without having official serial number. During upgrade, apple database will deny the system from being installed and activated. We are about to find out what exactly is the root cause of the problem. We will let you guys know when we get the answer.

Anyways, we’re working on how to distinguish the different parts easily without having to take apart the phone. Stay tuned for the update, or for more information please check our the rest of our blog.

Update:


Related:

How to Replace A Cracked Nexus 6P Screen

Accompanying the Nexus 5X, Google has released the Nexus 6P as another flagship this year. For whatever the reason Google chose Huawei to make the Nexus 6P, but it is now available in the market featuring a premium metallic design, high-resolution screen and powerful hardware. What about the repair difficulty? Will the Nexus 6P’s screen be easier to replace than the other Nexus devices? Check it out:

Tools needed:Heat Gun/Hair DrierScreen Separator Tool

1. Power off the Nexus 6P and remove the SIM card tray with the help of an ejector pin tool.
2. Heat up the plastic bottom cover on the back to soften the adhesive underneath, then remove the cover by gently prying it up with a case opening tool.
3. Undo the 4 screws in the back cover.
4. Gently pry up to remove the glass upper cover on the back and undo the screw underneath.
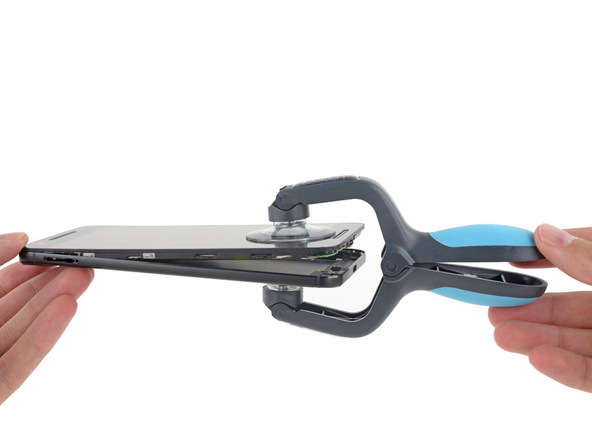
5. Gently pop up the Nexus 6P LCD assembly by a screen separator tool.
6. Pry up the flex cable ribbon connectors as shown in the below picture.
7. Gently pry up the Nexus 6P battery as there’s strong glue underneath. Be careful not to damage the fragile flex ribbon.
8. Pry up the signal cable and remove the Nexus 6P charging port PCB board.
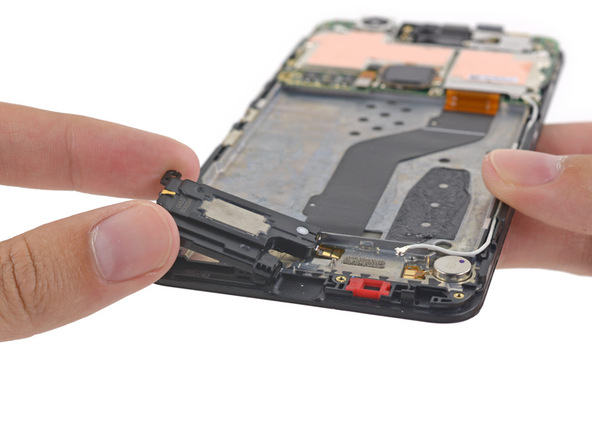
9. Remove the Nexus 6P loudspeaker module.
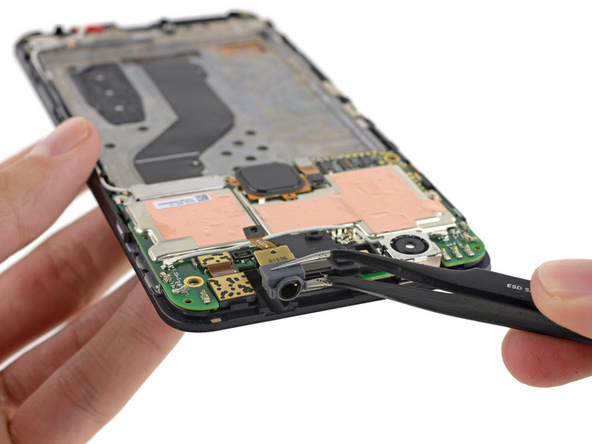
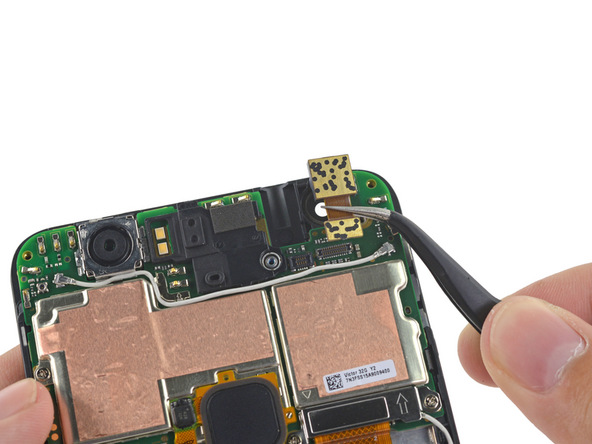
10. Remove the Nexus 6P headphone jack and front facing camera.
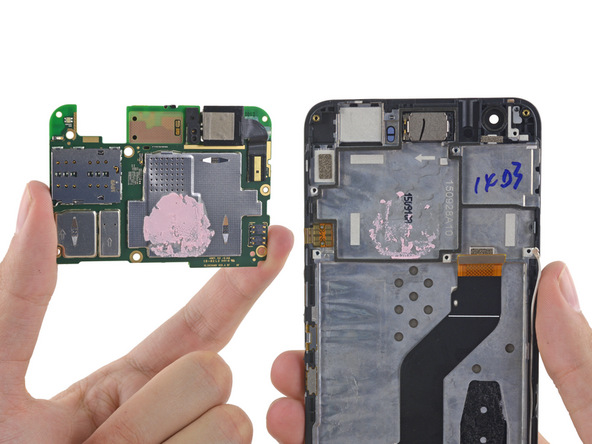
11. Remove the Nexus 6P motherboard.
Now, all the removable parts have been removed, reassemble the device with a new LG Nexus 5X LCD and digitizer with frame replacement in reverse order. The cracked Nexus 6P screen is now fixed!

How to Replace the Nexus 5X Battery, Step by Step Guide

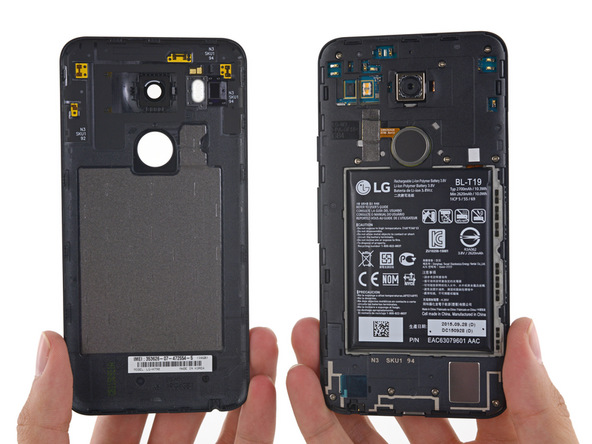
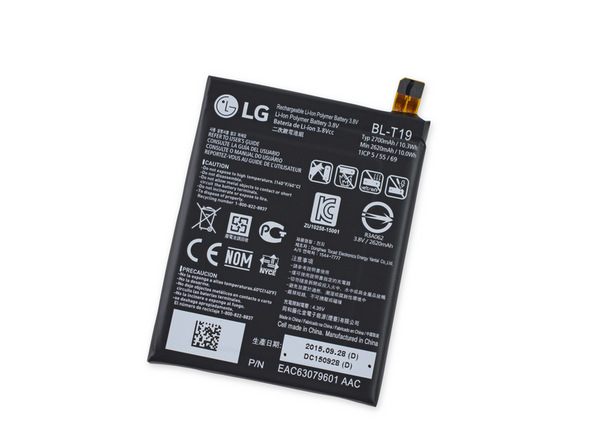
As a top Android device released in Oct, 2015, LG Nexus 5X has great performance, wide carrier compatibility and fairly good price, which makes it an eye-catching device among others. However, the 2700 mAh non removable battery could be a problem if you are a heavy smartphone user. This problem could be solve by bringing a power bank with you or charge the phone during the day time, but each battery has its own charging cycles which means after certain times of being charged, the battery life would drain little by little. What could you do when this happened? No worry, just follow this step by step guide, your Nexus 5X battery would back to normal again.

Tools Needed:

1. Power off the LG Nexus 5X and remove the SIM card tray.
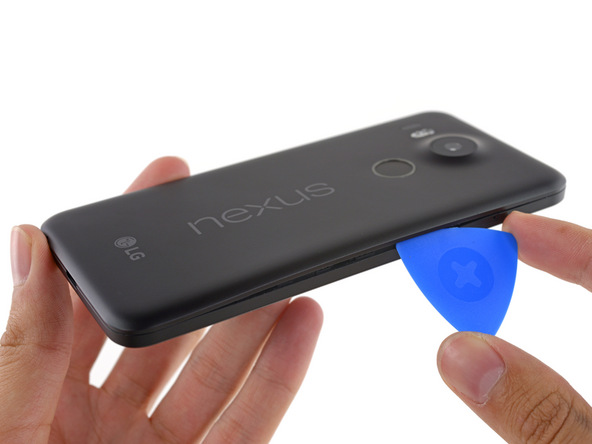
2. Insert a case opening tool, run it along the edges to release the Nexus 5X back cover.
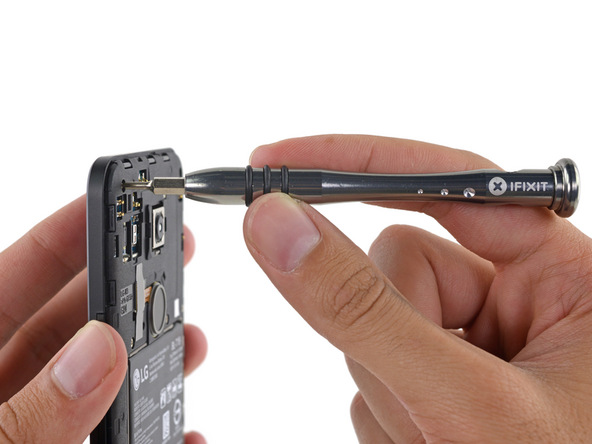
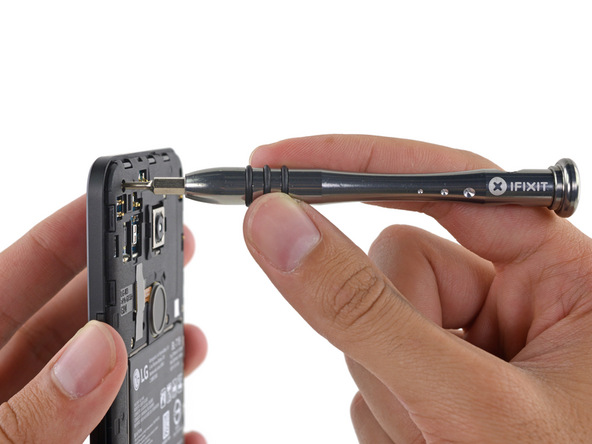
3. Undo the 10 screws in the rear housing and loudspeaker module.
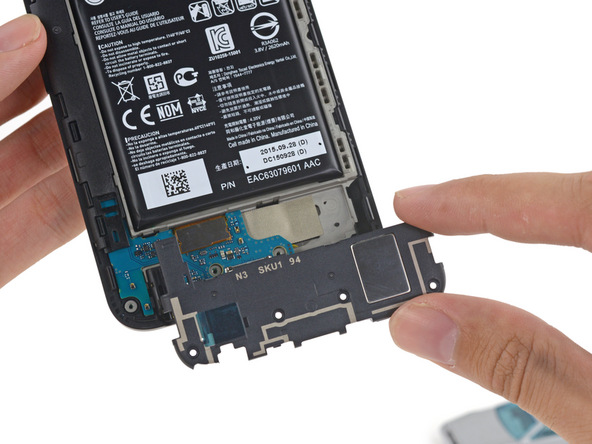
4. Remove the Nexus 5X loudspeaker module.
5. Remove the Nexus 5X rear housing.
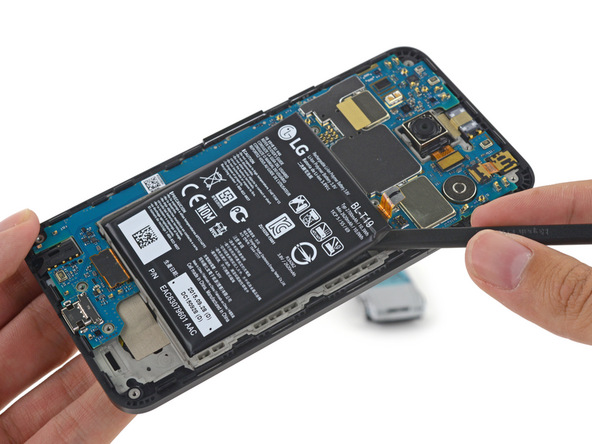
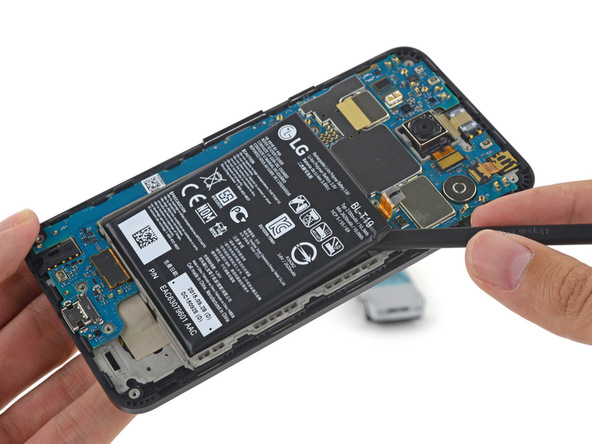
6. Pry up the battery flex ribbon connector, then gently pry up the Nexus 5X battery as there’s a few adhesive underneath.
7. Follow the steps vice versa to reassemble the LG Nexus 5X.

If you meet any problems during these steps, please leave a comment below, we’ll try our best to help you.

2015年10月27日星期二

99.9% People Don’t Know the Rare Function on iPhone 6S’ AssistiveTouch

Here we show you how to use the more rare functions of AssistiveTouch on the iPhone 6S. First of all, you need an iPhone 6S or iPhone 6S Plus, then, we can get started.

Step 1:
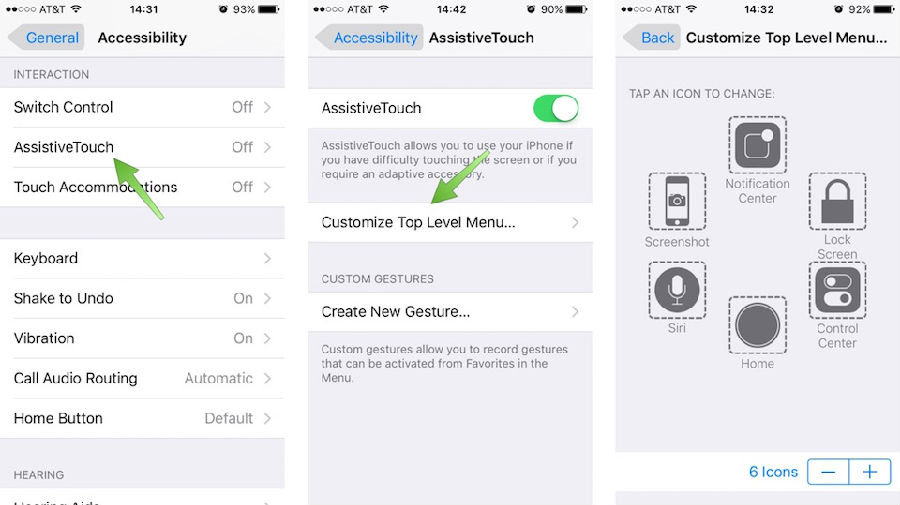
On your iPhone 6S go to the setting menu. Go through Setting>General>Accessibility>AssistiveTouch, and make sure the AssistiveTouch is enabled.

Step 2:
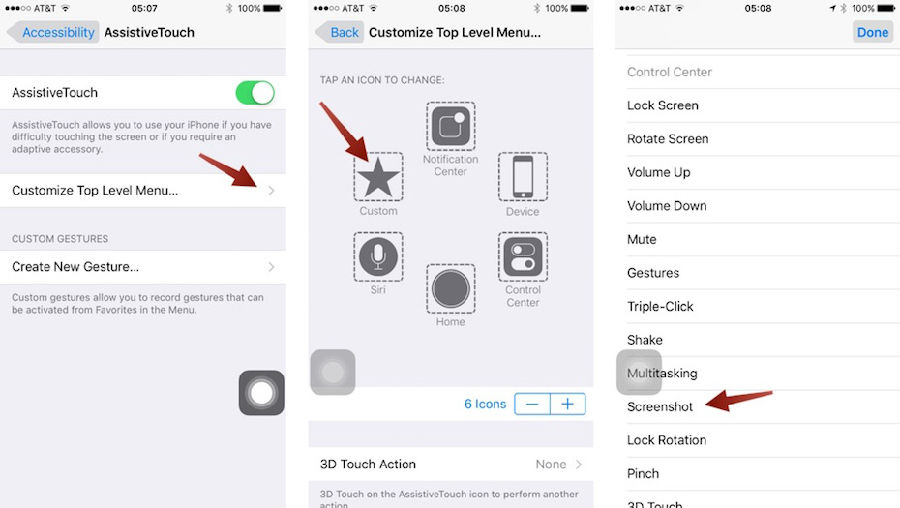
Click the Customize Top Level Menu to remove the icons and make sure the only one left icon is the Home option.

Step 3:
Click the 3D Touch Action option and choose Lock Screen.

After the setting have been changed, below are the features you can enjoy:

1.      Go back to Home with a light click on the AssistiveTouch.
2.       It will open a multi-task page when you double click the AssistiveTouch in a row.
3.       You can lock your iPhone 6S by pressing the AssistiveTouch firmly.
4.       With a firm press and a second light click, a screenshot will be taken.
5.       Click the AssistiveTouch firmly twice in a row and the device will power off. (However, tests show the feature won't work every time.) 

How to Fix Broken LG Nexus 5X for Screen Replacement

The LG Nexus 5X was released this October, and it features a 5.2-inch display that’s protected by Corning Gorilla Glass 3. The Nexus 5X comes equipped with a fingerprint reader on the back and a Type-C USB charger port. Will the Nexus 5X continue the popularity of the Nexus 5? Maybe yes, time will tell! Will the Nexus 5X’s screen be easier to be replaced than the Nexus 5’s? Let’s check it out now.

Tools needed:

1. Power off the LG Nexus 5X and remove the SIM card tray.
2. Insert a case opening tool, run it along the edges to release the Nexus 5X back cover.
3. Undo the 10 screws in the rear housing and loudspeaker module.
4. Remove the Nexus 5X loudspeaker module.
5. Remove the Nexus 5X rear housing.
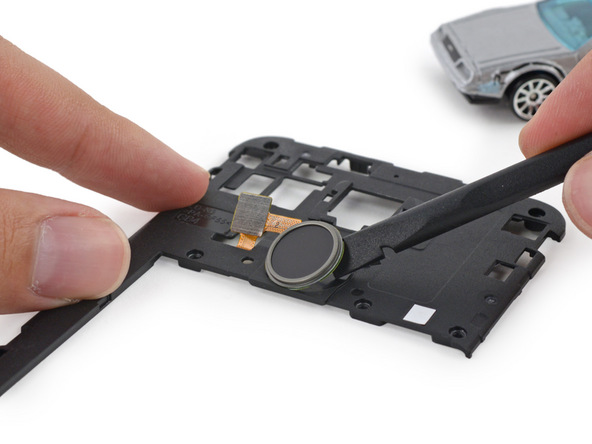
6. Pry up to release the fingerprint reader if needed.
7. Pry up the battery flex ribbon connector, then gently pry up the Nexus 5X battery as there’s a few adhesive underneath.
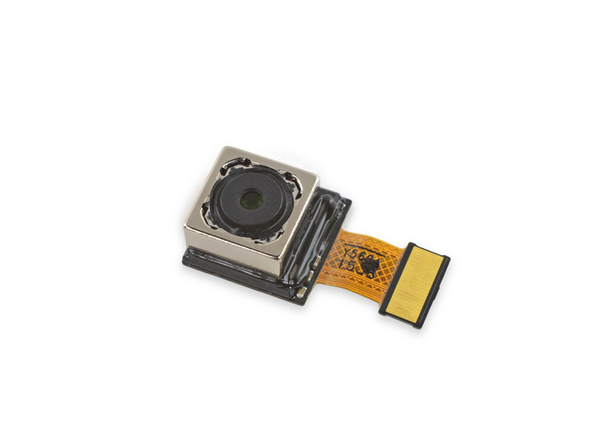
8. Pry up the connector to release the Nexus 5X rear facing camera.
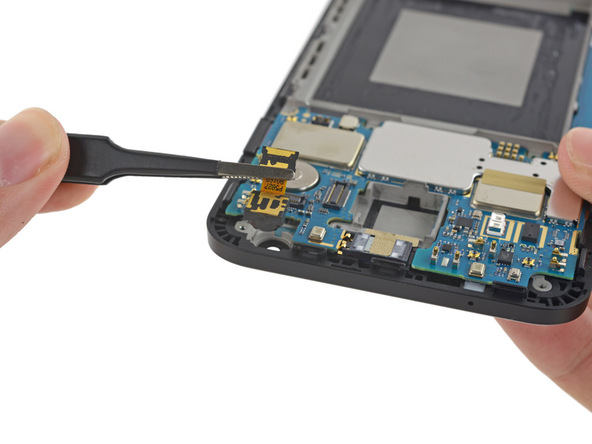
9. Pry up the connector to release the Nexus 5X front facing camera.
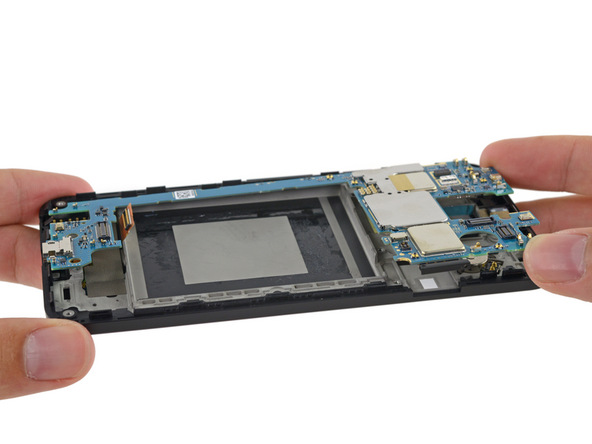
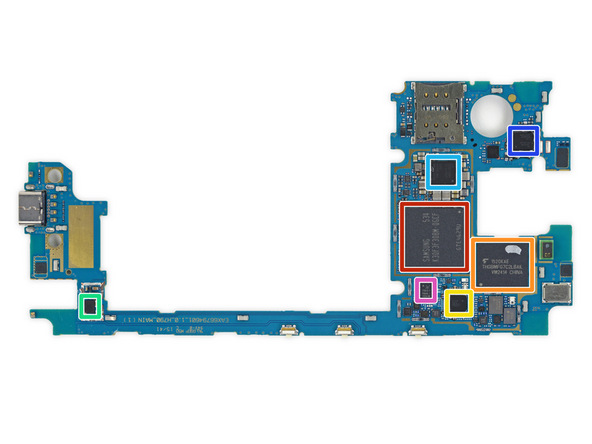
10. Remove the Nexus 5X motherboard. Unlike the Nexus 5 charging port flex, this USB Type-C charger port is assembled with the motherboard in one unit and is not that easily removed as soldering skills are required.
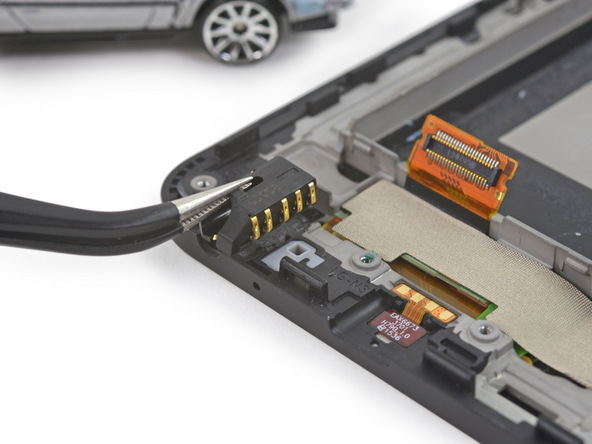
11. Remove the Nexus 5X earphone jack.
Now, all the removable parts have been removed, reassemble the device with a new LG Nexus 5X LCD and digitizer with frame replacement in reverse order. The cracked Nexus 5X screen is fixed!