2015年6月27日星期六

How To Disassemble/Tear Down HTC One M9


HTC One M9 was released in March of 2015. As the successor to HTC One M8, they both look so much alike at first sight. What about innards? Let’s take apart the device and see.

Tools Needed:
Hair Drier/Heat Gun

Step 1: Power off the HTC One M9, then take out the SIM card tray and SD card tray with an ejector pin or tweezers.


Step 2: Pry up the top rail, undo the 2 screws with a T5 Torx screwdriver.

Step 3: Pry up to separate the LCD assembly and frame from the rear housing.

Step 4: Undo the screws, pry up the adhesive shield, then pry up the connectors to release the motherboard.

Step 5: Remove the bottom loudspeaker assembly.

Step 6: Remove the charging port assembly  and the two signal cables.

Step 7: Release the main board flex.

Step 8:  Undo the screws and then pry up the connector to release the daughter board.

Step 9: Release the rear facing camerafront facing camera and upper loudspeaker assembly.
 

Step 10: Pry up the side key flex ribbon and then the battery carefully.


Step 12: Heat up the screen to soften the adhesive. Then insert a case opening tool to separate the LCD assembly from front frame.
(Notice: keep the heat source moving, don’t heat any one side for to long, and heat for no longer than 1 minute.)

You’ve now successfully disassembled the HTC One M9.

2015年6月25日星期四

The Cost Of Repairing A Cracked Nexus 6 Screen


Even the Motorola Nexus 6 features an AMOLED capacitive touchscreen and is protected by Corning Gorilla Glass 3, but a cracked screen is still possible if the device is dropped by accident. Here we estimate the cost of repairing a broken Nexus 6 screen for your reference.
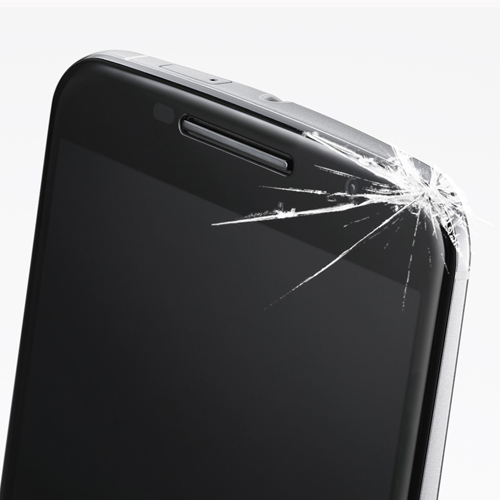
Nexus 6 Cracked Screen
If your Nexus 6 still responses and displays like nothing else happened despite the annoying cracked screen, then the Nexus 6’s glass screen was damaged and needs to be replaced. It doesn’t that much, $10 is more than enough to buy a replacement Motorola Nexus 6 Glass Lens.

If the Nexus 6 is unable to display anything but you can hear and feel the vibration when starting up the phone, then the LCD screen was damaged. Or if your Nexus 6 touch is not responsive but displays normally, then the touch screen was damaged. The worst-case scenario is the Nexus 6 screen is totally out of commission after being dropped. In this case, whether you send your device to the Motorola center or visit a repair shop, they will charge you no less than $300 as the whole LCD assembly needs to be replaced.

However, if you’d like to repair it by yourself, the damage to your wallet is not that bad. A replacement Motorola Nexus 6 LCD Touch Screen Assembly costs about $220 at present. The separation work between LCD Assembly and frame is difficult, and we’d suggest you to replace the Motorola Nexus 6 LCD Touch Screen with Frame if you do not want to take that risk. Along with the lower risk is a higher cost, which is about $280.

Here is a link to our repair guide: How To Repair A Nexus 6 Cracked Screen.
Here we also provide a video tutorial about How to Teardown Nexus 6.

2015年6月24日星期三

How to Save Your Water Damaged Phone


If you happen to drop your phone in water, immediately get it out and power it off, then what do you do to help save your poor phone? Put it into a bag of rice to dry it? 
In fact, rice won't do too much to dry your phone. It's better to wipe the parts with a clean cloth and lay the parts in a drafty place; however, after the parts dry what do you do about the water damage. Here we have submerged an iPhone 5 to show you the steps to diagnose your wet phone and how to save it.

Step 1, Disassemble your phone.

After the phone has been retrieved it should be wiped completely dry to remove any extra liquid, and then you'll have to tear down your phone so you can assess the damage. However, special tools and skills are required to tear down a phone, and we always recommend a qualified person to do this job. If you are experienced in repair work, you can follow our video tutorial for your phone.

Step 2, Check if there is any erosion or debris in the connectors/other metal contacts.

Generally speaking, there will probably be some erosion on the connectors or residue stuck on the board. Submerge the logic board in isopropyl alcohol, and allow it to soak long enough to loosen any hardened residue, and to displace any remaining water or other liquid. Use a soft ESD brush to remove visible corrosion and residue. 

Step 3, Check whether the device is short circuited or not.

Even after phone parts have been wiped and dried, some liquid may still be left in inside, which will result in a short circuit. First of all, you can use a multimeter to test if the battery is bad. In most cases batteries are one of the first things to go. So you may need to replace the battery. If the battery works fine you'll have to check all the parts 1 by 1 to find the short.

Step 4, Check whether the LCD screen is dead or not.

Before you install the new battery we recommend reconnecting the LCD screen and plugging in the charger in to see if the LCD screen still functions. If the LCD screen is dead, it must have been damaged by the liquid and can't be fixed by hand. The only way to fix the phone would be to replace the LCD assembly. The problem could also be caused by damage on the mainboard, so we recommend testing the new LCD with the board before reassembling everything.

Step 5, Reassemble all the parts and power on the device for testing.

Small parts with metal contacts are easily damaged by water, i.e. the ear speaker. Once you've reassembled everything you should carefully test smaller parts like the ear speaker and camera.

Water damage is a common issue users experience, especially when summer comes around, know how to diagnose and repair your water-damaged phone will definitely raise your chances to save it. Any questions, feel free to contact us directly or just comment below. 

2015年6月22日星期一

BlackBerry Z30 Disassembly/Tear Down/Tear Apart

BlackBerry Z30 Disassembly/Tear Down/Tear Apart

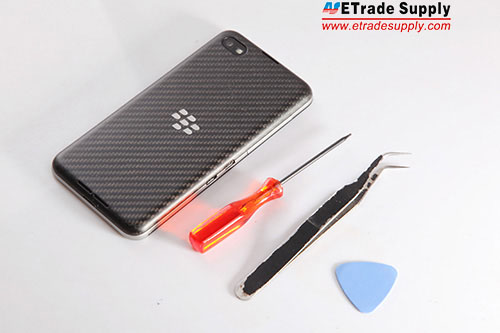
Tools needed:
            1. T4 Philip screwdriver
            2. Tweezers
            3.  Case opening tool
tools needed

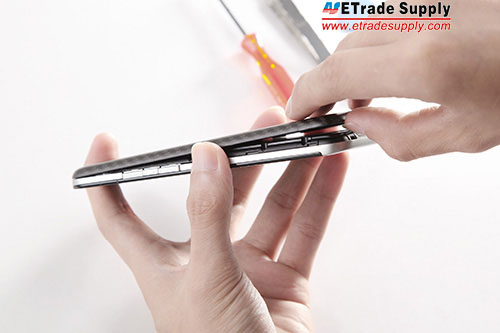
1.  Pry up the battery door cover.
remove the cover

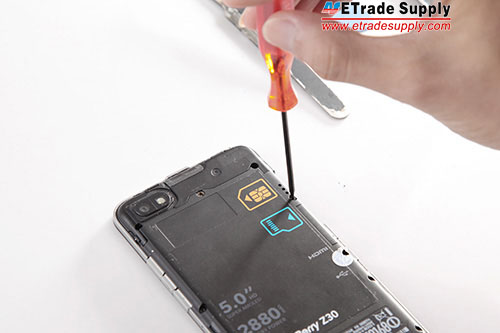
2.Undo the 10 screws that securing the rear housing.
undo screws

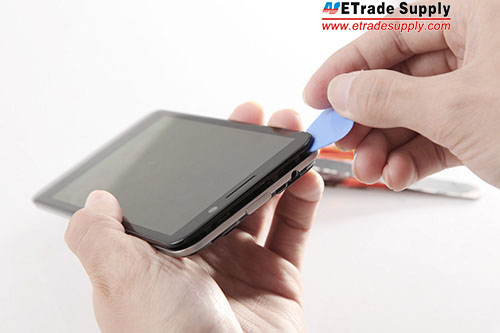
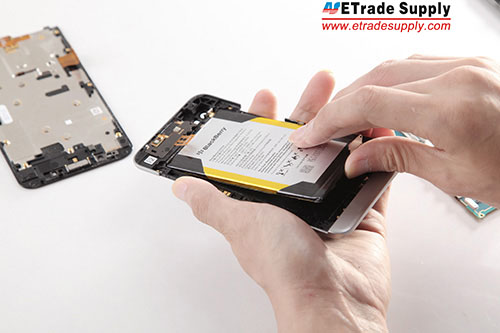
3.Pry up the screen with the case opening tool. (Notice: handle carefully as there’s a flex cable connecting to the logic board.)
pry up screen

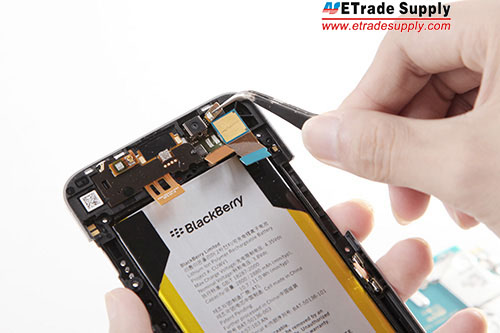
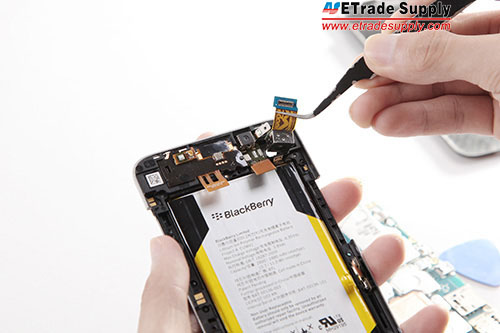
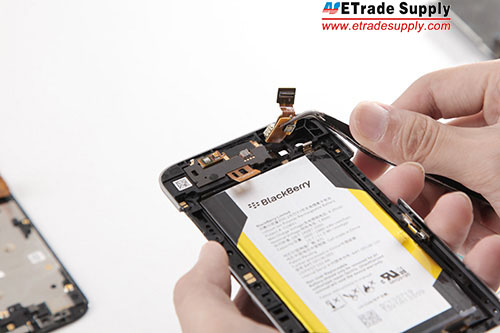
4.Pry up the clip, remove the flex cable carefully for its fragility.
disconnect flex cable

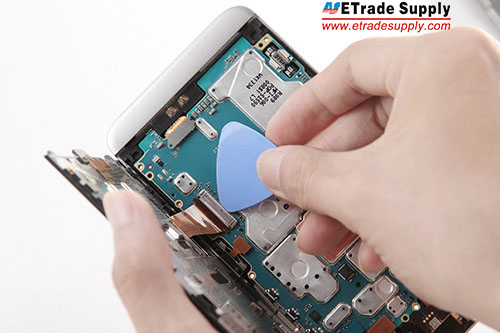
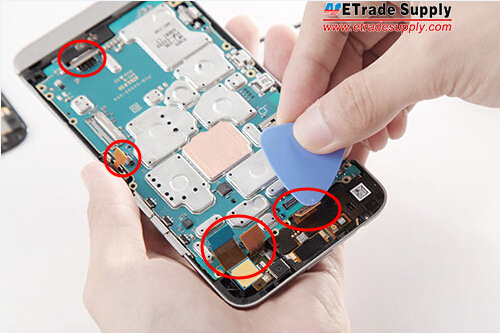
5.Pry up the connectors that securing the logic board, then take out the motherboard.
pry up flex cables and remove logic board

6.Remove the volume button and power button retaining bracket.
remove volume retaining bracket

7.Pry up the flashlight flex cable.
pry up flashlight flex cable

8.Remove the rear facing camera.
take out rear camera

9.Remove the flashlight flex cable from the rear housing slot.
remove flashlight flex cable

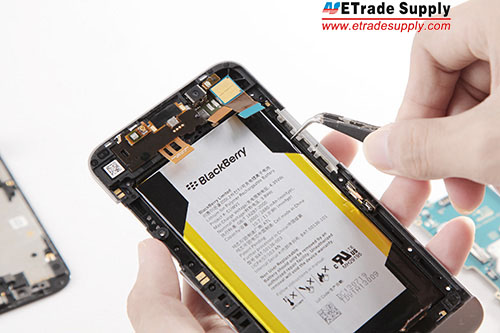
10.Take out the battery.
take out battery

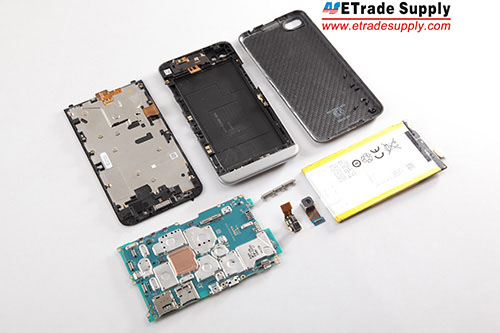
11.Then, the BlackBerry Z30 has been disassembled.
the disassembly finished

We show you how to reassemble BlackBerry Z30 step by step.
we hope it  is helpful by watching  our tutorial to fix your broken cellphone.

2015年6月21日星期日

How To Fix HTC Nexus 9 Charging Port Replacement


Charging port problems like slow charging or not charging at all are commonly seen in cellphones after frequent use. When your device experiences charging problems, first thing you should do is to check whether the charger is an original or not. Using a non-original charger you risk causing damage to your device and yourself.

Having dust or lint in your phone’s charging port can also prevent charging. In this event, what you’ll need to do is to clean the USB port with some household tools like: a needle, a toothpick, a bobby pin or a Q-tip. Rubbing alcohol can also help it evaporates quickly, and is always good for cleaning electronic equipment.

However, if a charging port fails to work after prolonged use, perhaps replacing the charging port is the best way to fix it.

Here is a tutorial on how to replace the HTC Nexus 9’s USB charger port to you with your charging woes.

Tools Needed:

Step 1: Remove The Nexus 9 Battery Door.
▪ Power off the device.
▪ Remove the battery door by hand.
(Notice: the rear facing camera is set in place between the battery cover and motherboard, be careful not to damage it.)

Step 2: Remove The Nexus 9 Battery.
▪ Gently pry off the battery.
(Notice: the battery is glued to the frame with some strong adhesive, be careful.)

Step 3: Remove The Nexus 9 Front Facing Camera.

Step 4: Remove The Nexus 9 Antenna Board.
▪ Remove the copper shield.
▪ Undo the 3 screws to release the antenna board.

Step 5: Remove The Nexus 9 Motherboard.
▪ Remove the flex ribbon connectors.
▪ Undo the screws to release the logic board.

Step 6: Remove The Nexus 9 Charging Port Assembly.
▪ Remove the flex ribbon connectors.
▪ Remove the USB charging port assembly.

And now, reassemble it with a new charging port in the reverse orders. If you’d like to know how to replace a broken Nexus 9 screen, you can check it out here: How To Repair A Cracked Nexus 9 Screen Replacement

2015年6月19日星期五

Top 5 Selfie Mobile Phones You Don’t Want To Miss


Taking selfies has become widely popular around the world in these recent years, as a result so have selfie-focused smartphones. The main difference between selfie-focused mobile phones and other phones is that selfie phones usually feature advanced front facing cameras, aimed at making selfies more attractive.
Love taking selfies? 
Time to upgrade your phone now, here are the top 5 selfie-designed smartphones just for you.

#5: Oppo N1
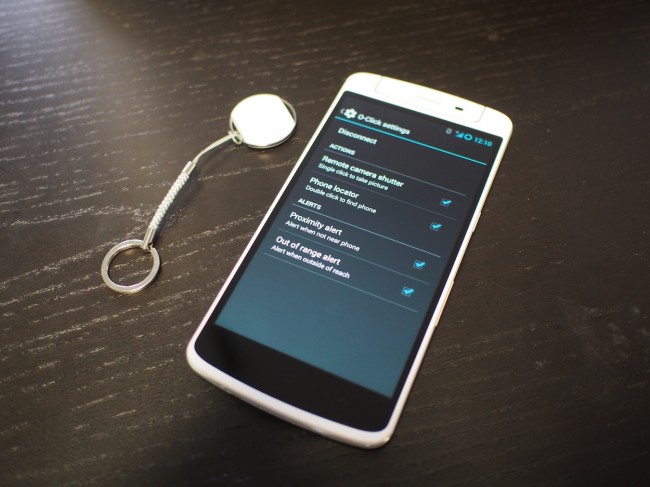
Undoubtedly, the Oppo N1 is the first phone equipped with a rotating camera in the world. This revolutionary rotating camera features 206° of rotation, and enables the camera to be locked at any angle. That’s to say, no matter what angle you choose to take a selfie, the shots are just as impressive as the back facing ones. What’s more, the Oppo N1 comes with a remote control named the O-click, which allows you to control aspects of the phone via Bluetooth.
But if you’re enthusiastic about innovative technology, we recommend you to checkout the Oppo N3. This new generation phone features a camera with a built in motor for handless rotation, and the smartphone allows you to control the angle via on-screen gestures, the O-Click 2.0 Bluetooth Remote Control or Touch Access.
 oppo n1 with o click

#4: Nokia Lumia 735
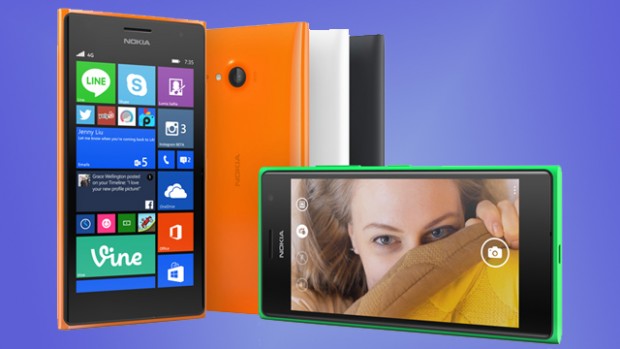
In the past, we post an article about the World’s Biggest Selfie Powered By Nokia’s Lumia 730, reporting the biggest selfie ever captured with 1,151 people included with a Nokia Lumia 730. As the twin of the Lumia 730, the Single-SIM Lumia 735 is another selfie smartphone with a 5 MP front-facing camera and wide-angle lens.
 lumia 735 selfie

#3: Sony Xperia C3
As described by Sony on their official site, the Xperia C3 is perfect for selfies as it’s a Quad-core Android phone sporting a 5 MP Superior Auto front camera with soft LED flash and a 25 mm wide-angle lens. Another reason why the Xperia C3 is specially designed for selfies is its 25 mm wide-angle lens sporting an 80 degree field of view. With the Exmor RS™ technology, HDR (High Dynamic Range) and Superior Auto mode, the Xperia C3 can create stunning shots in any light.
 xperia c3 selfie

#2: HTC Desire Eye
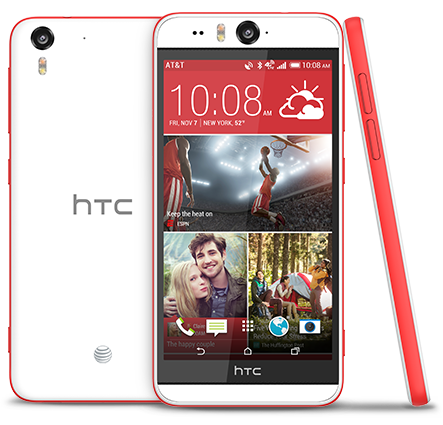
Released in this November, HTC’s Desire Eye is another extraordinary selfie focused smartphone. The front camera will have as many as 13MP, which is the same as the back camera. With the dual LED flash and built-in selfie tools for instant edits, the HTC Desire Eye will give you high quality pictures even in low light settings.
 HTC Desire Eye Selfie

#1: Huawei Ascend P7
The Ascend P7 comes with an innovative Panorama Selfie feature, which means you can create spectacular self-portraits with a wide panoramic background. Huawei defined the Ascend P7 as a “groufie” not “selfie” smartphone because the 8MP front-facing camera and software make it easy for users to capture panoramic group shots in the selfie style.
Remember that selfie from the Oscars featuring a group of celebrities all cramming into the shot? Well, if it had of been shot by a Huawei Ascend P7, perhaps Ellen could have fulfilled her wish of squeezing in more celebrities for the shot.
  huawei ascend p7 oscar selfie

Reasons Behind & Solutions for iPhone 6 Frame and LCD Separation Issues

       
        Reasons Behind & Solutions for iPhone 6 Frame and LCD Separation Issues

Undoubtedly, OEM parts are better than refurbished or aftermarket parts whether in quality or durability. However, as the OEM parts are far more expensive and the supply is not always that stable, most repairs are done with refurbished or aftermarket parts, which can result in many irritating problems. For example, currently iPhone 6 frames are suffering from separation after being assembled with the LCD assemblies. Here we’re going to explain why this happens and how to prevent it.

Reasons:
1. Glue
Generally, iPhone 6 LCD assemblies and frames are held together by PUR glue, which has two types HMG (Hot Melt Glue) and CPG (Cold Press Glue). OEM factories use CPG to assemble the screen and frame, which requires 15 seconds cooling time, 2-3 hours protecting time (Protecting time: time to keep the mold to hold the glued parts). It needs higher cost, longer working time and better equipment to produce and handle. While the assembled flex or refurbished iPhone 6 screen replacements are glued with HMG which the cooling time is 10 seconds and the protecting time is only around 6 seconds. It costs less, doesn’t require a strict working environment, has a shorter working time and results in weaker stickiness.
HMG quality also varies by Low, Middle and High grades due to the different prices. Most third-party manufacturers use mid-grade glue for Apple products, however, it is not sticky enough to meet the higher requirements as the iPhone 6’s frame is thinner and the screen is bigger than previous models.
2. Frame
For assembled flex and refurbished iPhone screen assemblies with frames, both the frame and the front glass are high copies, and the frame is custom-made according to the size of the original front glass. After the molds of these two parts have been made, third party factories will constantly use them which means once the frame separation problems had occurred, many of the parts have already been sold in the market previously and currently.
The sizes of the iPhone 4/4S, 5/5C/5S and 6 frames are as follows.
Model
iPhone 4/4S
iPhone 5/5C/5S
iPhone 6
Frame Width
1.5 mm
1.4 mm
1.4 mm
Screen Size
3.5 inches
4.0 inches
4.7 inches

We can see that the edge of the iPhone’s frame has been getting progressively thinner and thinner, thus the bonding area of the screen and frame is getting smaller. As we mentioned before not only is the problem with the mid-grade glue, but also with the machinery as well as the process that is used for previous iPhone models are not applicable any longer.

As you can see, there’re black areas on the bottom of 5/5C/5S and 6 frames. OEM factories will apply adhesive on that area, while many third-party factories won’t apply any adhesive to those areas in order to cut costs, which results in the glass separating from the frame.

The quality of high copy frames and front glass are not as good as OEM ones, the surface areas of these two high copy parts may not be smooth enough to ensure sufficient contact for the adhesive. This is also a reason why the frame tends to fall off.

 Extended Research: Why the assembled flex frames have a higher refurbish rate than the OEM ones?
The high copy frames used in assembled flex parts are not as strong as the OEM counterparts, and third-party factories have lengthened the height of the frame in order to increase the bonding area. The height ofOEM iPhone 6 frames is 0.89 mm VS 1.18 mm for the high copy iPhone 6 frame.

3. Glass
  iPhone 6 Frame                             iPhone 6 Glass
The assembly work put into iPhone 6 screens and frames should be done in a dust-free room, but many third-party manufacturers are unable to meet this standard. Dust easily sticks to the glass unless these conditions are met, which will affect the quality of the glue.
Besides, there’s a varnish on the bottom of the iPhone 6 glass, if it is not sticky enough and coming off, the frame is guaranteed to come off as well.

ETS Solutions:
1. Working Standards
▪ Use high grade HMG to assemble iPhone 6 LCD assemblies and frames
▪ All work is done in a dust-free room.
▪ Closely monitor the timing and temperature during the assembly work. (Cooling time: 15 seconds).

2. Source Standards
▪ Frame thickness should be less than 1 mm.
▪ Carefully select glass lenses with stickier varnish.

3. QC Standards
▪ Daily test: add forces when testing the frame, and peel the frame off the glass to test the strength of the glue.
▪ Durability test: after assembling the frame to the screen, heat the part at 50℃ for 30 minutes, then place it under 0 temperatures for 120 minutes.