Since battery life is among the top 3 concerns of iPhone users, expanding the original battery capacity is the most “beautiful” and convenient choice. No ugly case, heavy power-bank is needed. As a result of it, there are many people wondering that whether the iPhone 6S Plus /iPhone 6 Plus and iPhone 6S /6 can share the same battery since they feature the same body size and the iPhone 6/6+ users can upgrade their battery capacity by replacing the 6S/6S+’s batteries. Some even did a test to figure out whether they are exchangeable. Here we did some researches and these detailed information about iPhone 6S Plus and iPhone 6 Plus battery comparison below may help you out of this puzzle. By the way, the iPhone 6S and 6 battery comparison is also included.
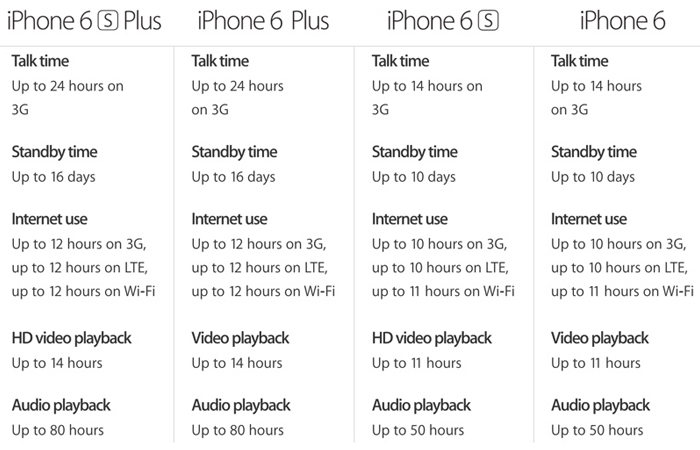
1. Specifications comparison
| Specifications/Model | iPhone 6 | iPhone 6S | iPhone 6 Plus | iPhone 6S Plus |
|---|---|---|---|---|
| Battery Type | Non-removable Li-Po battery (6.91 Wh) | Non-removable Li-Po battery (6.55 Wh) | Non-removable Li-Po battery (11.1 Wh) | Non-removable Li-Po battery (10.45 Wh) |
| Capacity | 1810mAh,3.82V | 1715mAh,3.82V | 2915mAh,3.82V | 2750mAh,3.80V |
Some people may think that both the iPhone 6S and iPhone 6S Plus battery capacity is smaller than 6 and 6 Plus, so the battery life will be shorter at the same time. However, we have get some data from ANANDTECH to show you.
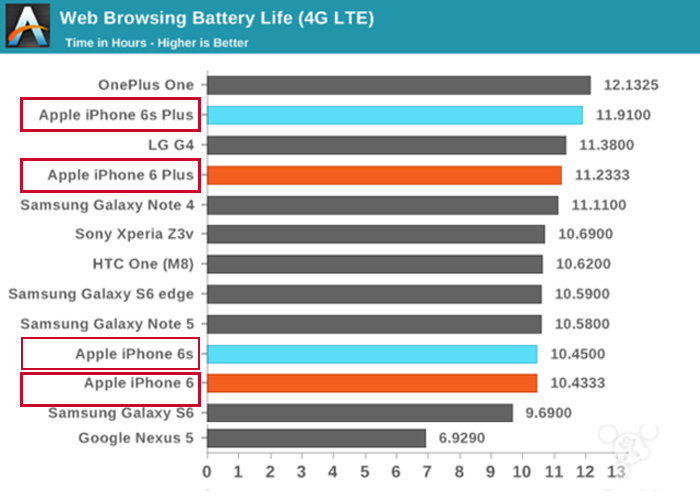
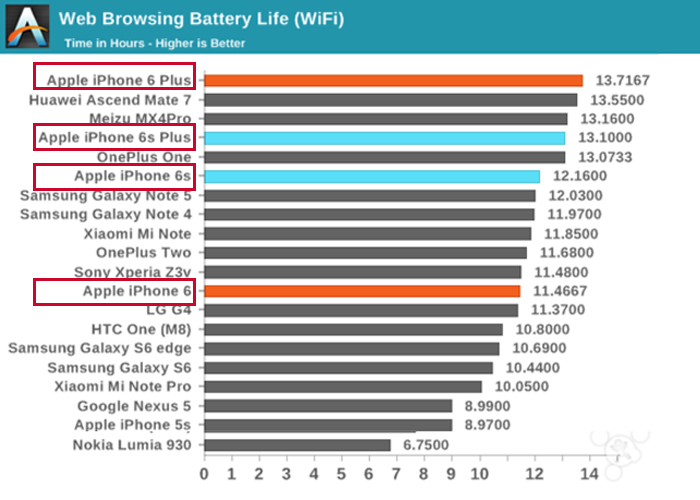
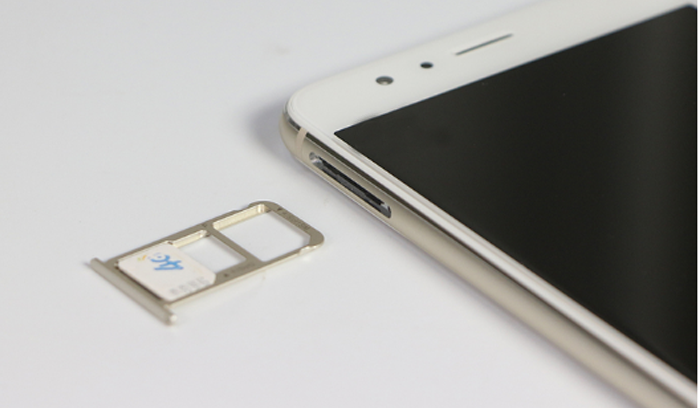
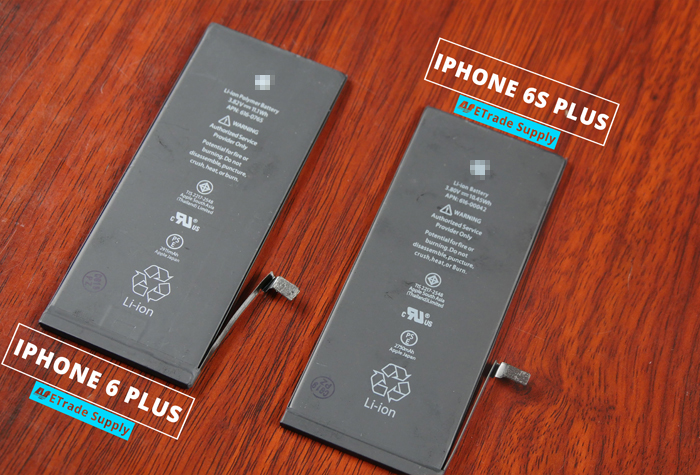
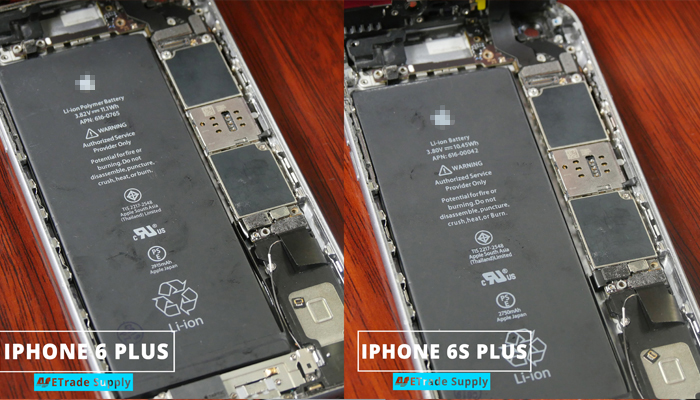
Because of the differences of hardware between 6S series and 6 series, of course there are differences in the power consumption. So we can’t define exactly which one features longer battery life. Some people think of buying an iPhone 6 Plus battery to install into the iPhone 6S Plus so that the phone can last up longer since the iPhone 6 Plus owns 2915mAh while iPhone 6S Plus is 2750mAh, plus the battery dimensions look like the same, that may deserves a try to those people. On the other hand, however, is there any possibility to do so? The truth is that there are some differences between these batteries.
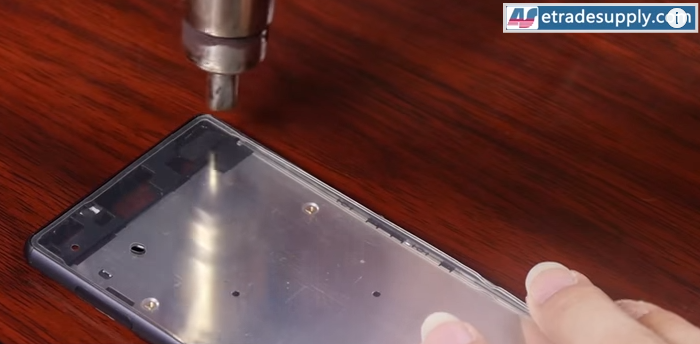
2. Dimension comparison
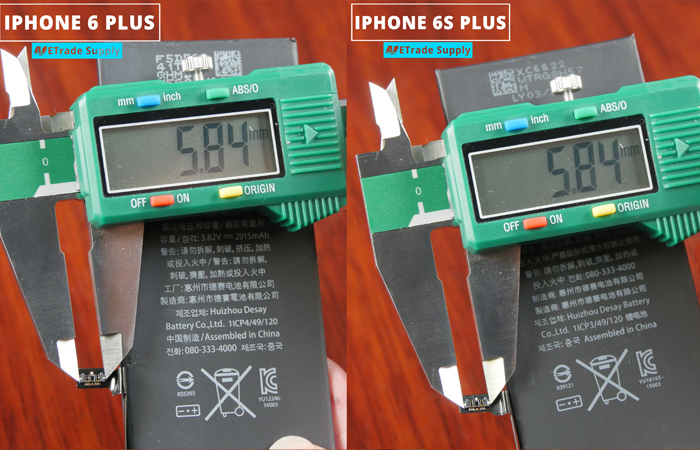
A. For iPhone 6S Plus & 6 Plus Comparison
B. For iPhone 6S & 6 Comparison
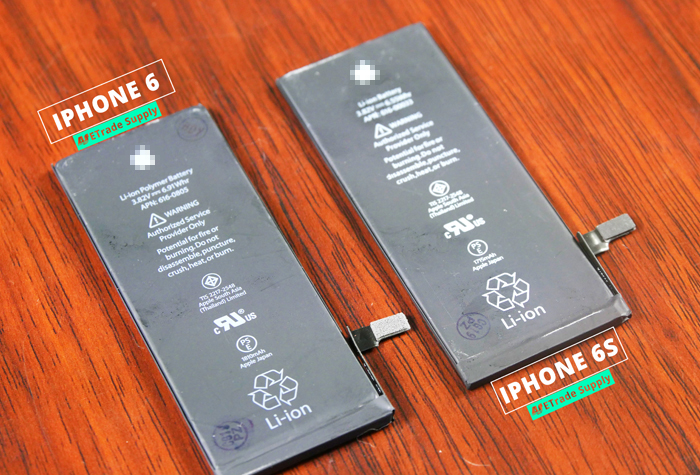

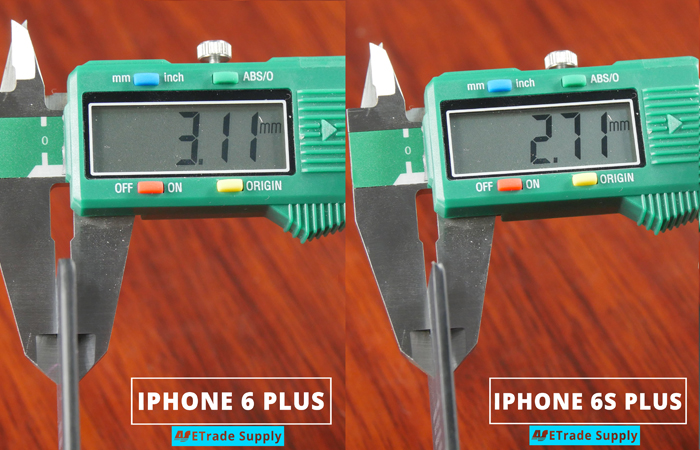
From the picture above we can see that iPhone 6S Plus & 6 Plus, iPhone 6S &6 are almost the same body size, apart from the little difference in thickness.
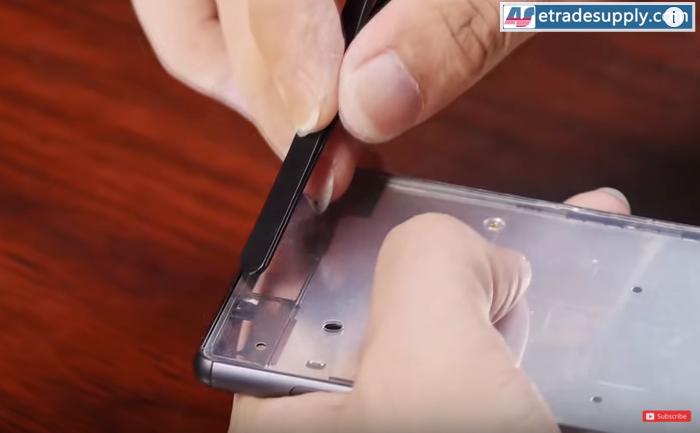
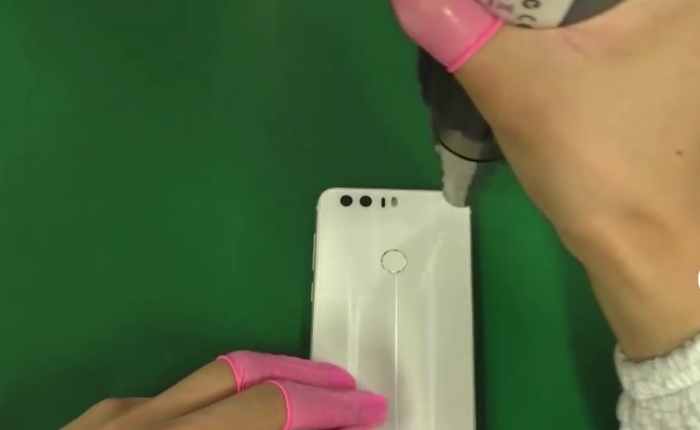
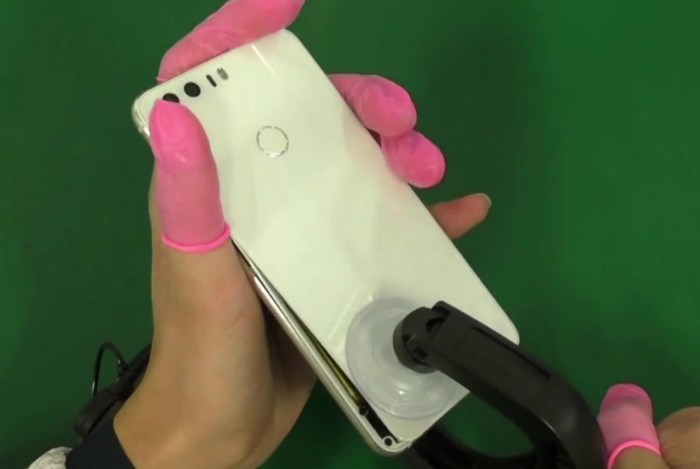
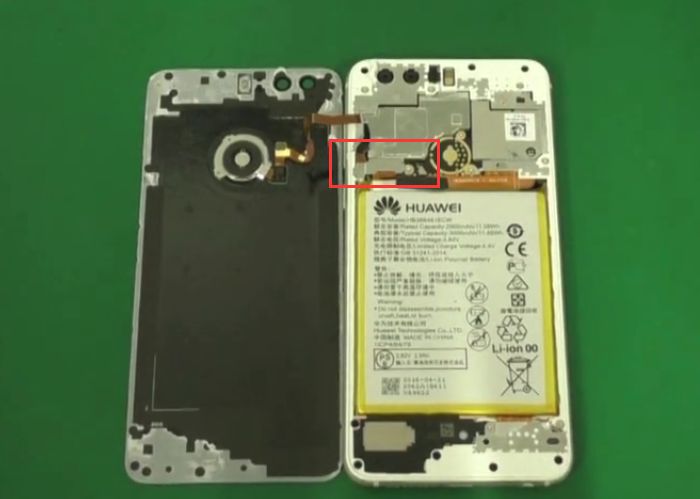
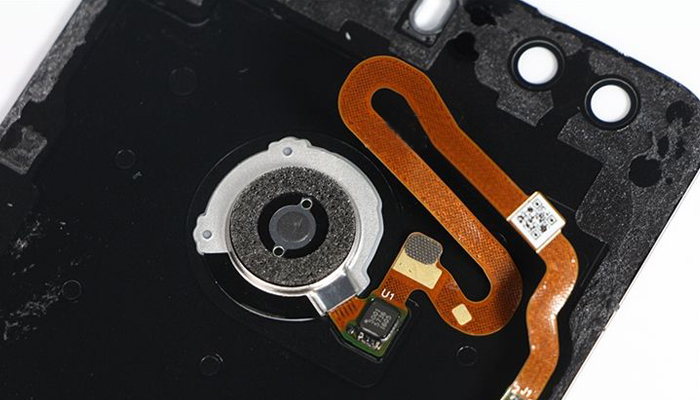
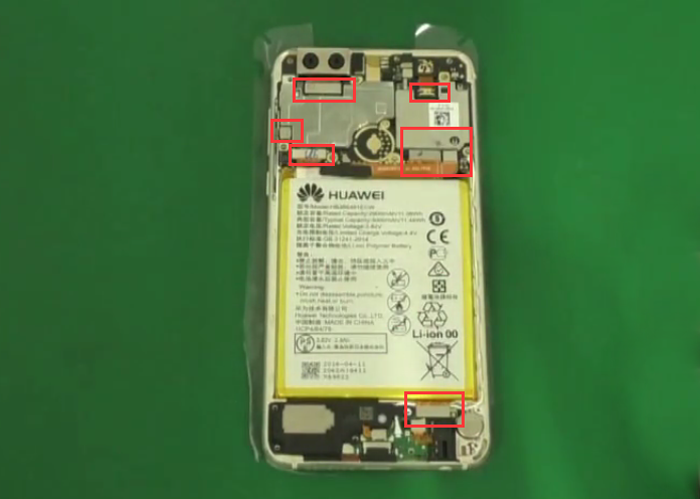
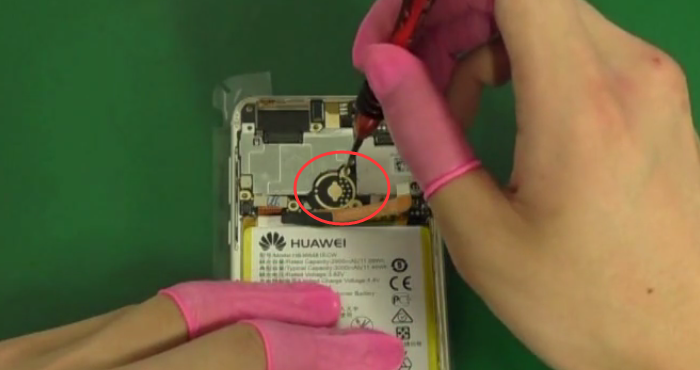
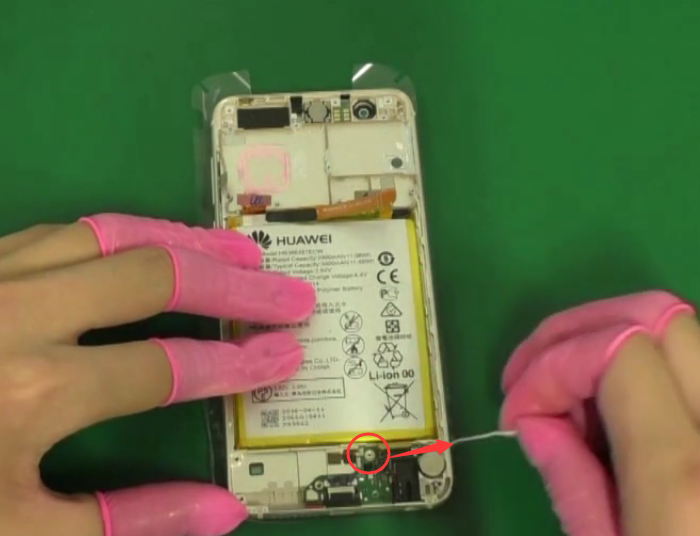
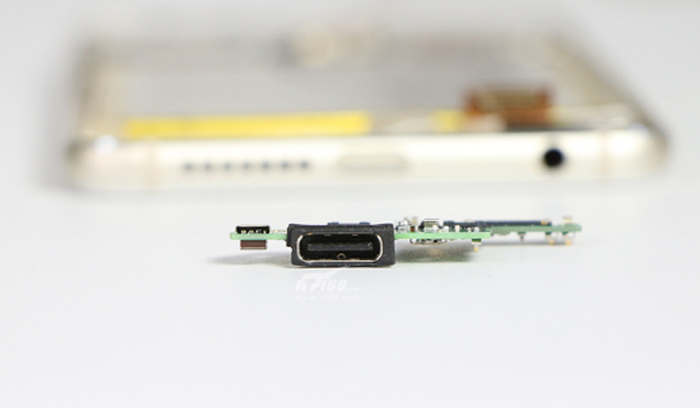
3. Flex connector comparison
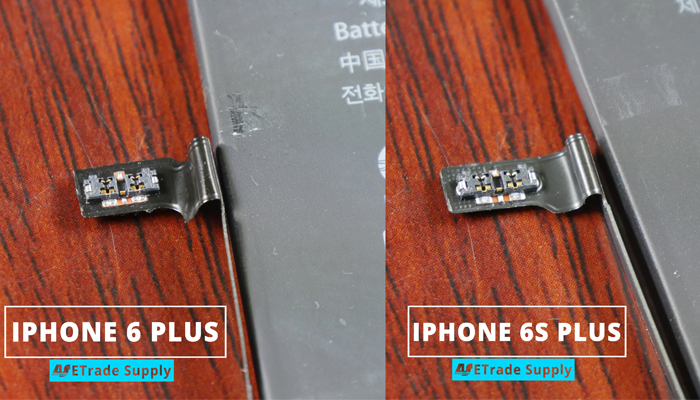
A. For iPhone 6S Plus & 6 Plus Comparison
 B. For iPhone 6S & 6 Comparison
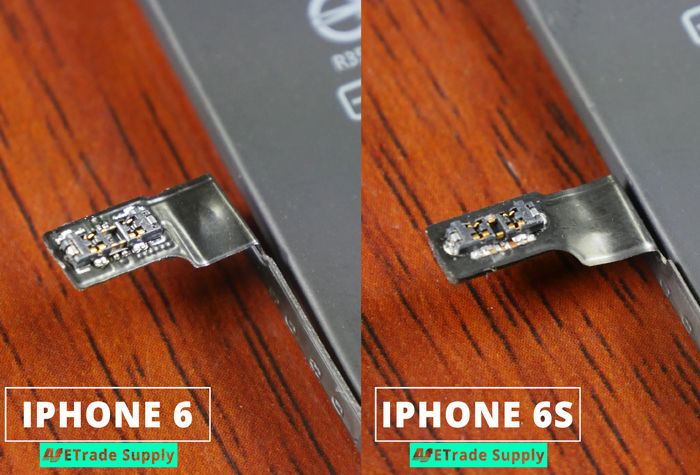
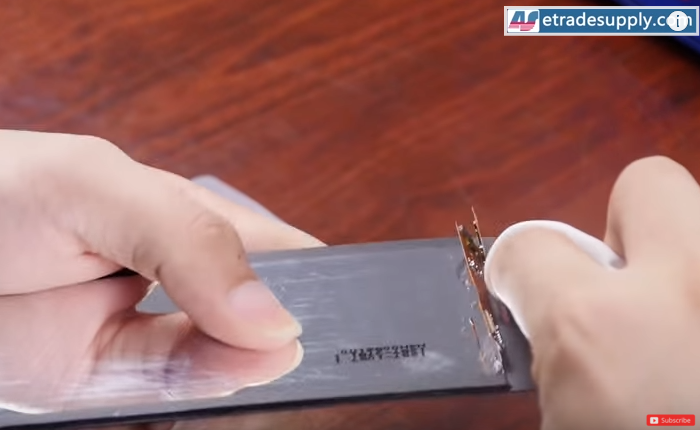
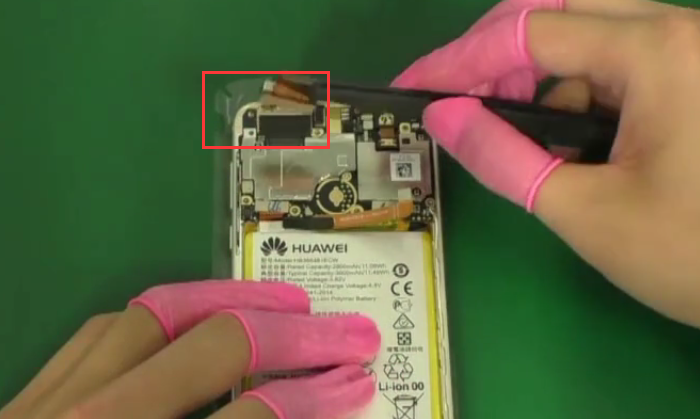
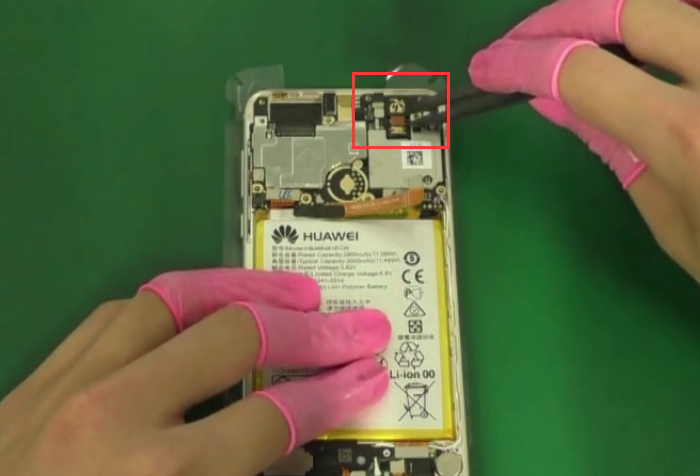
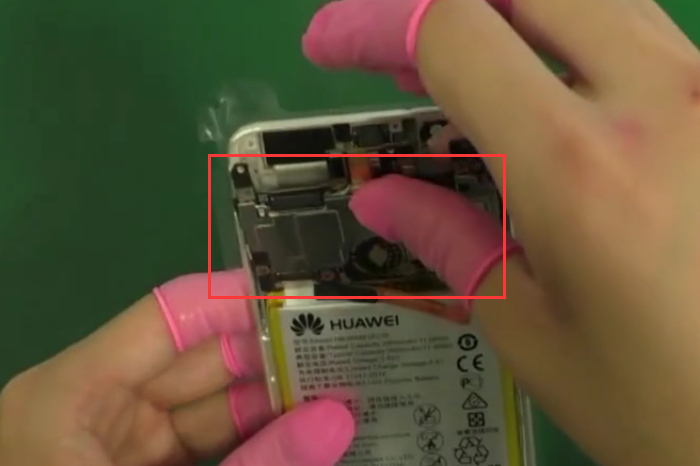
 However, when compared to their battery connectors, there are some differences neither in shape nor length of the connectors for iPhone 6S & 6, which makes them NOT possible to match well to the motherboard. Luckily we can see that 6S Plus and 6 Plus battery connectors are the same, thus we made a deeper move to 6S Plus&6 Plus battery.
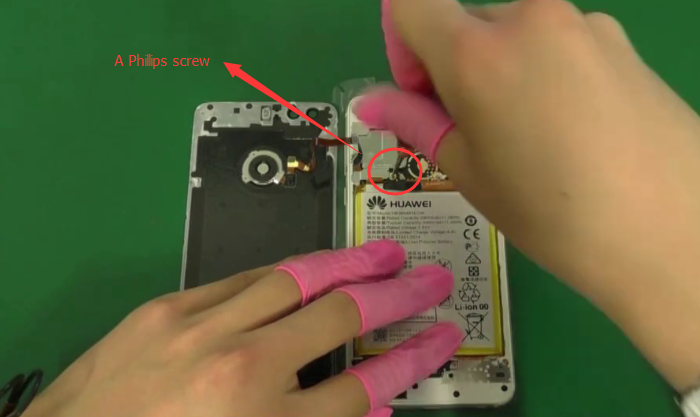
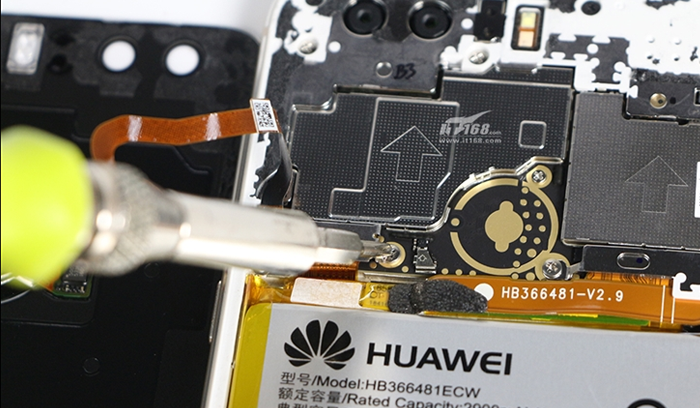
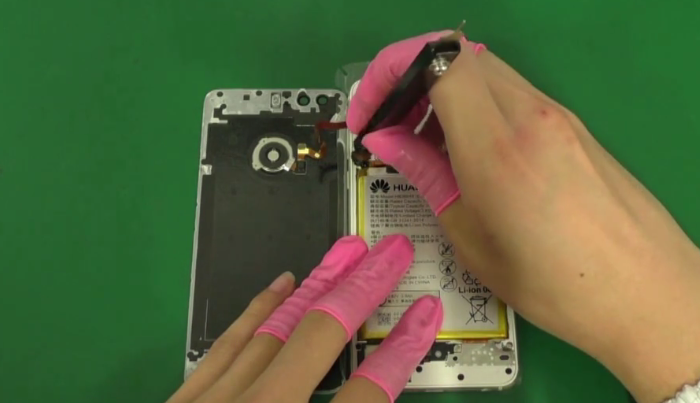
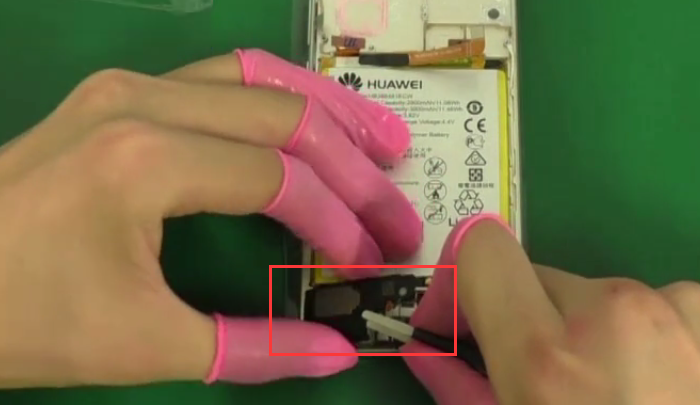
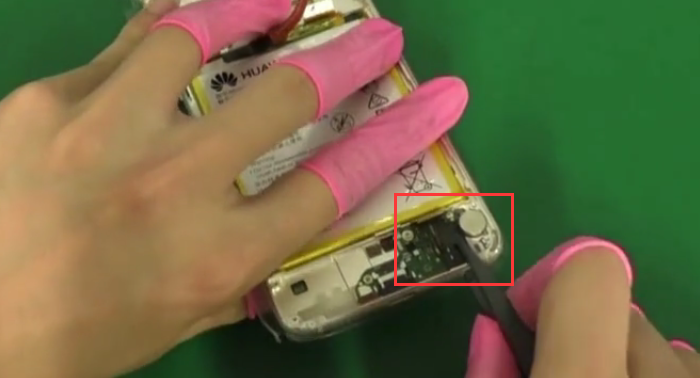
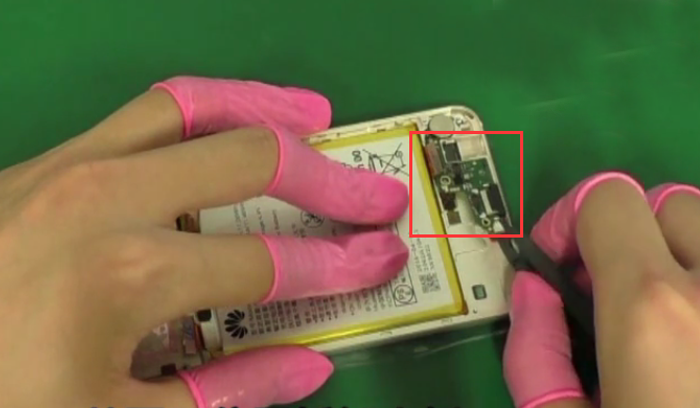
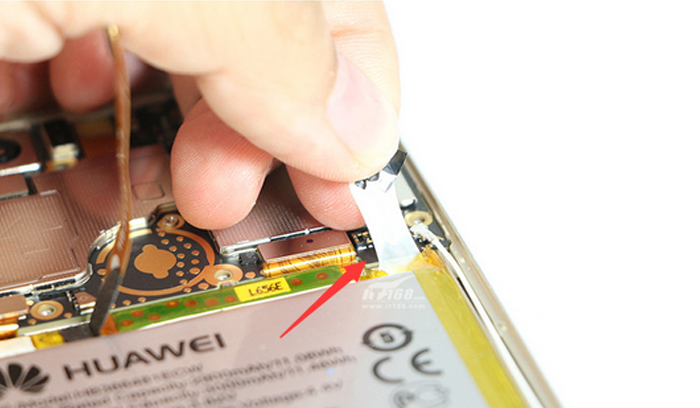
4. Installation comparison
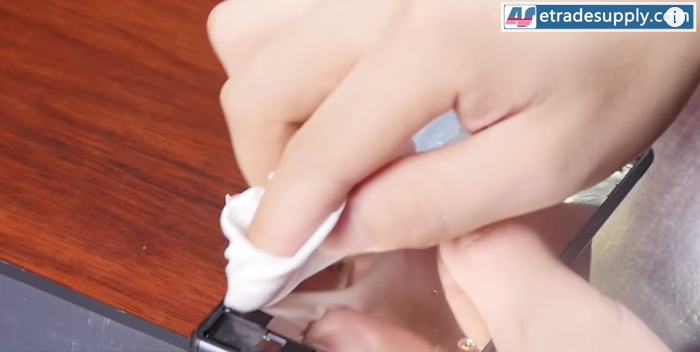
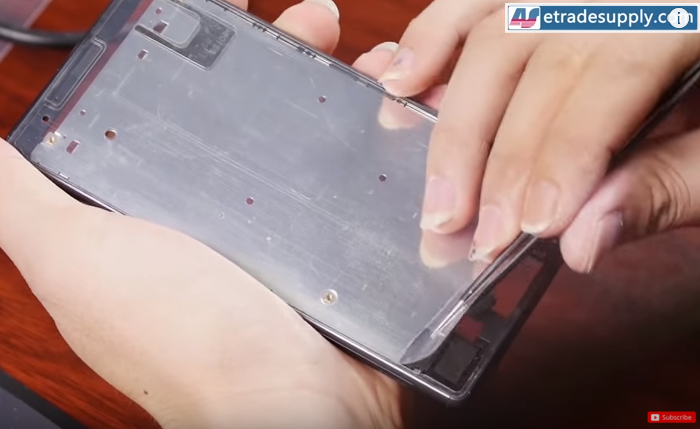
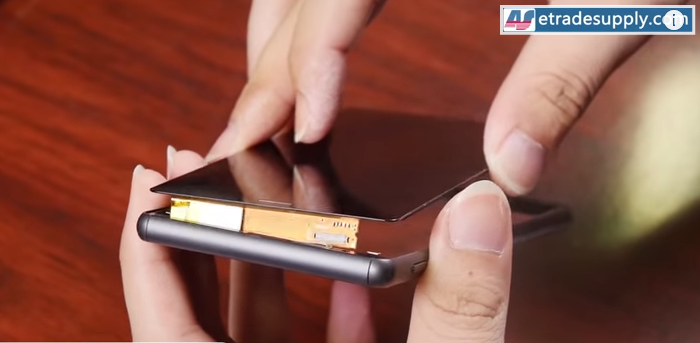
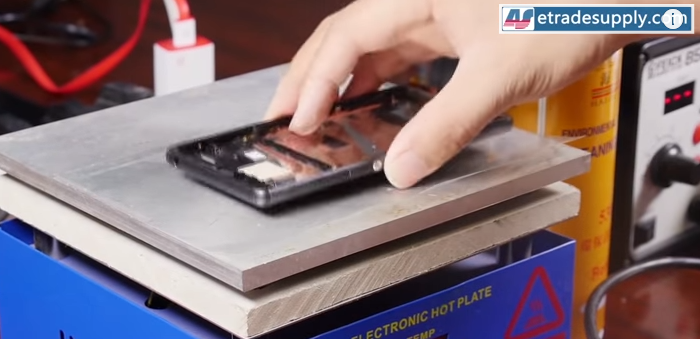
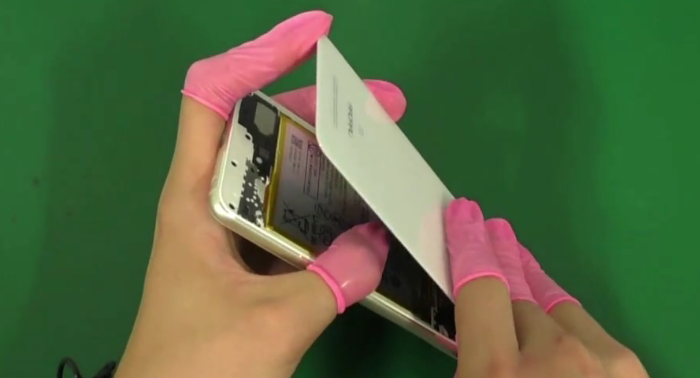
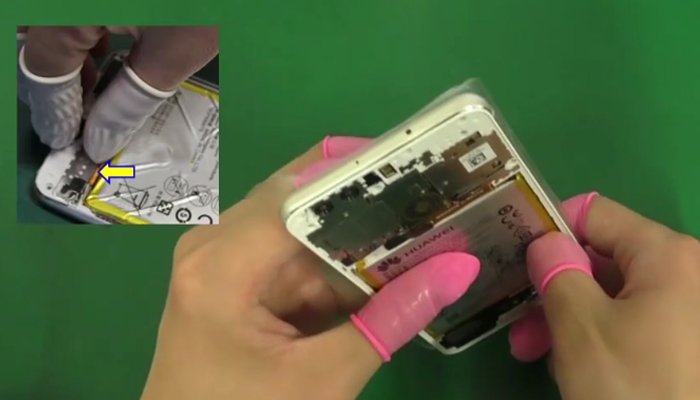
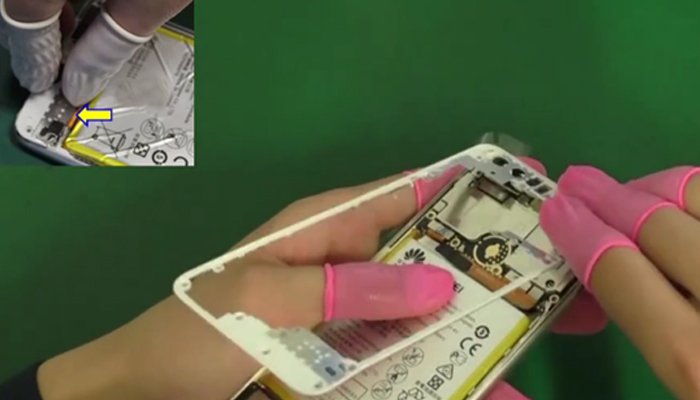
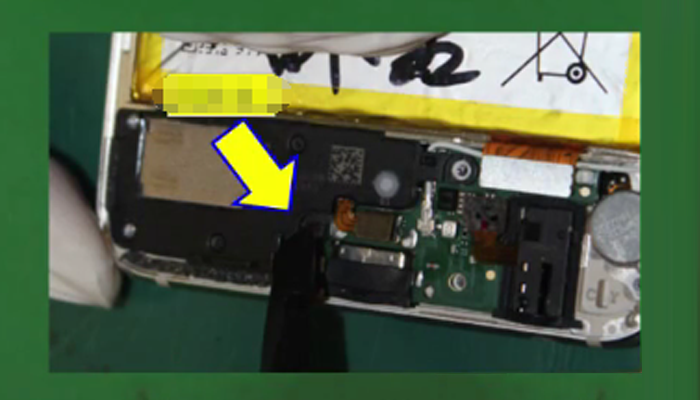
From the pictures below, we put the iPhone 6 Plus battery into the 6S Plus, the connectors & installation position matched well and it works fine within our testing time.
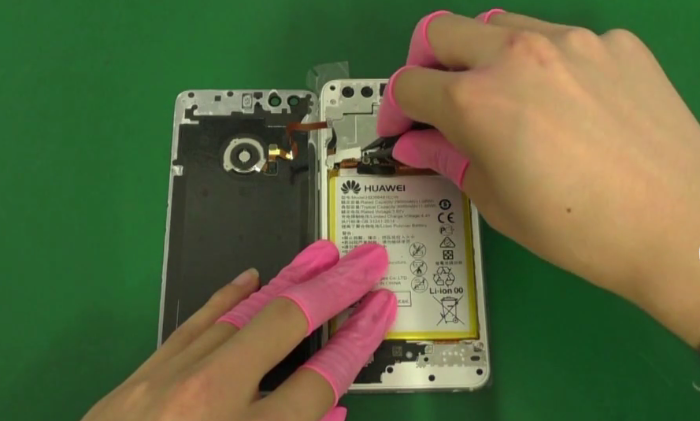
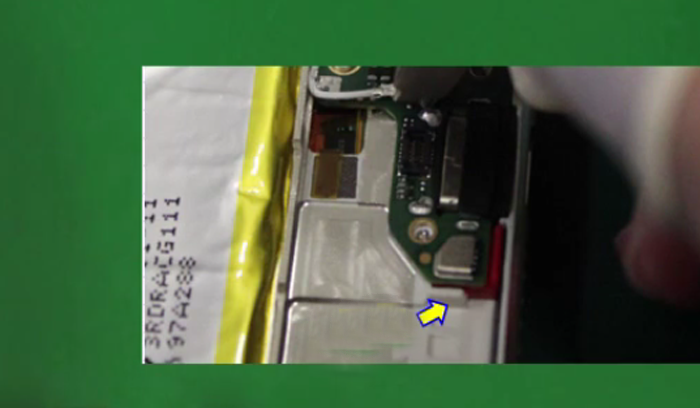
 We did this test and found that even though there are little difference in battery thickness between them, still they can be installed well in to with each other’s body.
Conclusions:
According to our battery test, the 6S and 6 can’t share the same battery because of different battery connectors,which makes it impossible to connected well to the motherboard. As for iPhone 6S Plus and iPhone 6 Plus, we can exchange battery for each other and it worked for a while within our testing, however we can’t assure that the 6 Plus battery can work in an iPhone 6S Plus for a long time without any bad effects. Because our testing time is limited, and we recommend you to use the original mating battery for your iPhone. Any questions do not hesitate to share with us!