2016年4月1日星期五

iPhone SE Full Tear Down Comparison with iPhone 5S by ETrade Supply

Not long ago, Apple has released a brand new 4 inches phone, the iPhone SE. From appearance, the iPhone SE looks exactly the same as iPhone 5S, while for the specs, it can almost be called a smaller 6S, only without the 3D Touch function. For many people who own the iPhone 5S, is that possbile to upgrade your 5S by a simply DIY? What changes did Apple make indeed? Let’s walk you out through this detailed comparison disassembly.

1.       Screen assembly with home button and other small parts:
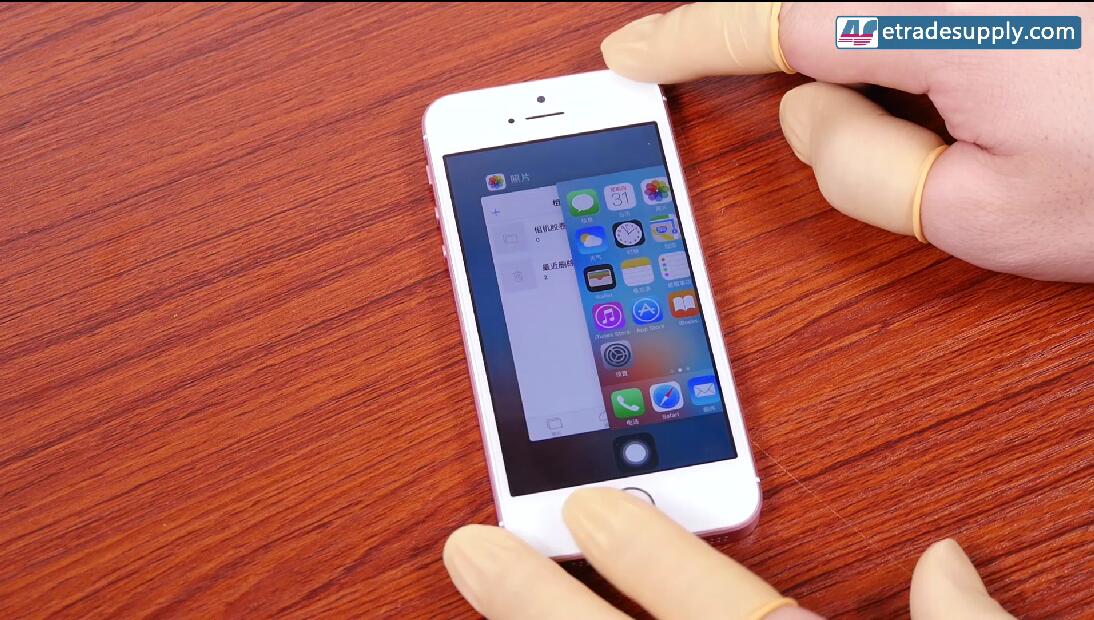
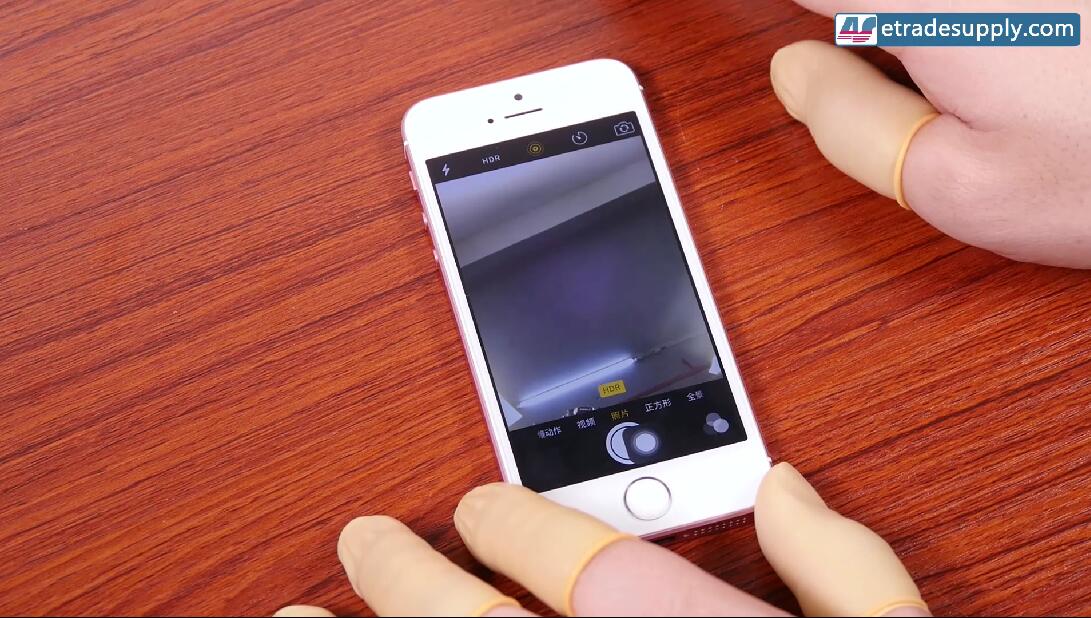
A 640 x 1136 pixels display and a 1.2MP front camera all indicate that these two screens are identical. Not to our surprise, the iPhone 5S’s digitizer, display, front facing camera, ear speaker all work well after been transferred to iPhone SE. Except for the Home button, the Touch ID is disabled while you can still use it to quite apps.

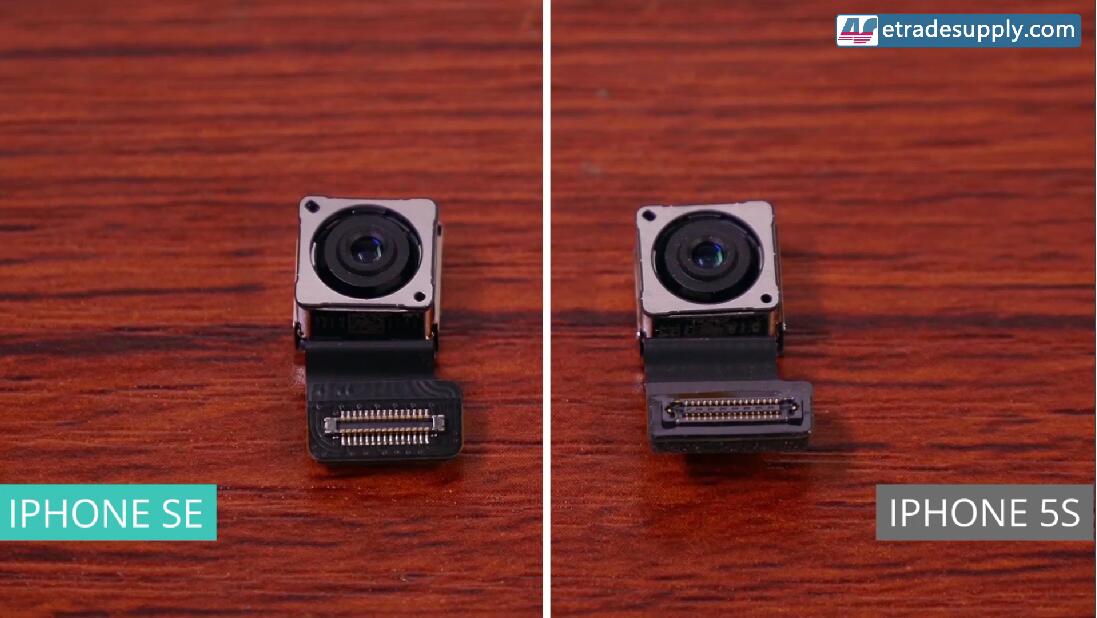
2.       Rear facing camera:
The iPhone SE and iPhone 5S rear facing cameras are in the same size. However, the connectors of these two cameras are different. Upgrading the 5S rear camera by transferring the SE camera can’t work!
 
3.       Battery:
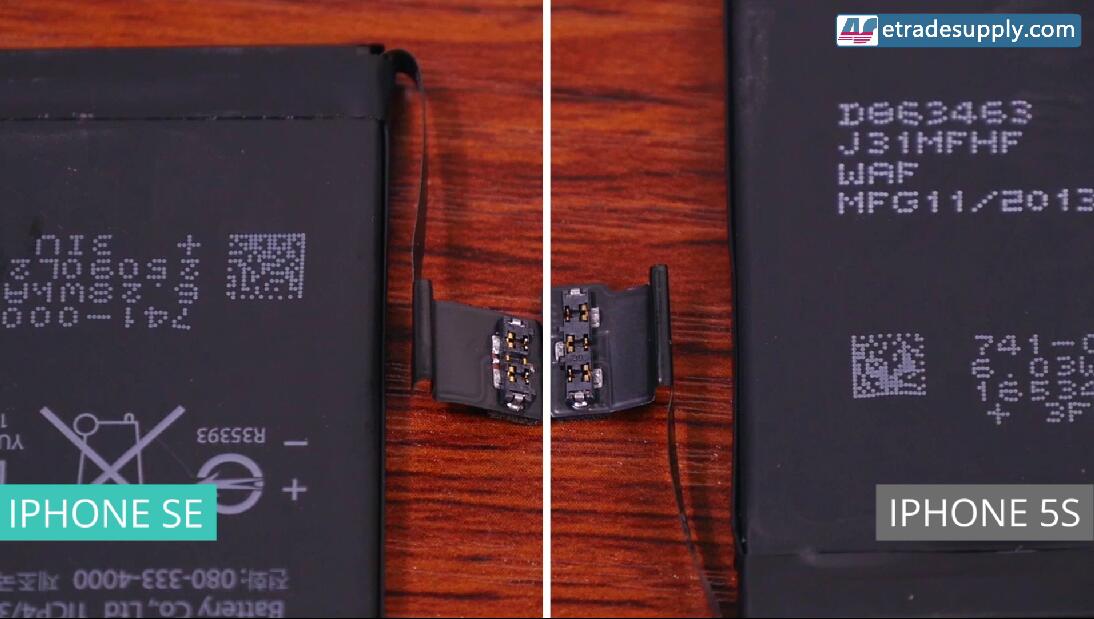
The battery capacity of iPhone SE is 1624mAh while for iPhone 5S, is 1560mAh. Many iPhone 5S users are wondering whether it’s possible or not to improve their phones’ battery life by transferring a SE battery.Unfortunately, the battery connectors are different in these two devices. No way can you expand your 5S battery life by replacing an SE battery.

4.       Charging port flex cable:
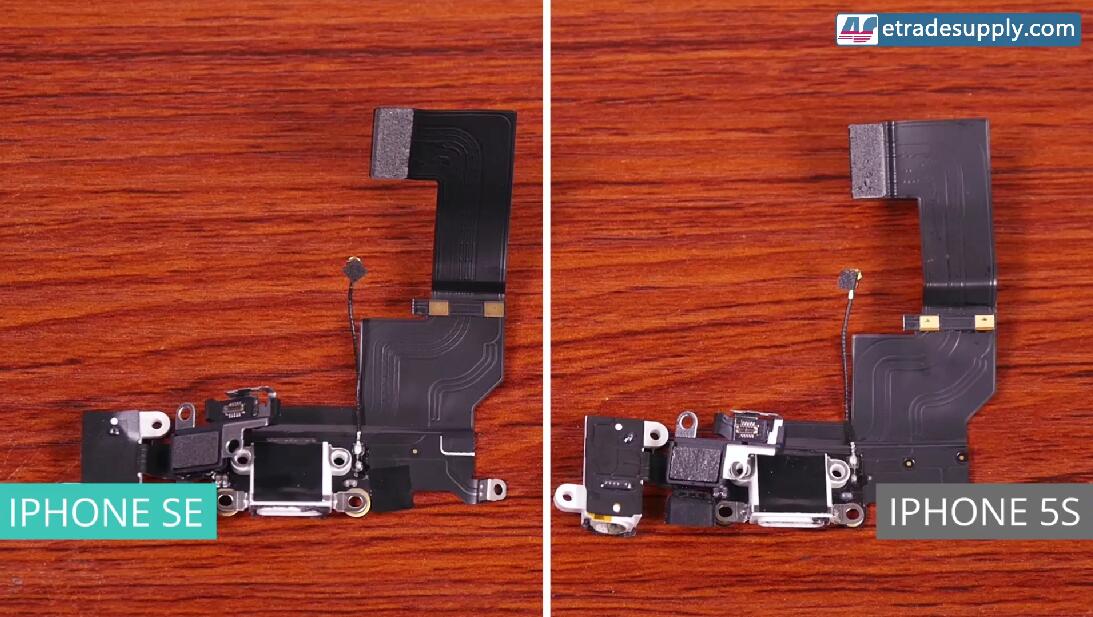
The connector on the charging port flex cable of iPhone SE is different from that on the iPhone 5S, not compatible.

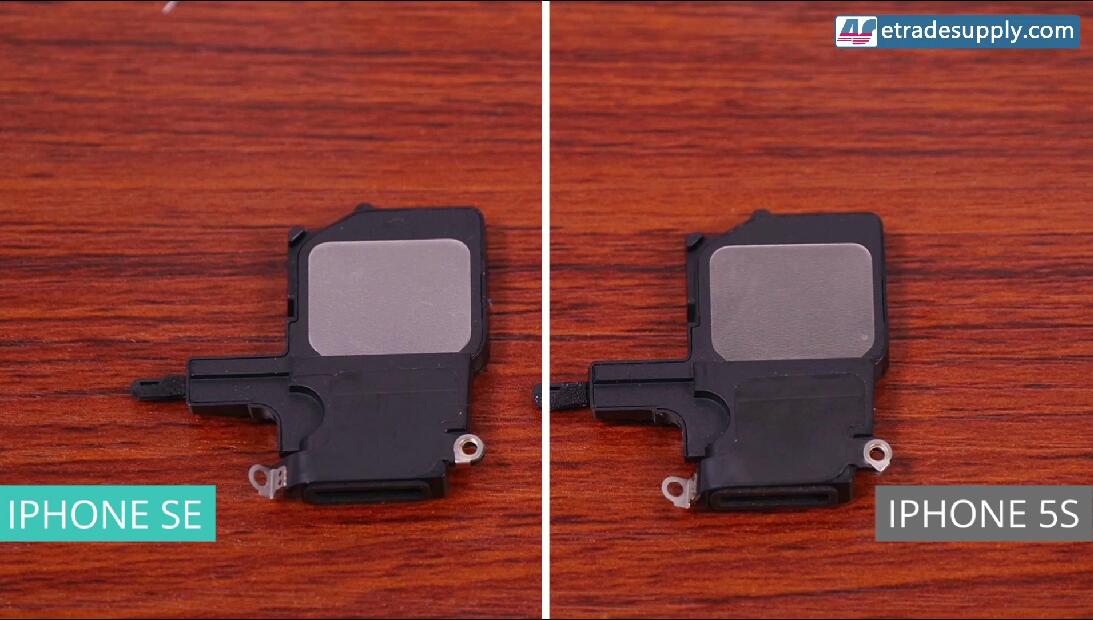
5.       Loud Speaker:
The Loud speaker module of iPhone SE is the same as iPhone 5S’.

6.       Motherboard:
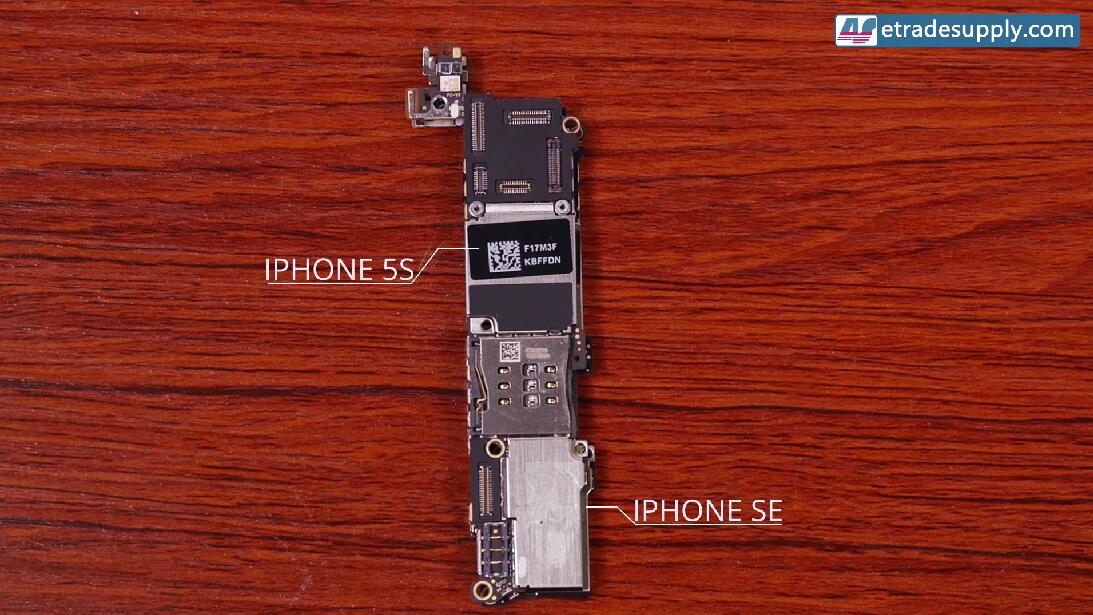
The motherboard of iPhone SE is slightly bigger than the iPhone 5S, which means you could put the 5S motherboard to the SE rear housing; on the contrary, the SE motherboard does not fit the 5S rear housing.

7.       Apple Logo:
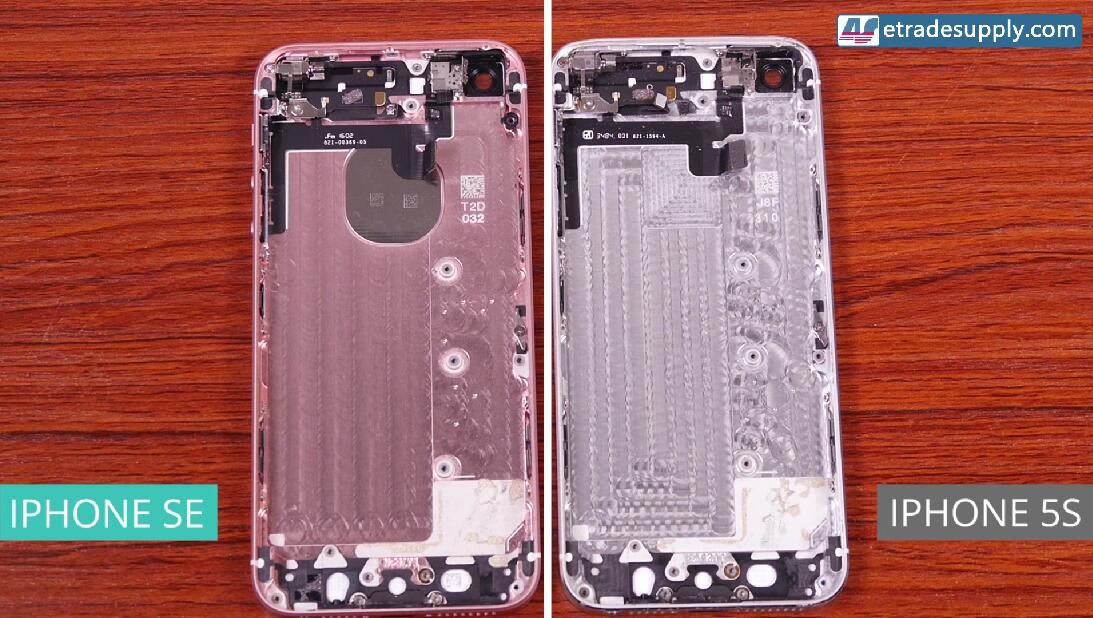
The Apple logo of iPhone SE is glued to the rear housing by strong adhesive which is replaceable, while for iPhone 5S, the Apple logo is electroplated to the rear housing which is not.

After we disassemble the iPhone SE, the advanced features such as 12 MP rear camera and larger battery can not be upgraded from iPhone 5S through a simply DIY. If you really enjoy the 4 inches advance phone, buy the iPhone SE would be a good choice. 

Here is our detailed tear down comparison video:

2016年3月31日星期四

Apolo F1 Waterproof Spray for Your Cellphone

Spilt coffee on a newly purchased iPhone 6S? Splashed soup on the iPhone 6 Plus speaker hole when you’re eating and scrolling the screen? Showered your Galaxy S6 Edge+ in a heavy rain without covering under an umbrella? Dropped your LG G5 by accident after using the toilet? Well, it does happen, every day and everywhere! Some devices like Galaxy S7Galaxy S7 Edge, Sony Xperia Z phones are built waterproof to protect them from accidents similar to the cases mentioned above. However, not all smartphones are waterproof, is there a way to protect them from water damage?

Here at ETrade Supply we not only supply quality parts to meet your cellphone repair needs, but also endeavor to develop new products to help solve problems from the source. Today, we’re so proud and excited to announce that the best waterproof solution to fix water damaged smartphones is able to meet the public.

Apolo F1 Waterproof spray is based on nanotechnology, providing a high quality super hydrophobic protection to the digital devices like smartphones or tablets. Unlike other waterproof spray that can be used on texture, leather, stone, wood or metal surfaces, our Apolo F1 is exclusively developed for protecting smartphones and tablets from liquid damages. It’s a nano coating that surrounds all the tiny electrical parts in and around your device which is completely invisible to the human eyes. The waterproof spray is used to protect your devices from accidental occurrences.


Why Choose Apolo F1 Waterproof Spray?
1. It protects your smartphone from accidental exposure to water or other liquids.
2. Your device will no longer need to wear a bulky “life proof” case to be waterproof.  
3. It protects your device without even opening it!
4. It allows you to protect your device even it’s not brand new.

How to Use Apolo F1 Waterproof Spray?
1. Power off your device.
2. Clean your devices with the microfiber cloth.
3. Shake the waterproof spray.
4. Spray all sides of your device, esp. the earphone jack, ear speaker, charging port, side keys etc.
5. Wait for 10 hours, allowing the waterproof coating to cover your device totally. Do not use your device during this process.

Can’t wait to get one? No worries, check it out here: Apolo F1 Waterproof Spray for Your Cellphone
2016年3月25日星期五

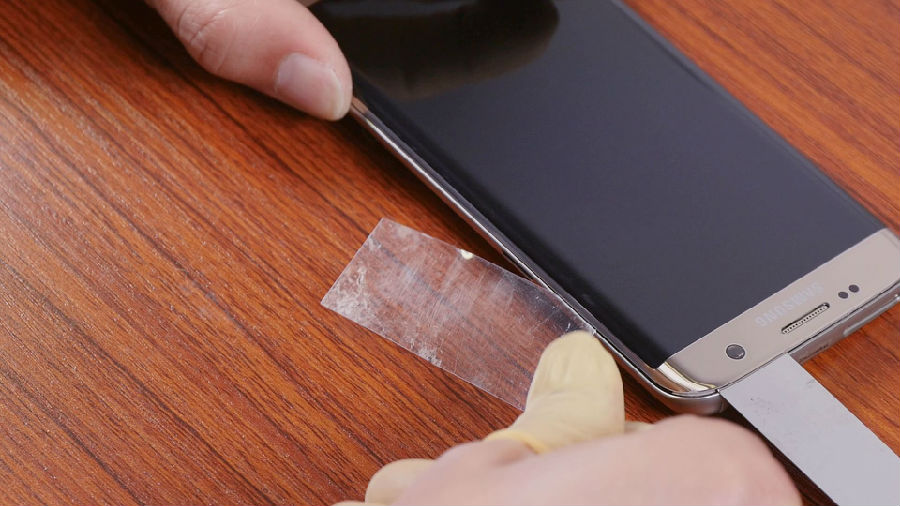
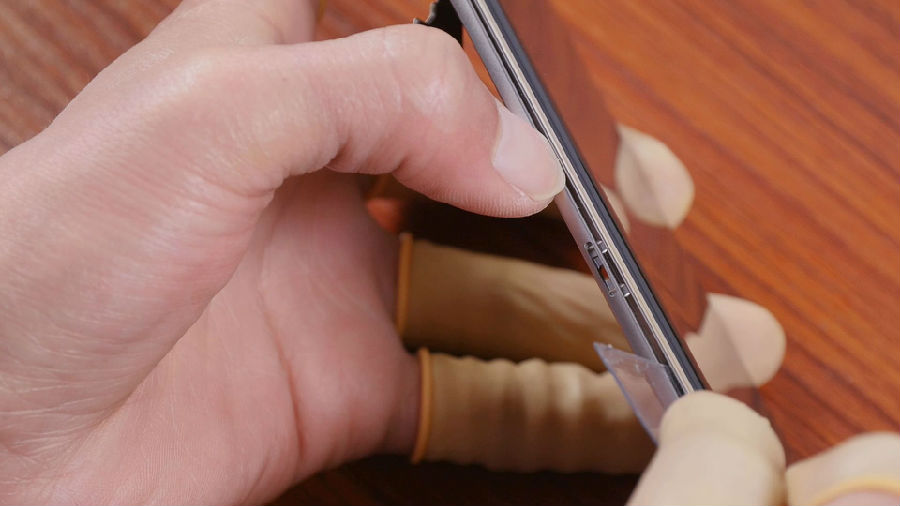
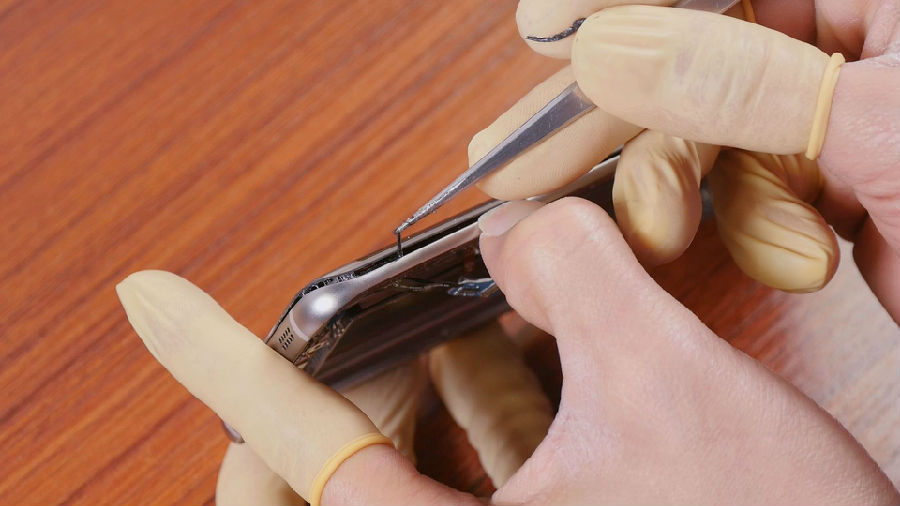
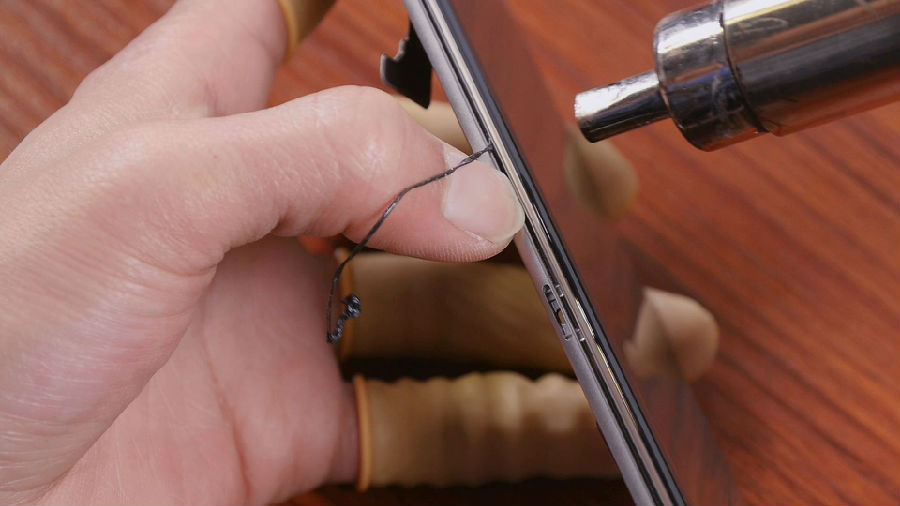
How to Successfully Tear Down the Samsung Galaxy S7 Edge Screen

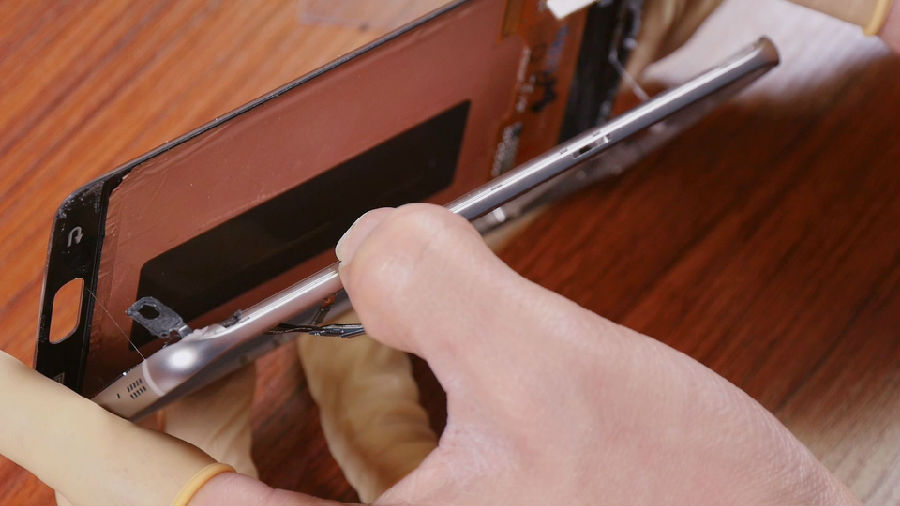
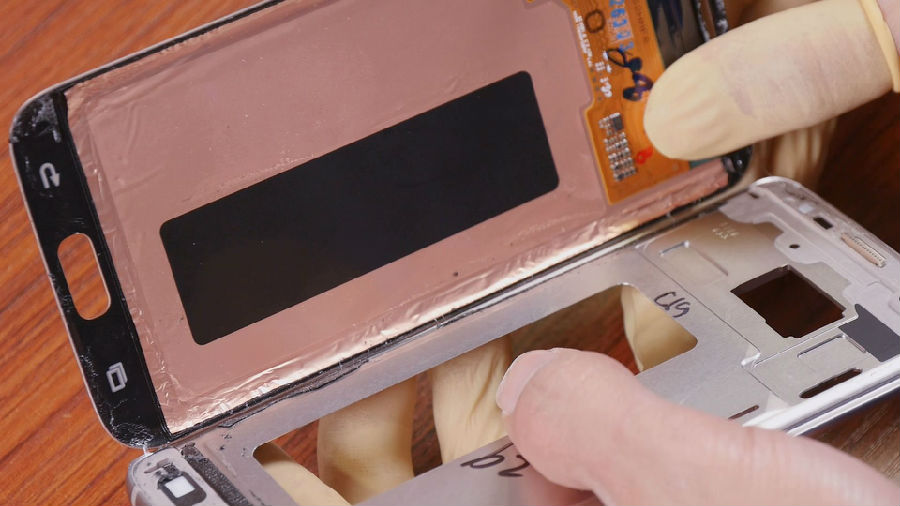
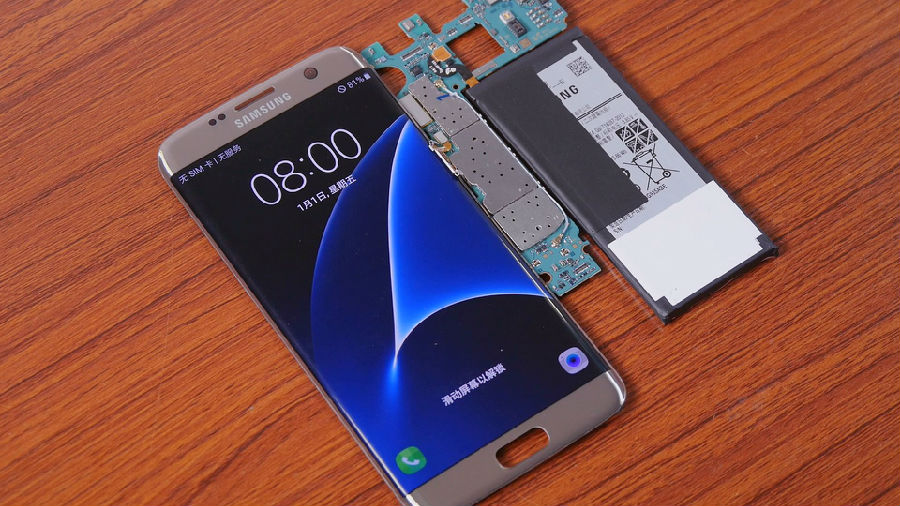
Since the release of Samsung Galaxy S7 edge, plenty of repair technicians have already torn it down. However, none of them has showed the process of taking out the screen from the front housing. We decided to have a try on this and make a detailed tutorial of how we do that (This will void your warranty, DO AT YOUR OWN RISK!).

Tools Needed:
Heat Gun
Cotton Swab
Thin Metal Separation Tool
Some pieces of Thin Plastic Films/Business Cards/Playing Cards
A Pair of Tweezers

Step 1.
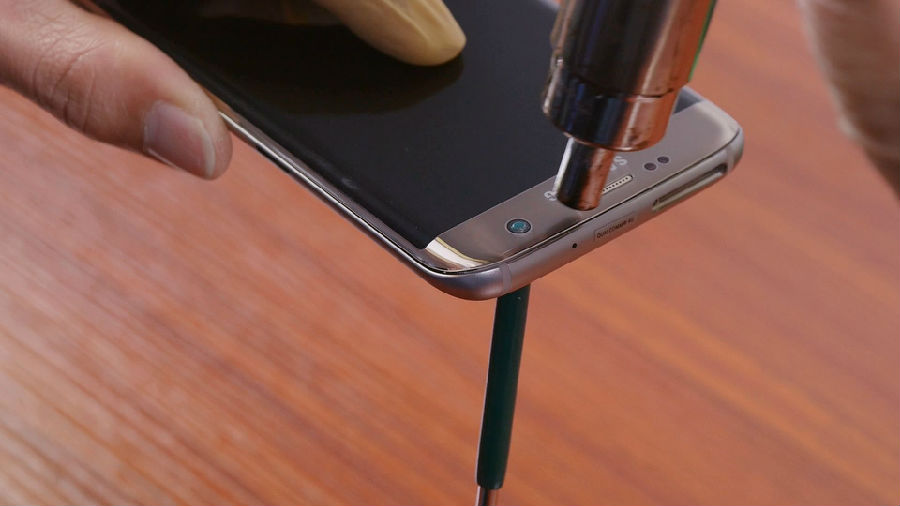
Use the cotton swab to withstand the proximity and light sensor hole, then apply some heat around the top front glass panel.
                                             
Step 2.
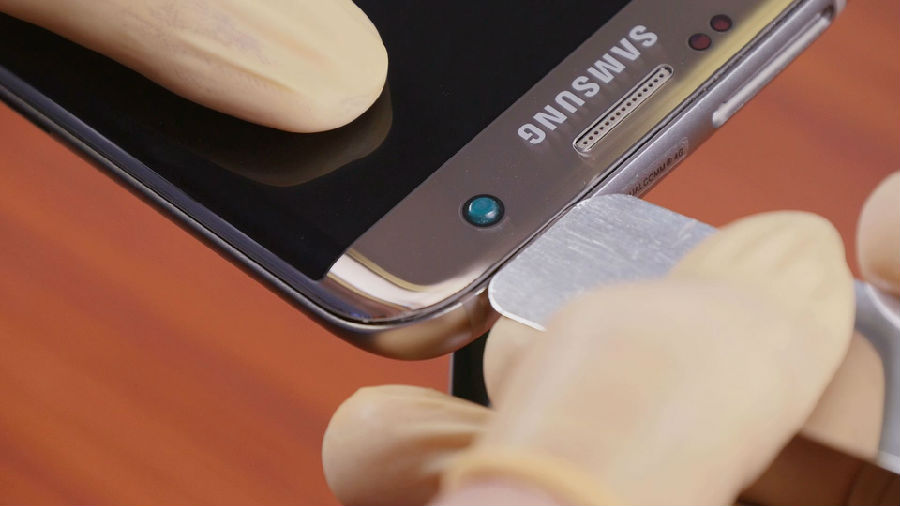
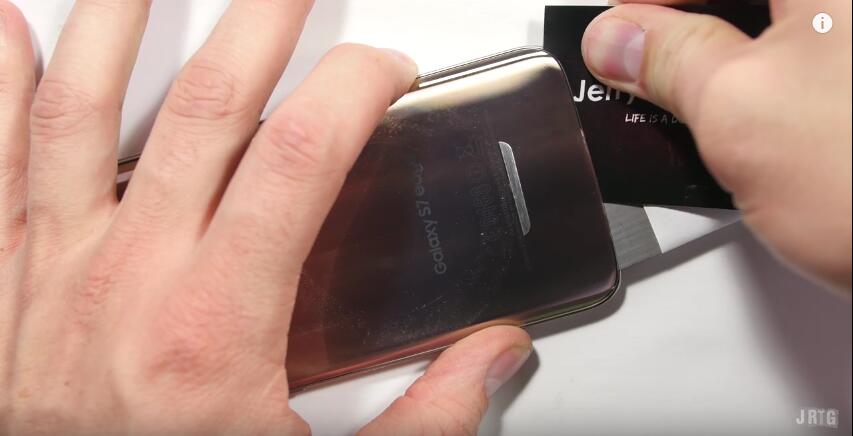
VERY gently press the screen assembly a little bit to leave a gap between the screen and the front housing, then very slowly insert the thin metal separation tool (don’t insert it too deep, when the top of the separation tool reaches the hole, that’s far enough).
Step 3.
Insert a thin plastic film/business cards/playing cards from the gap you created just now, then slowly and gently slide it through the edge.
Step 4.
Use a soft/plastic tool (we used our fingernails LOL) to withstand the open gap (Keep the angle of the gap, DON’T widen it too big).
Step 5.
Use a pair of tweezers to drag out the black adhesive around the edges little by little, two sides alternately (Apply heat to the edge when it’s cooled down).
Step 6.
After all the adhesive has been cleared, carefully open up the screen from one side.

Step 7.
Test the screen works or not after it has been separated.

2016年3月23日星期三

Plastic Again, Watch Out to Keep Scratches Away from Your Samsung Galaxy S7/S7 Edge Home Button

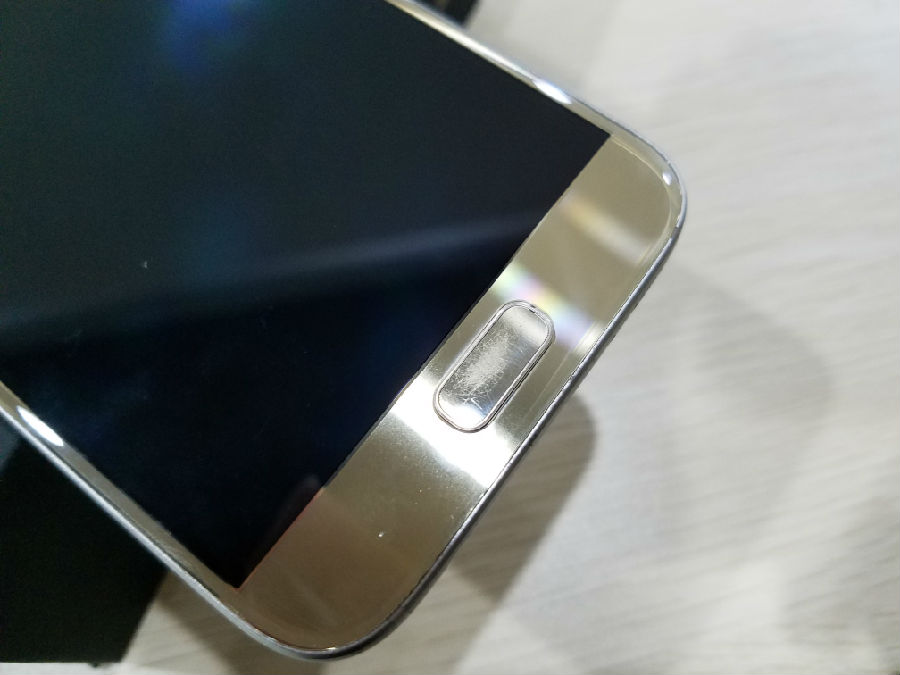
As the flagships of Samsung in 2016, there is no doubt that millions of Samsung Galaxy S7/S7 edge will be sold. Qualcomm Snapdragon 820 CPU, 12MP rear camera with 1.4 µm pixel size, 5.1/5.7 inches Super AMOLED display and the fast react fingerprint scanner on the home button are all attractive features for their potential users. However, only after one day, we’ve found significantly scratches on the home button. 
How this happened?
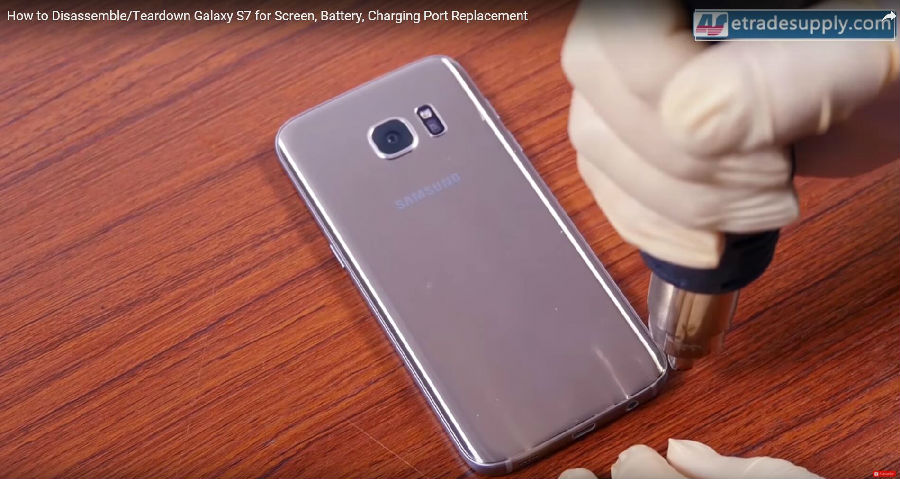
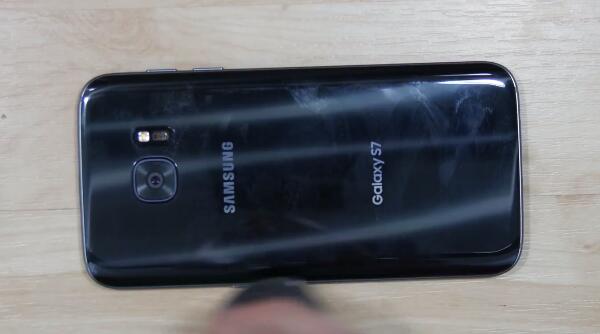
As usual, we bought the latest flagship phones for making the teardown videos. And the scratches appeared during the disassembly process. When we faced down the S7 to heat up the battery door and trying to remove it, the protrudent home button “kissed” the wooden desk for a while and left very clear scratches to the brand new phone. 
Why this happened?
Back to S5, Samsung has combined the fingerprint scanner to its home button. Though the front screen of the phone is protected by the Corning Gorilla Glass, the home button of the new Samsung flagship, is made of plastic, not glass. This means it will easily get scratched in daily uses. Two years has passed, the home buttons of the Samsung flagship phones are still made of plastic. Unlike Sapphire or glass, plastic will be easily scratched by our daily used materials, such as coins & keys, or even wooden table surface.  
Is there a way to prevent this?/How to solve it?
A case and a screen protector would be of great help to prevent our tragedy from happening. Though the home button can’t be covered, the height of screen has been increased so when you face the phone down, the plastic button is impend above the table without direct touch. However, coins and keys in your pocket would still be harmful to your home button. Seems the only solution for this is to carry them separately.

If the home button of your S7/S7 edge is already scratched, the only way to solve it is to replace a new one. However, the home button is in between the front housing and the screen assembly which makes the cost to replace it really high (the screen would be easily cracked). If you really can’t stand the scratches, we strongly suggest you to let the professionals to replace it for you. (There is no clear official price list for it) If you do have plenty of related experiences, you could follow this blog to try it yourself: 
http://www.etradesupply.com/blog/how-to-replace-the-galaxy-s7-screen-charging-port-and-home-button/ (This will definitly void your warranty, so DO AT YOUR OWN RISK!)

2016年3月19日星期六

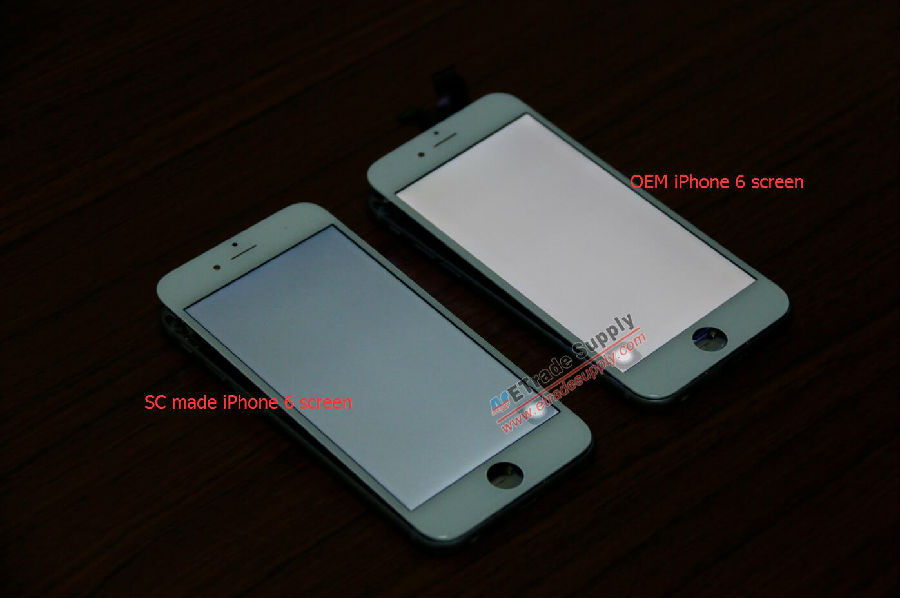
Analysis of China Made iPhone 6 Screens (Version 1, Updates About a New Manufacturer)

2 weeks has passed since we’ve posted the first China made iPhone 6 screens. Now in the market, except LT and JDF, there is one more manufacturer producing the iPhone 6 screen named SC. Recently, we’ve got some samples of the SC made screens and would love to share the information with you.

Appearance:
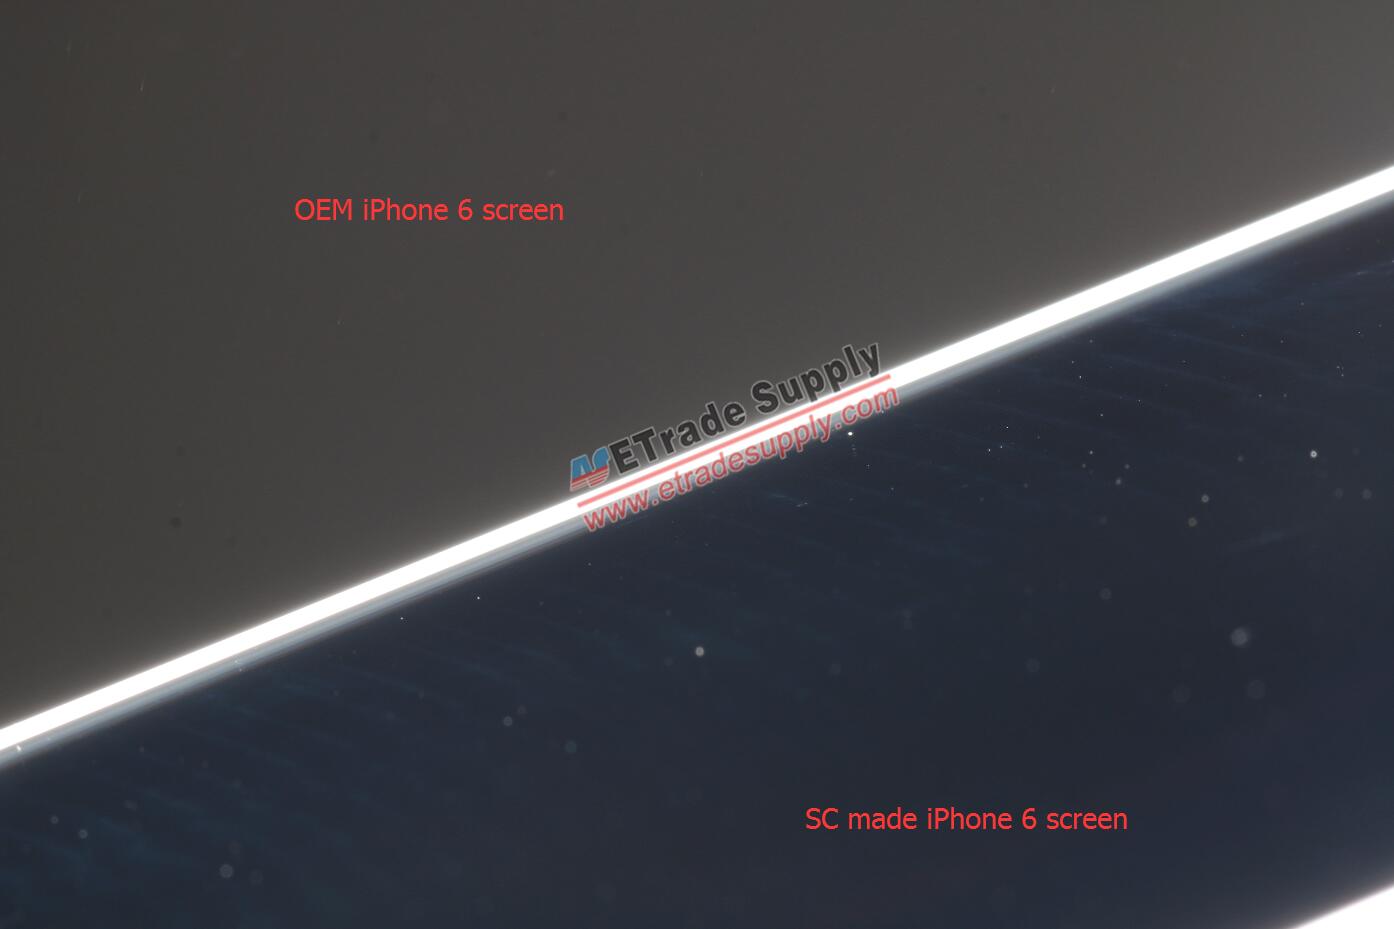
Same problems can be found in the SC made iPhone 6 screens. Horizontal textures can also be seen clearly under the light.

Size:
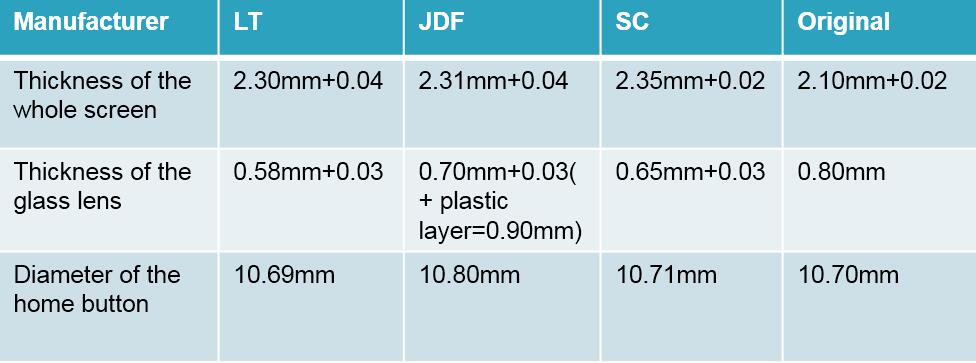
All of these three China made iPhone 6 screen assemblies have adopted the G+G technology instead of the In-Cell technology that OEM screens used, which means they are far too thick. The screws used to hold the metal plate under the backlight can’t be fastened. None of these screens can fit the original iPhone 6 rear housings.
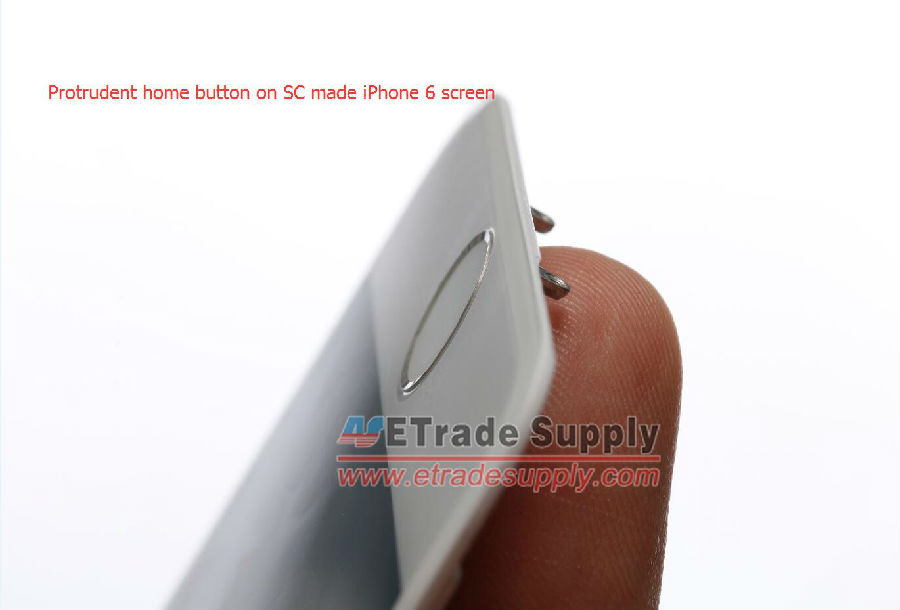
For the SC made iPhone 6 screen, the glass lens is too thin which lead to the home button stands out. It’s 0.15mm higher than the glass lens.

The Color of the Display:
The display effect of the SC made iPhone 6 screen is the closest to the OEM ones when comparing with LT and JDF made ones. However, the visible angle is far small compared with the OEM screen.

Conclusion:
As the LCD for iPhone 6S is exactly the same for iPhone 6, more and more third party factories are using the OEM iPhone 6 LCD to produce the iPhone 6S screen because there are $30-$50 price difference between these two screens. As the OEM iPhone 6 screen assemblies are gradually dying out, we got to get prepared to use the China Made iPhone 6 screens in the not so long future. (No doubt the price of third party made iPhone 6 screens using the OEM LCD will go up due to the demand and supply) At the moment, none of the manufacturers are producing qualified screens. It’s still takes time.

2016年3月18日星期五

How to Replace the Galaxy S7, S7 Edge Battery

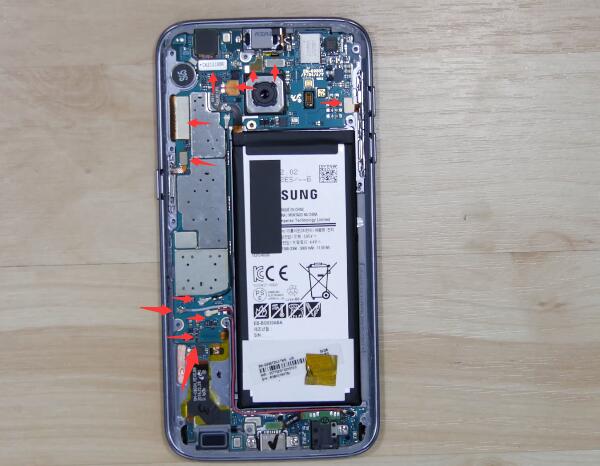
As the 2016 flagships of Samsung, the Galaxy S7 and S7 Edge feature higher capacity batteries compared with the Galaxy S6 and S6 Edge. The Galaxy S7 and S7 Edge batteries are non-removable, which doesn't it's unable to be replaced. In some cases, the battery has to be replaced in order to cure the device. Here we're going to show to how to replace the Galaxy S7 and Galaxy S7 Edge batteries step by step.

Tools Needed:
Heat Gun/Hot Plate Machine
Guitar Picks/Playing Cards

How to Disassemble the Galaxy S7 for Battery Replacement?
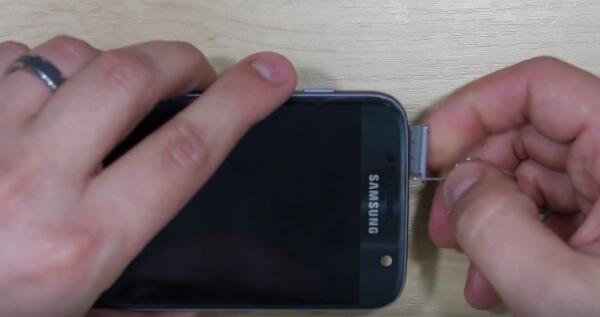
1. Power off the device and remove the Galaxy S7 SIM card tray.

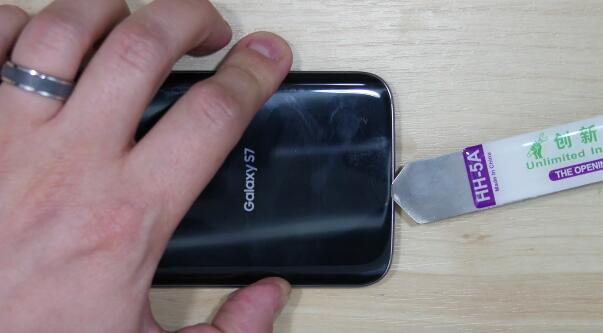
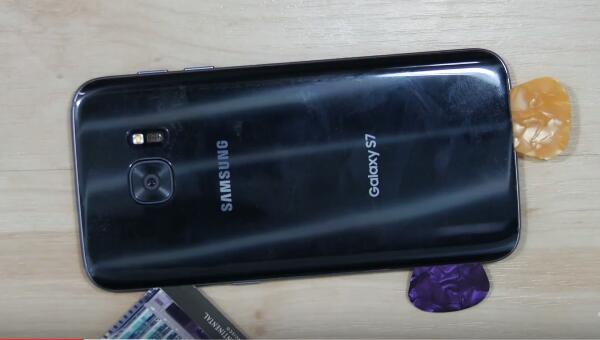
2. Heat up along the sides of Galaxy S7 for 1~2 minutes, the back cover is glued to the rear housing with sticky waterproof adhesive. Pay your patience on this step and make sure the Galaxy S7 back cover adhesive is nicely warm and loosen.
Insert the spudger tip into the back cover and carefully raise it up so as not to damage the fragile glass, stick a playing card in and walk it around, then insert a guitar pick and run it along the edges of Galaxy S7 back cover. The adhesive is easily cooled down, you'll need to heat it up back and forth before releasing the back cover. Likewise, be patient.
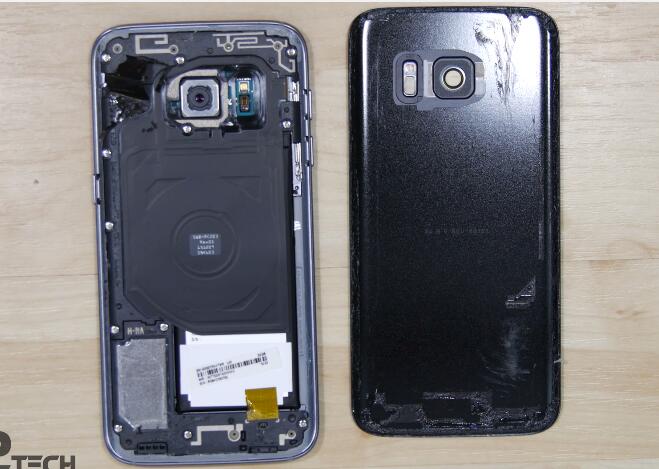
Now the Galaxy S7 back cover was pulled out from a large portion of strong adhesive as you can see from the below picture, also avoid to hurt the fingerprint sensor in the middle of rear housing while you're heating.

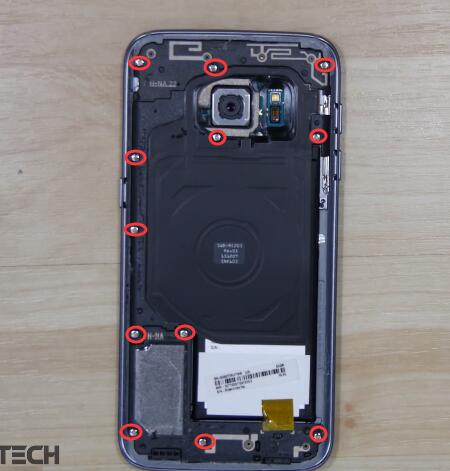
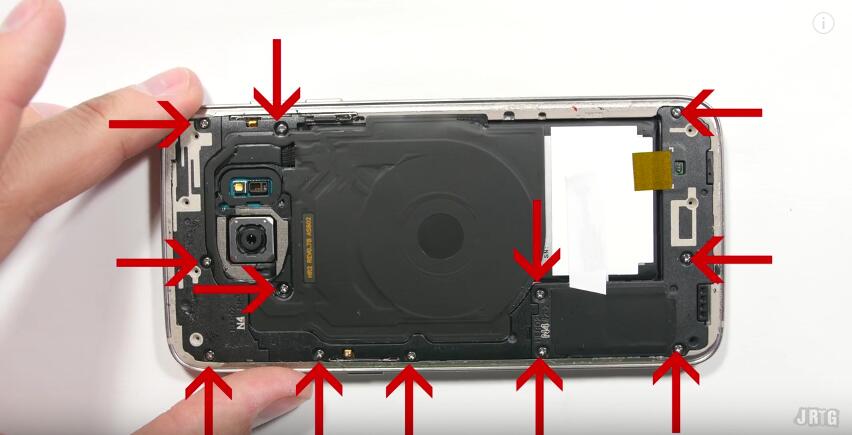
3. Undo the 12 screws in the rear housing. The screws are in the same size, no worries to mix them up. Use a pair of tweezers to pick up the screws if they're still stuck in the holes.
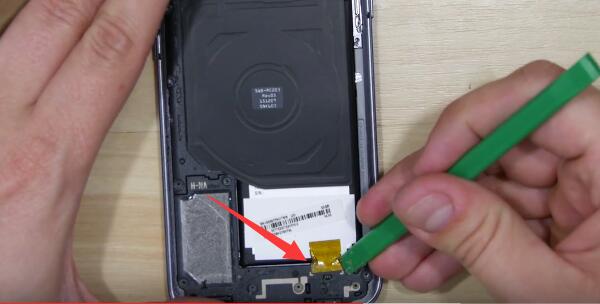
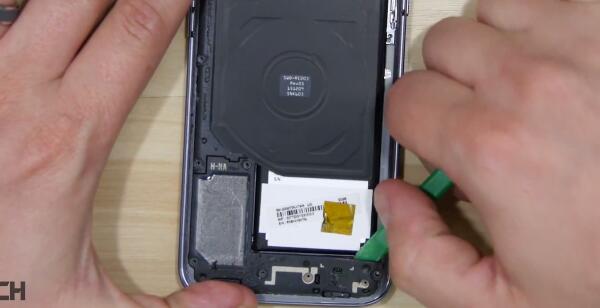
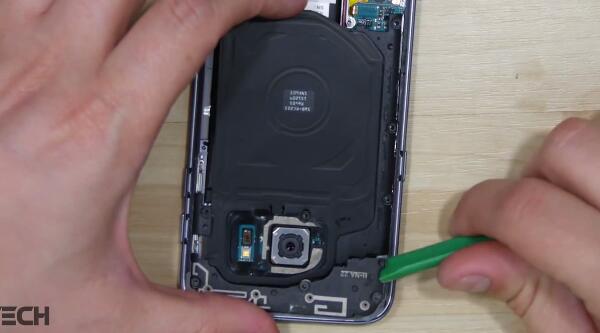
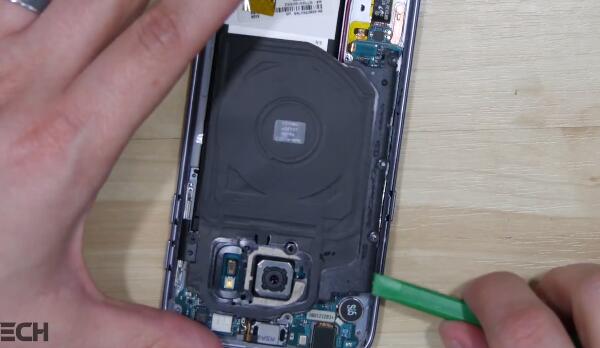
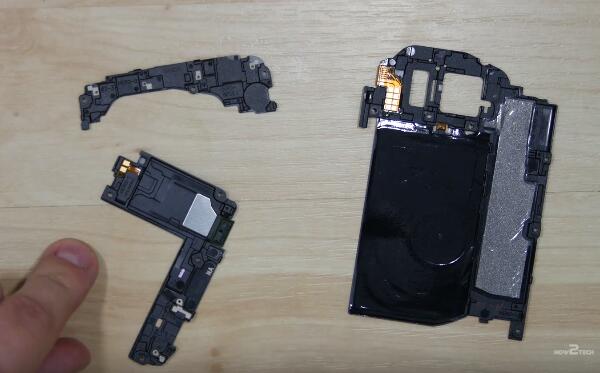
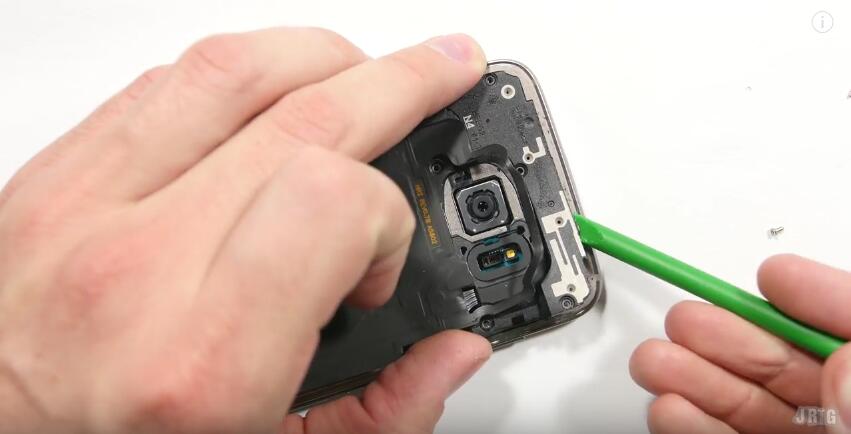
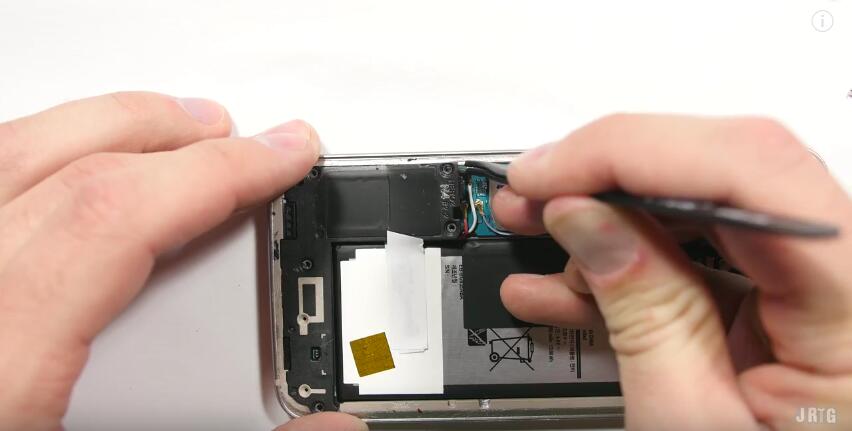
Peel off the yellow tape and then remove the Galaxy S7 loudspeaker assembly.
Remove the Galaxy S7 top cover.
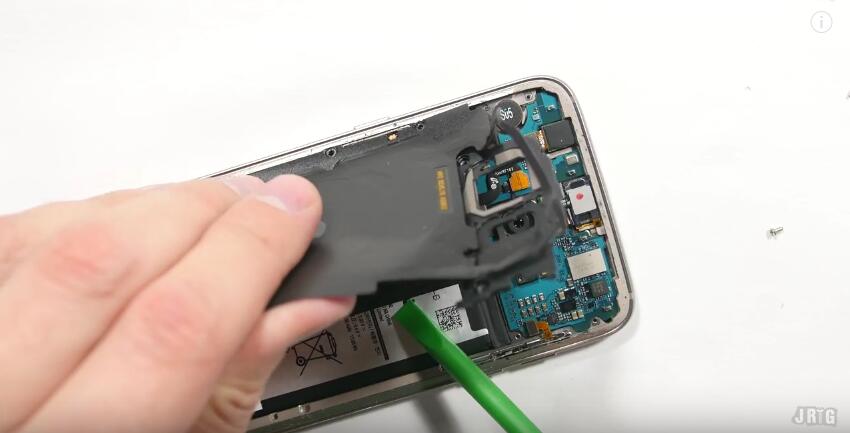
Remove the Galaxy S7 wireless charging chip, be careful not to damage this vulnerable part.
Now the Galaxy S7 rear housing set was disassembled.

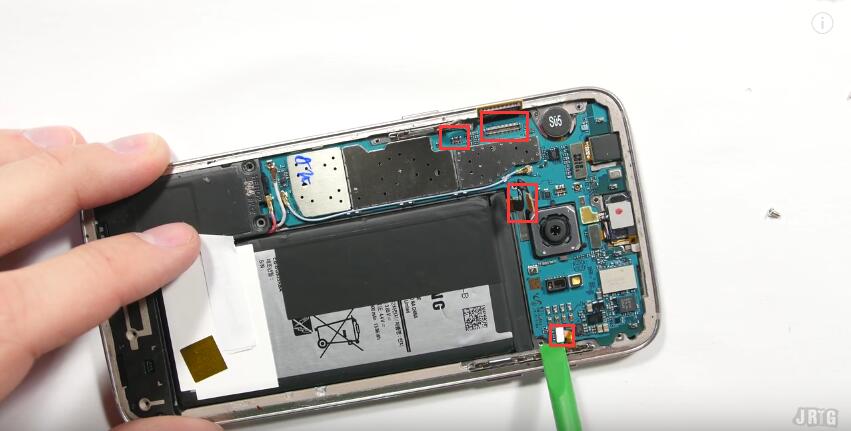
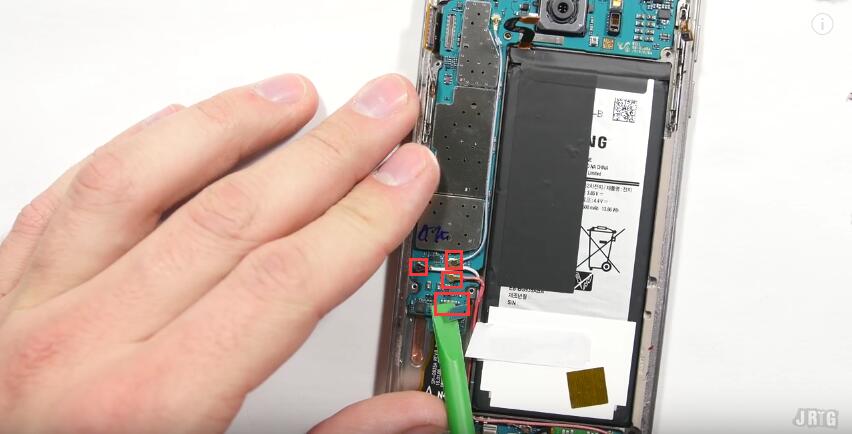
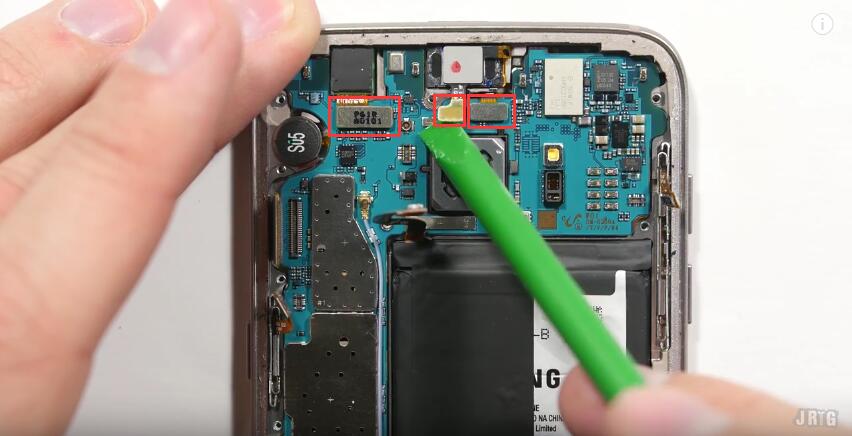
4. Pry up the connectors shown in below to release the Galaxy S7 motherboard.


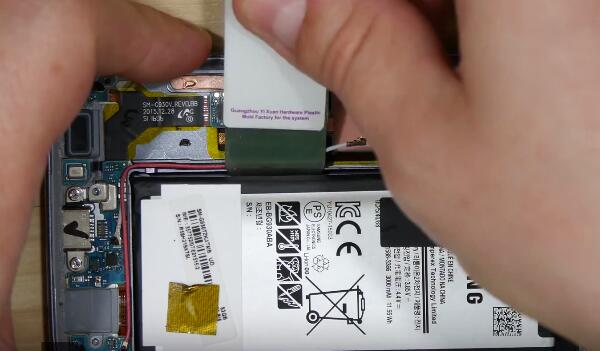
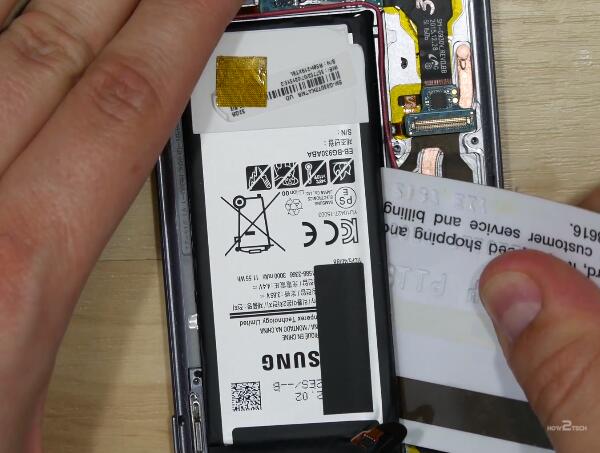
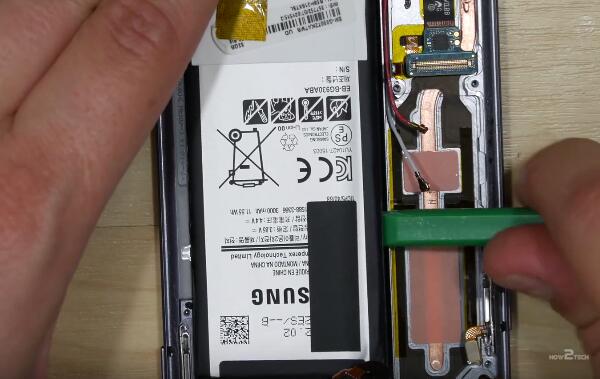
5. Wedge the metal spudger under the battery and pry it back and forth, you may also need a plastic plain card and a plastic spudger to help to remove the battery. The battery is glued to the front housing with strong adhesive in square, that's why the battery is stucking so well.

How to Disassemble the Galaxy S7 Edge for Battery Replacement?
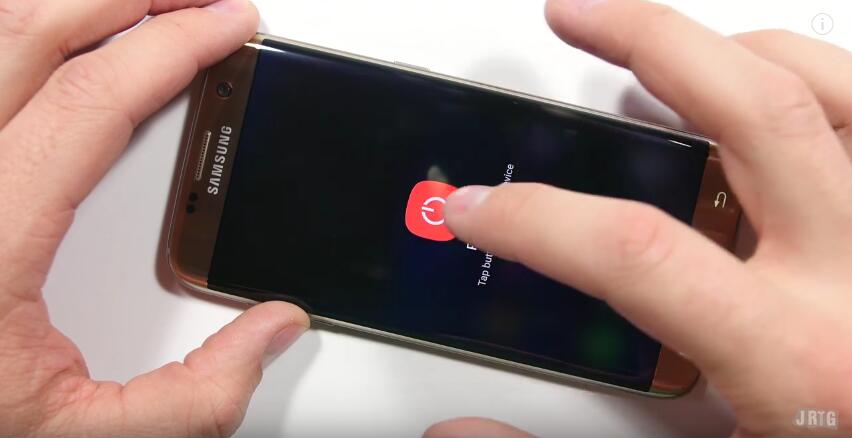
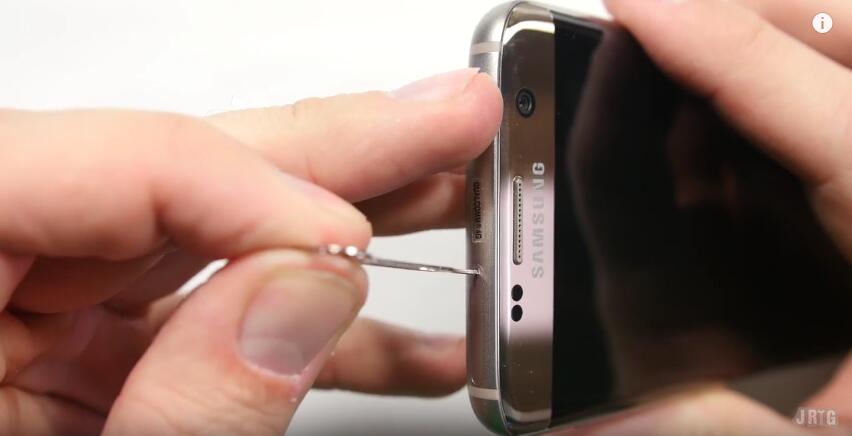
1. Shut down the Samsung Galaxy S7 Edge then remove the SIM card tray.
 

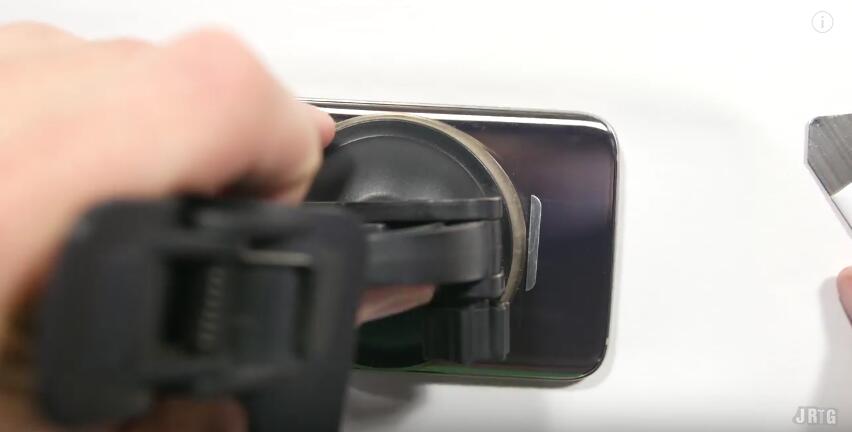
2. Heat up the back the S7 edge(until it’s too hot to touch), then apply the suction cup to the back cover of the S7 edge.
 

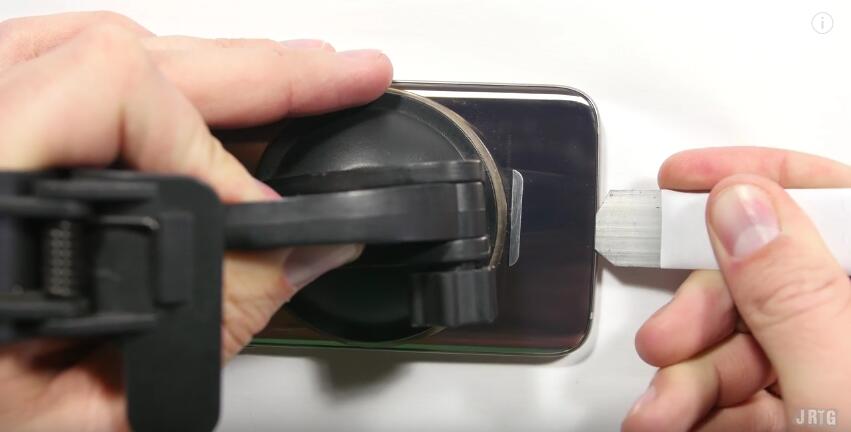
3. Pry the edge of the S7 edge back cover a little bit to insert the thin metal spudger.
 

4. Slide away the metal spudger a little bit then insert some business cards/playing cards to do the rest.
 

5. Once the back cover has been released, undo the 12 Phillips screws holding the rear housing.
 

6. Use the plastic separation tool to separate the top plastic bracket then remove the wireless charging pad.
 

7. Disconnect the battery cable, power cable, display cable and the volume button cable.
 

8. Use a pair of tweezers to remove the loud speaker module.
 

9. Pop off all the antenna cables and the fingerprint scanner cable.
 

10. Disconnect the earphone connector, front facing camera connector and the proximity and light sensor connector.
 

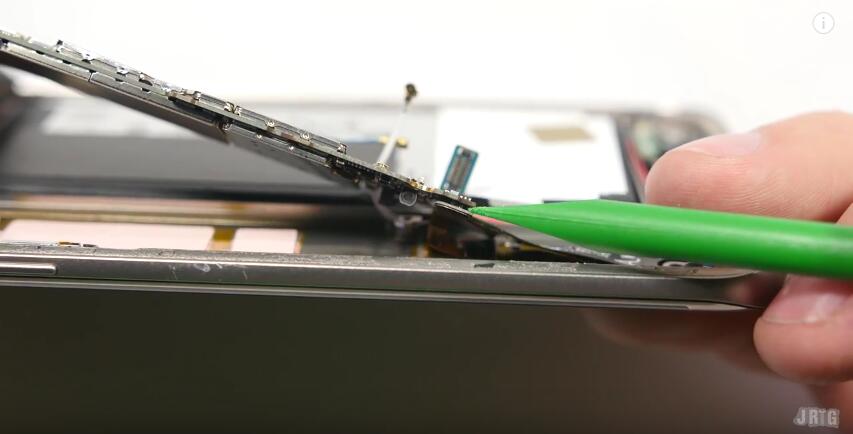
11. Lift up the motherboard then disconnect the charging port connector.
 

12. Heat up to the adhesive underneath the battery, then use the metal spudger to lift it up (slowly and carefully).