2015年7月9日星期四

Possible Reasons Why iPad/iPad Mini Digitizer Functions Are Affected by Its Inner Magnets


Background Info:
Some iPad Mini digitizers with ICs work perfectly before installation, while after installation it experiences random touch issues and a black display. After careful inspection and testing, we’ve found that the inner magnets in the rear housing are missing and these issues disappeared after the inner magnets have been reinstalled.
 

Possible Reasons:
The following analysis is based on research we’ve done:
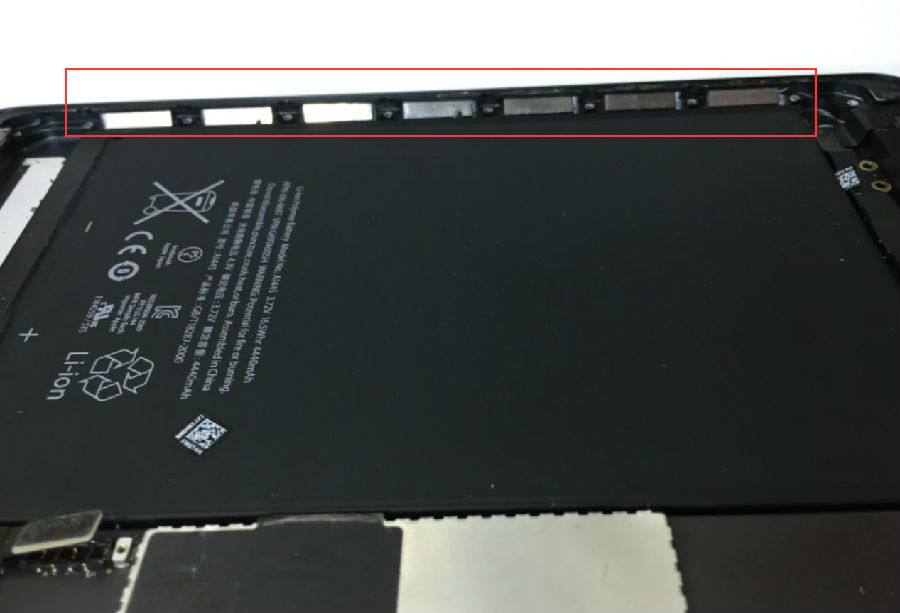
As everyone knows, there are several magnets on the side of the iPad’s rear housing which works as a gravity sensor for the device.
After disassembling the magnet, the structure can be seen as
2 sheets of iron and 3 magnets, which are balanced in a magnetic field
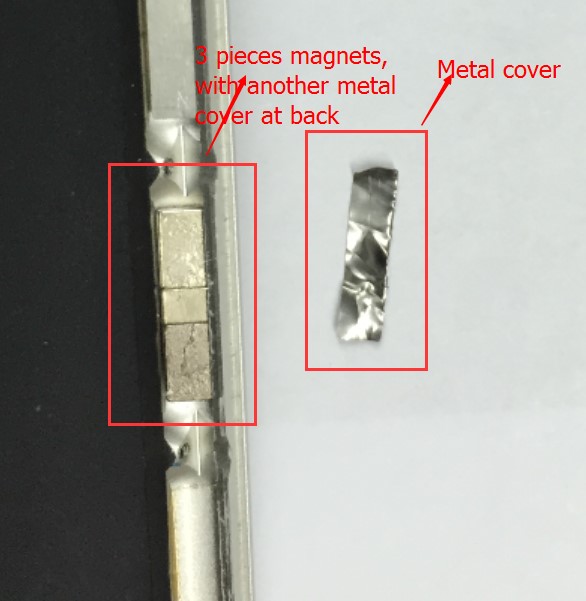
The three magnets are made to achieve balance in a magnetic field, so when the position of a iPad is changed, the balanced magnets relation to the magnetic field of the earth is changed, and this allows the sensors to prompt a change in the display.
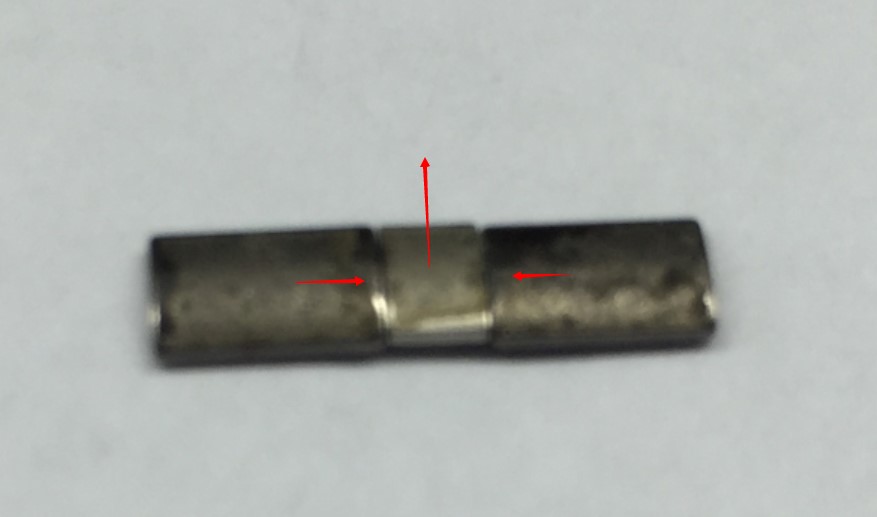
Though we are not exactly clear where the iPad’s magnetic sensors are, we at least know that magnets affect its functionality.
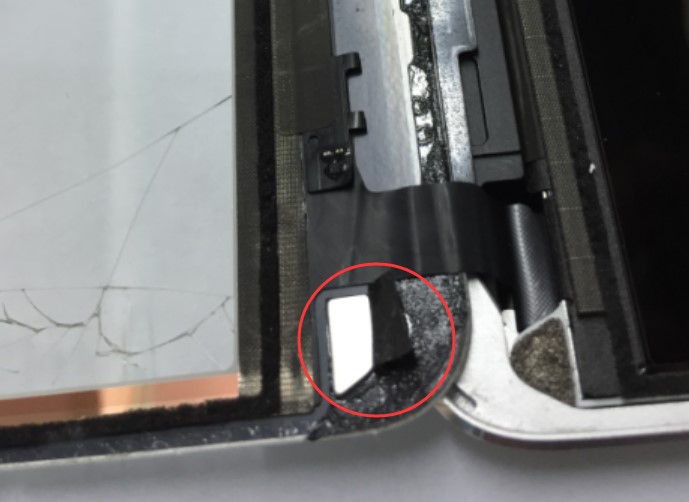
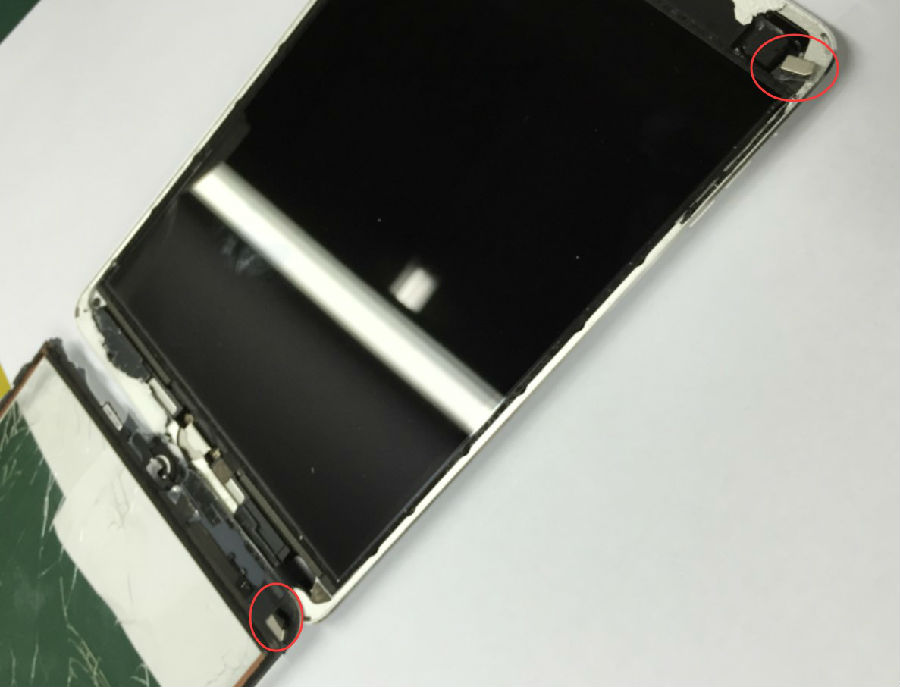
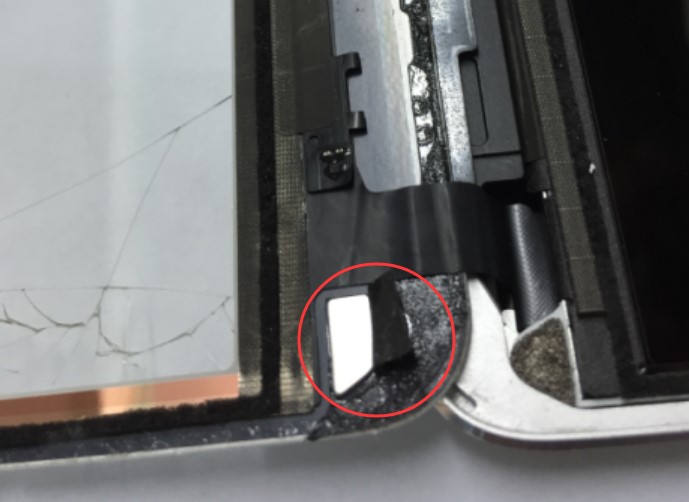
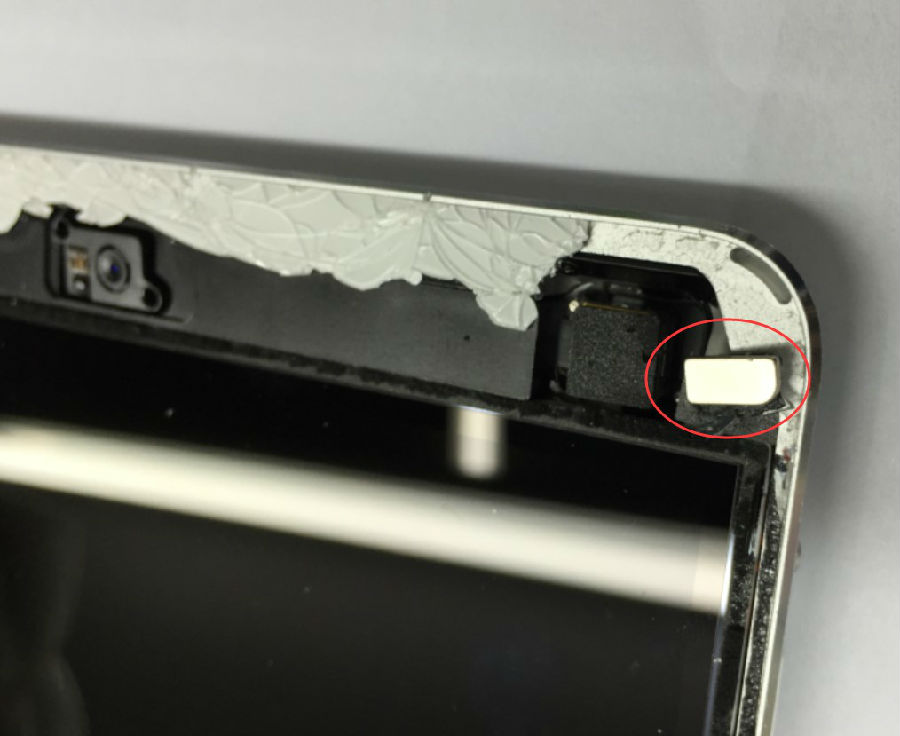
There are 2 magnets on 2 corners of the iPad, which are easily missed by people (shown in the pics). These 2 are covered with a conductive adhesive, which makes them more difficult to spot. These magnets also affect the functions of the display.
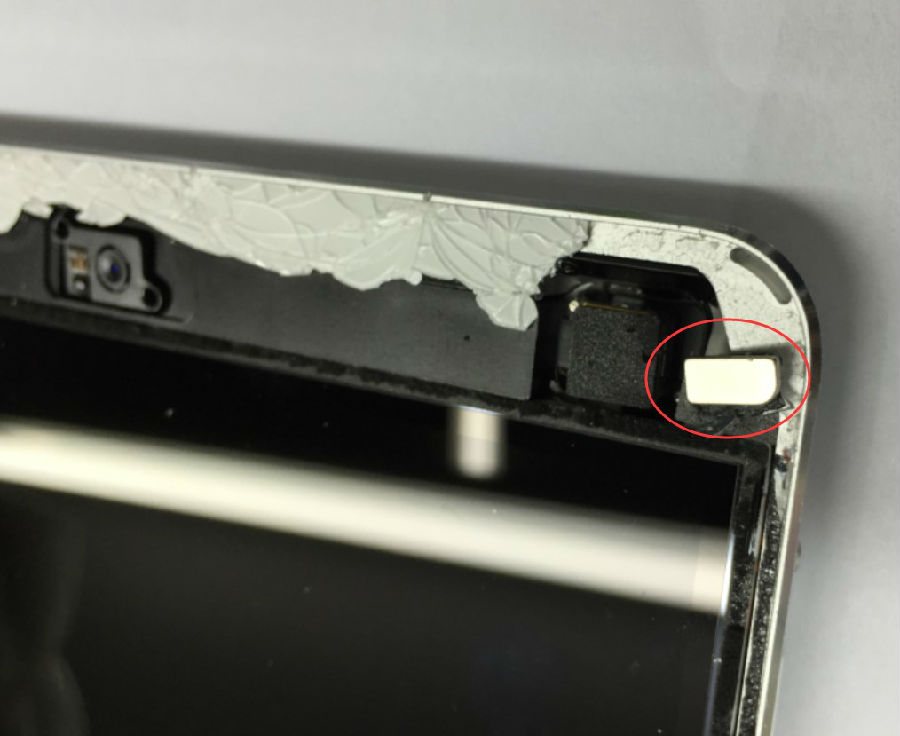
We’ve found some more features of the iPad’s magnets after further inspection:
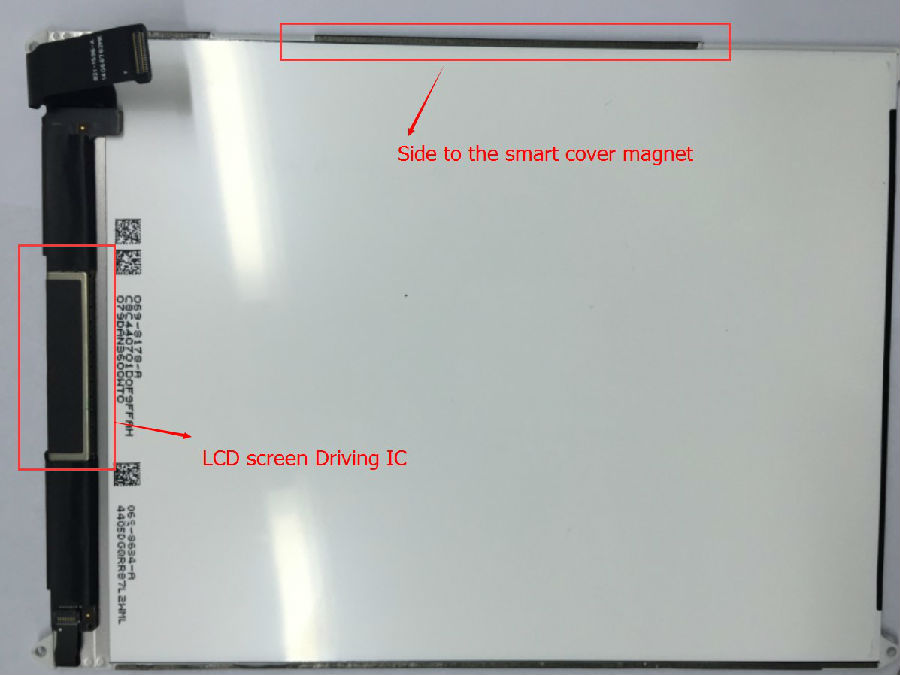
   The two slides of the conductive adhesive on the back of the iPad’s screen are not the same length. One is aligned with magnets and is much longer than the other.
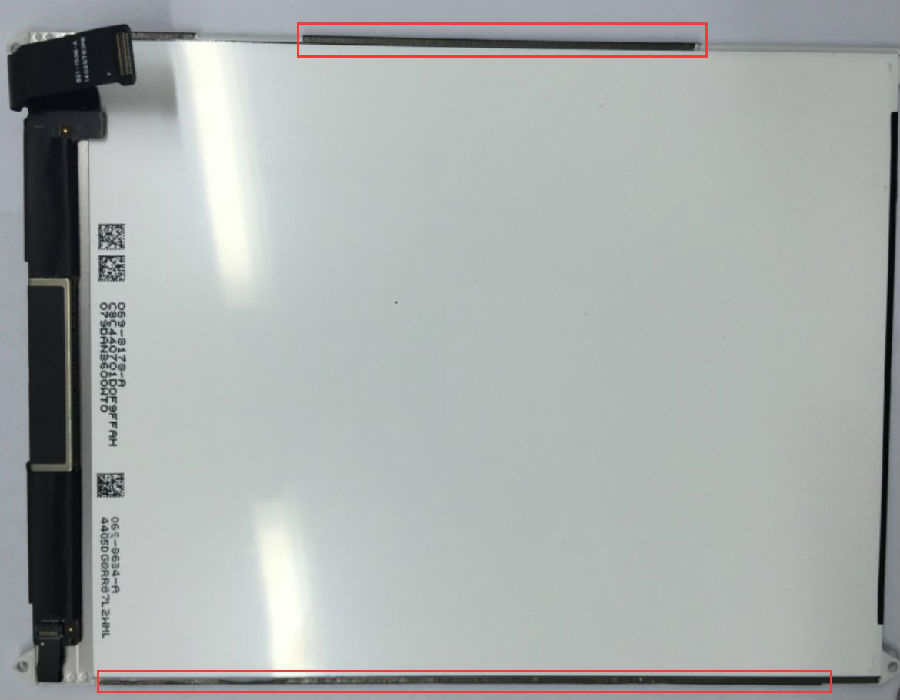
     ② The length of the longer conductive adhesive is the same length of the magnets.
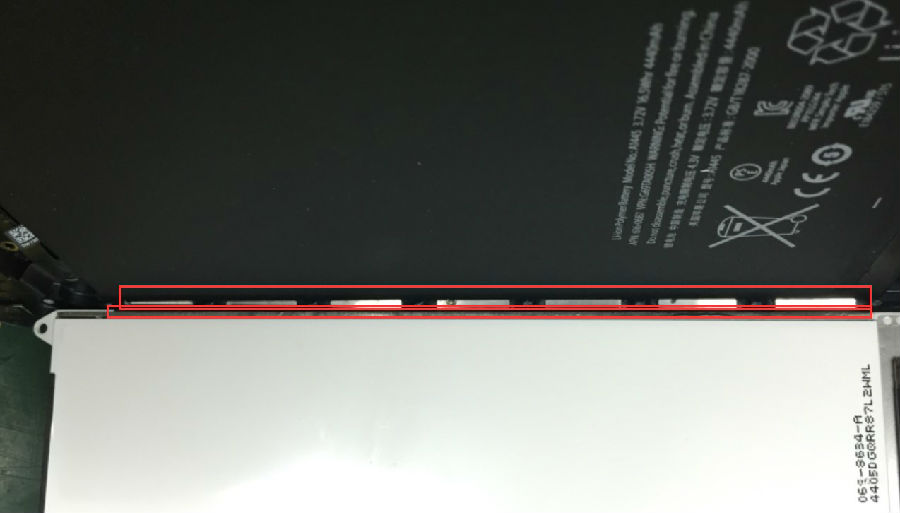
Though there is no clear evidence one can conclude from the above inspection that the IC of the digitizer works closely with the magnets.
Though the exact functionality of the magnets is not completely clear yet, we know it still affects the functionality of the screen. The magnets should be installed properly in order to guarantee proper screen function.
If you have any thoughts or experiences with the iPad’s magnets, we welcome you to share them with us!

2015年7月8日星期三

Why Are LG LCD Assemblies So Easily Damaged


We've been getting a lot of feedback from our repair community especially surrounding issues with LG G2 andG3 LCD assemblies. The issue is fairly strange since generally OEM LG LCDs dont generally have problems, but it seems a lot of people are experiencing dead or defective screens. But we took some time researching the issue and we want to share our findings with the repair community. We hope this information helps you out.
From our research it seems that there are two main issues that contribute to a dead/damaged LG LCD. One reason is a major design flaw while the other is user error.

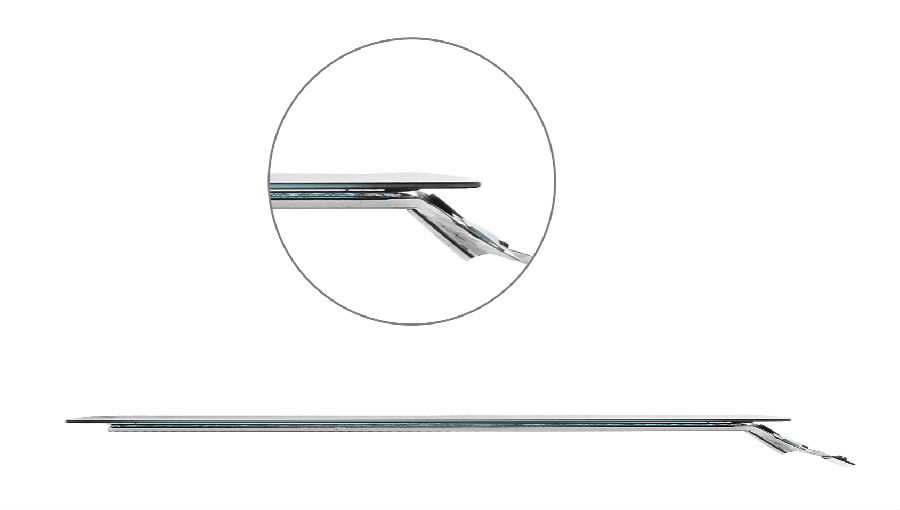
From the pictures above you can barely see a tiny gap between the LCD screen and the glass lens near the bottom of the assembly. The reason for this gap is because LG designed the screen so that no matter what angle you view it from it will be illuminated. However, the designers may not have taken after market repairs into account, because the LCD screen is extremely easy to damage specifically at the corners due to the design. Most people probably don't know how fragile those corners are so when installing the new screens the may put pressure on those areas, and that's where problems arise. The design causes the glass on the LCD to act like a fulcrum for the backlight (the part that juts out). This amplifies the slightest amount of pressure due to a leverage effect, thus resulting in the corner breaking. And since the IC is right there if any one of those corners is broken you'll either have a dead screen or a screen with lines/other display problems. For this reason we think this is a major design flaw which results in a unusable screen.


Do other phones have the same design? As far as we know only LG uses this sort of design on its flagship's LCD screen assemblies, such as LG's G2 VS980 and G3 D820. Other manufacturers such as Apple puts the LCD's IC on the top of the assembly, additionally, there are no gaps between the LCD screen and the glass lens. What’s more, iPhones' LCD screen assembly has a frame, while HTC's LCD screen assembly usually have a metal plate behind it. Although Sony and Samsung's LCD screen assemblies have no protection directly on the LCD screen, the whole LCD screen is fit flush with the assembly, so there is no obovious gap.

We consulted our engineers, and they informed us that since the LG LCD screen assemblies are so fragile, special care needs to be taken to keep from damaging them. So, here we show how to replace an LG LCD screen assembly with little risk of damaging it. You can also check out the video at the end of this article.

Before you install the LCD assembly, make sure you have cleaned the parts of all dust or dirt. If you miss this step, the dust/dirt can prevent a secure fit resulting in screen separation. 

First of all, keep in mind that you don't want to apply any pressure or force to any of the corners. Then, since your replacing the new LG LCD screen assembly yourself, you'll need to take an extra step to prevent any light leakage after installation. To do this we recommend using a black sharpie to trace the edges around the LCD screen. The black ink will absorb any excess light preventing light leakage.

The next step is to install the part onto the front housing. After applying adhesive on front housing, you need to smooth the adhesive down against the frame. We recommend tweezers or any other tool to smooth it out. If you don't do this step, any section of adhesive that isn’t flush will allow light to leak through. Then, you want to insert the flex cable through the hole and align the bottom of the LCD screen assembly to the front housing. DO NOT just press down the rest of the part! You may damage the LCD screen if the parts are not lined up accurately. You should then flip the part upside down so that gravity works with you to slide the LCD down into place while you line up the upper portion of the part. You can also try gently flexing the LCD to fit the part into the slot.

The main reason behind LG LCD screen assembly issues is usually IC damage, which is a result of mishandling the parts. Because of the design of the LCD, people who don't know these tips run a high risk of damaging their parts while repairing their LG phones. We hope this blog will help inform the community

Feel free to contact us at service@etradesupply.com if you have any questions, or you can comment below.

5 Tips to Tell OEM and Copy LCD of iPhone 6

Tip 1: Apple Logo

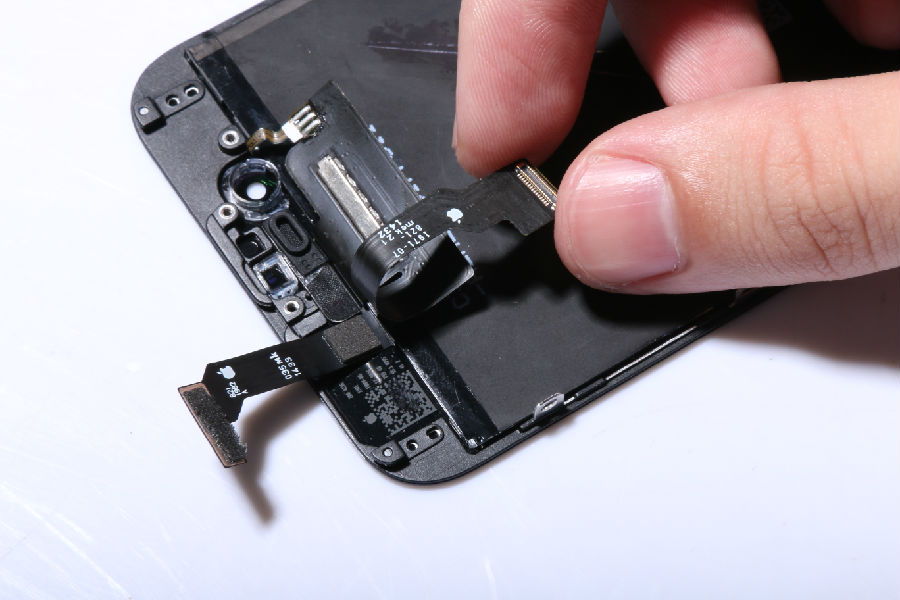
The most obvious evidence towards an OEM iPhone 6 LCD screen is whether or not Apple's logo is present. Are there Apple logos on both the LCD screen flex and digitizer's flex cables? Moreover, is there an Apple logo printed on the back of the LCD screen? If there are, then congrats! You have a 100% OEM manufactured and assembled iPhone 6 LCD screen and digitizer assembly.

Please keep this tip it in mind when you are buying iPhone 6 LCD screens. Additionally, there is a laser mark onthe front facing camera's retaining bracket and proximity sensor retaining bracket. If the laser mark is present then you will be able to see a blue layer film reflected in the light on the covers.

Tip 2: Cable Flexibility

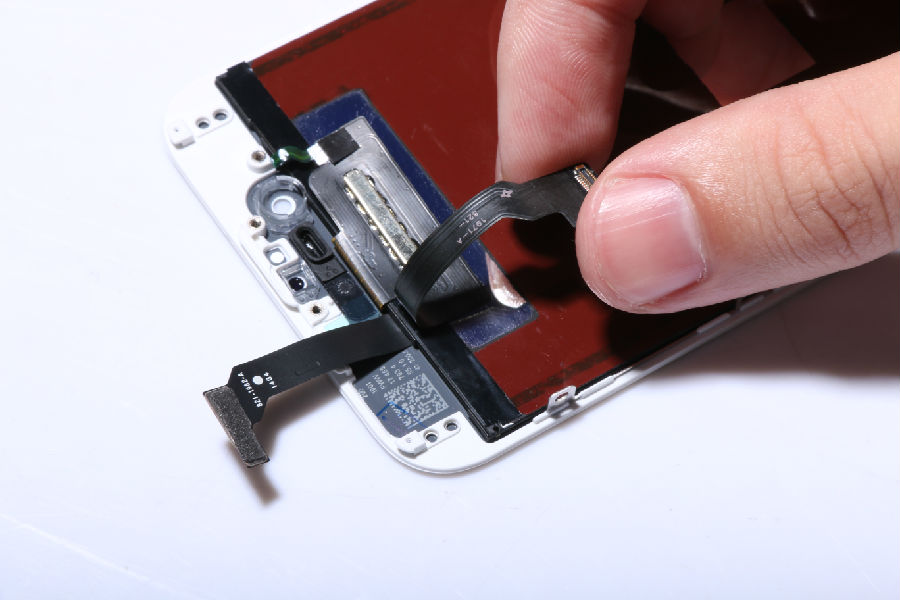
The next tip requires you to check out the flexibility of the flex cables. The OEM factories need to produce softer and more flexible digitizer flex cables to make sure that they will not break during installation and after being folded many times. These softer flex cables have a much higher production cost then standard hard flex cables. Keep in mind that only the digitizer's flex should be softer, while the LCD's flex will be harder even on the OEM.

Tip 3: Hydrophobic Glass

The OEM LCD screen's glass lens has a special material on its surface, making it hydrophobic. This means that water has no way to stick to the surface and will roll right off, but the material is made so that not even any liquid residue will be left over. It use to be that this was very expensive for 3rd party factories to produce, and residue or “mist” would be left over from the water rolling off the screen. Recently though 3rd party factories have been applying a coating that achieves this effect, but there are still many screens in circulation that do not have this coating.

Tip 4: Frame

The fourth tip to tell the difference is by the frame. Real OEM iPhone 6 LCD Screen Assemblies have a smoother and shinier frame. The difference between OEM and a copy part is not easy to describe accurately. The only way to figure it out is to touch and feel the parts, but essentially a real OEM part will have smooth brackets on the frame with no small metal shavings coming off them.

Tip 5: Appearance

Don't judge a book by its cover? Well in this case you can. Real OEM LCD screens are darker than fake copy ones. Compared with the original part, copy iPhone 6 LCD screens tend to have a gray tint to them. As for the glass lenses, the rim and the edges of the OEM part feels much smoother to the touch around the four corners. Reclaimed or copy parts may have kind of a rough trim on the rim and the edges.

One more tip. Look at the QR code on the back of the parts. Generally speaking, a QR code is printed on the back, which can't be wiped off easily on an OEM part, but a fake part's QR code will come right off with a little bit of rubbing alcohol.

If you have any questions, feel free to comment below or contact us by email at: service@etradesupply.com. We'll reply ASAP.

2015年7月6日星期一

Hardware Comparison of the Note 4 and Note Edge

The Samsung Galaxy Note 4 and Galaxy Note Edge were released almost at the same time and they share similar specifications, however, it’s known all over the web that the Galaxy Note Edge features a curved screen. Actually, there are a few other differences in the devices aside from the curved screen.
1. Side Keys
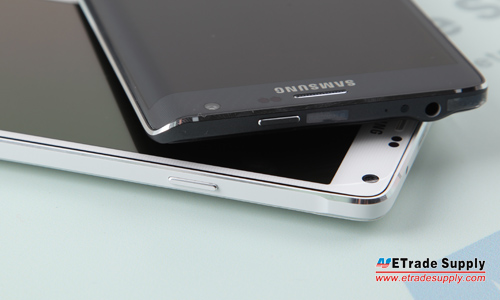
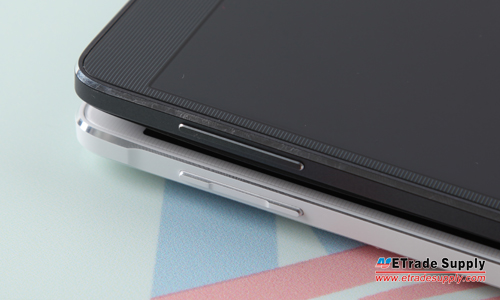
Inherited from the last generation of Galaxy Note, the Galaxy Note 4 power button is designed on the side, while it’s moved to the top in Galaxy Note Edge. The power buttons won’t be interchangeable either since they have a difference in size and shape between the two phones. Substituting the volume buttons won’t work either, obviously, as they’re different in design, too.
power buttonvolume button
2. USB Charging Port
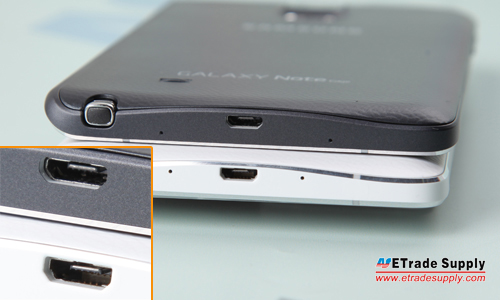
The Galaxy Note 4 and Galaxy Note Edge charging ports seem alike at first look, however, even if the USB charger ports are interchangeable, while the charging port flex cable ribbons are not. However, the chargers and USB data cables are compatible.
 charging port
3. Battery Door
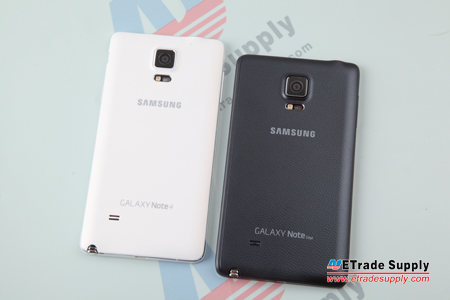
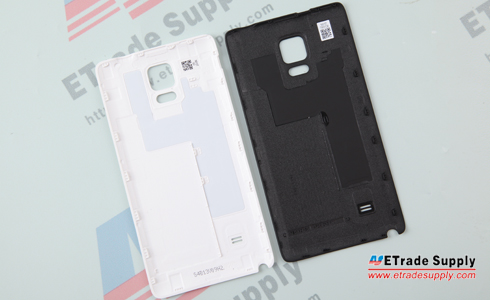
From the outside, the Note 4 and Note Edge battery covers look exact the same except for the printed logos. However, all of us were taught from a young age not to judge a book by its cover, which is fitting here. We found that the back covers hold more differences besides the printed logos, shapes and sizes when removing them to compare.
 battery door
battery door3
4. Battery
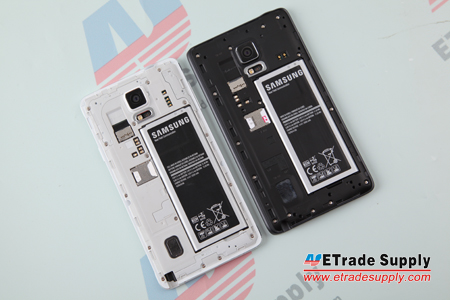
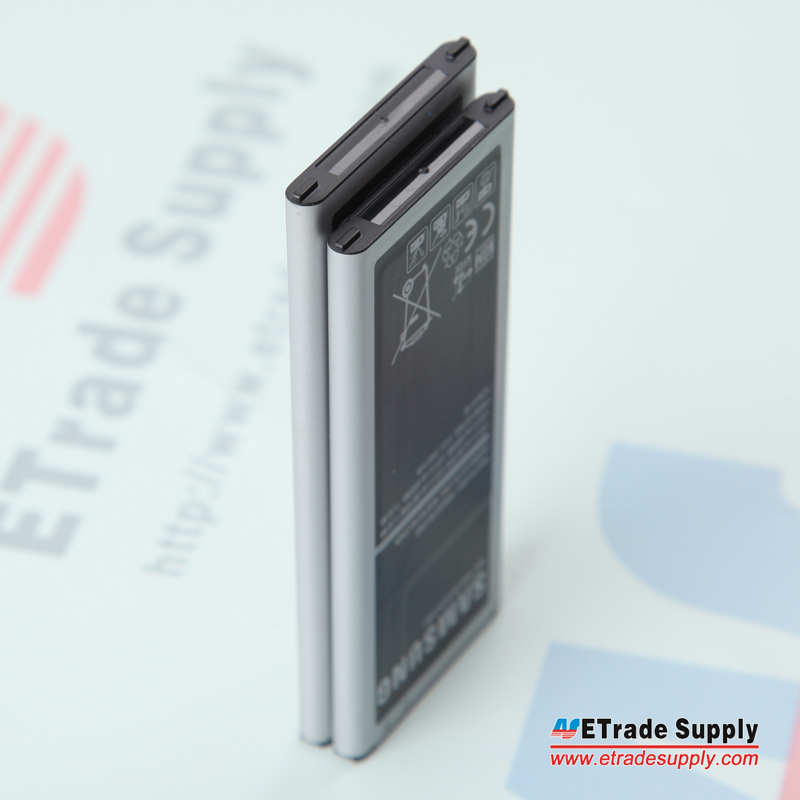
When opening the battery doors, don’t assume that the batteries are compatible. The Galaxy Note 4 has a 3220mAh battery, which is 220mAh bigger than the Galaxy Note Edge’s battery.
 rear housing battery
 battery 3
Stay tund for more hardware comparison after we tear down these two devices.

2015年7月5日星期日

How to Replace Xperia Z3+’s Charging Port

Charging port issues are common in the cell phone repair world. Since Sony recently released its new flagship Xperia Z3+, let's show you how to replace the Charging port in Sony Xperia Z3+. We hope you will find this guide helpful.

Tools Needed:
Hair Drier/ Heat Gun
PH00 Philips Screwdriver

Step 1:
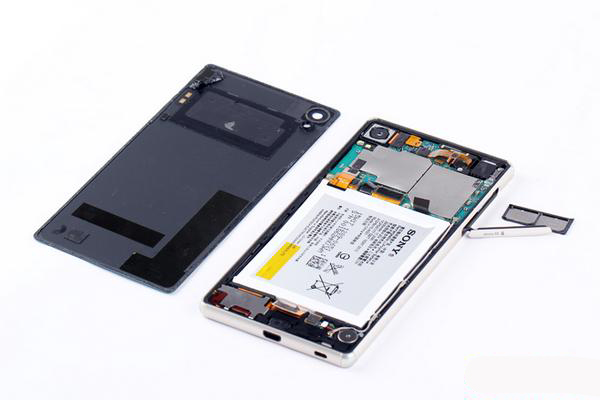
Power off the device and take out the Nano-SIM card tray. Use a hair drier or heat gun to heat up the rim of the battery door. After heating for no longer than a minute, to soften the battery door adhesive, you can use a suction cup tool to remove the battery door.

Step 2:
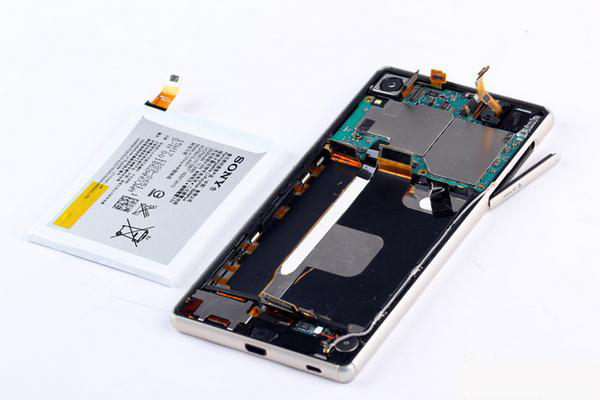
Disconnect the battery connector on the motherboard. You can remove the Xperia battery, but be very careful when using your spudger to pull out the battery as it is held in with some adhesive. The adhesive is not very sticky, but you will still need to be careful.
 
From the pic, you can see that the Xperia Z3+'s battery has a capacity of 2930mHA.

Step 3:
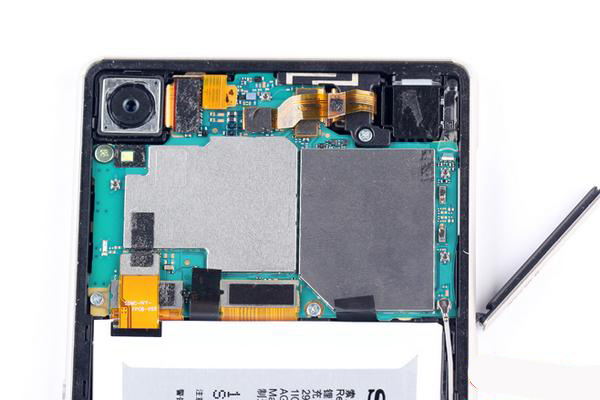
Undo the 4 screws in the motherboard; then you can easily remove the board. In fact, there is no need to actually remove the motherboard to replace the charging port, but it will be easier to do the replacement with it out.
 

Step 4:
Use a case opening tool and spudger to remove the charging port flex cable connected on the left of the middle plate.
 

Step 5:
After replacing the charging port flex cable, you’ll want to put the motherboard back and replace the 4 screws in the motherboard, then connect the battery connector to the motherboard. Notice: We recommend using 3M adhesive to make sure the charging port flex cable sticks to the middle plate.
 

Step 6:
Replace the battery door, apply some adhesive on the edge to prevent separation.
 

This tutorial is to show you how to replace the Sony Xperia Z3+ charging port. It's not very complicated, but we definitely recommend finding a professional to help you out. One more note, since the Sony Xperia Z3 is supposed to be dust proof and water resistant over 1.5 meter and 30 minutes, it won't be waterproof after disassembly and reassembly.

Any questions, feel free to contact us at service@etradesupply.com or just comment below.

2015年7月2日星期四

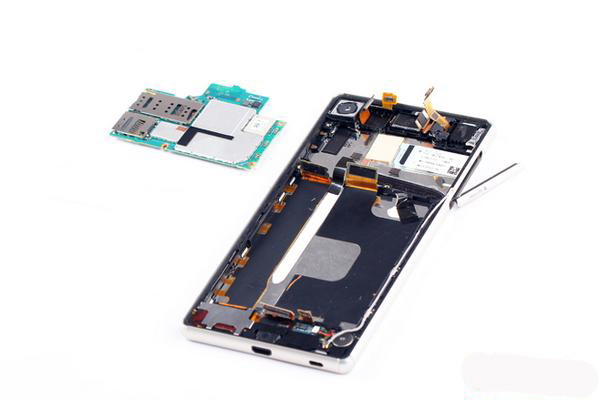
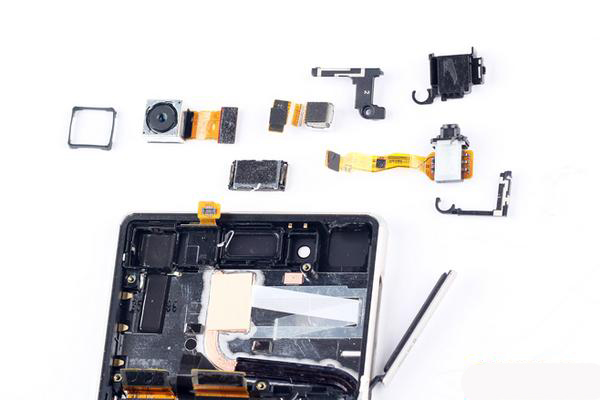
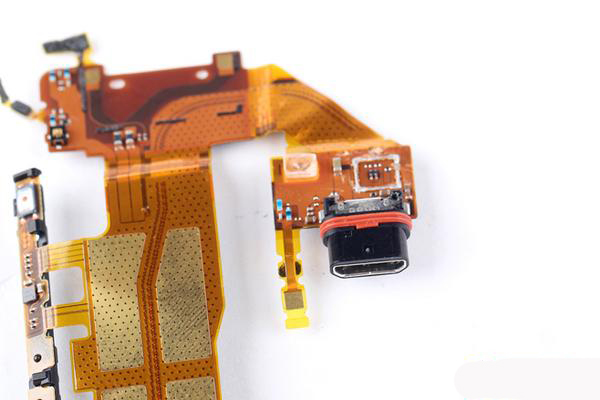
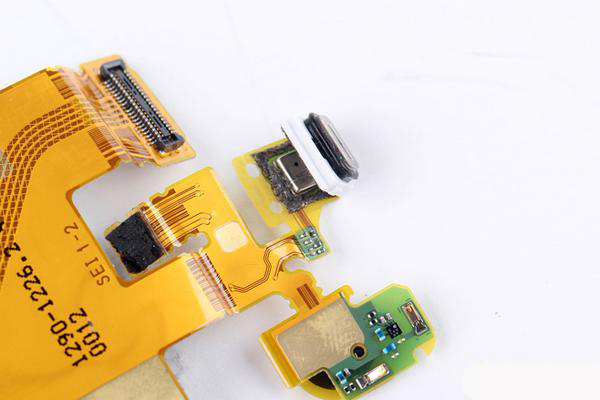
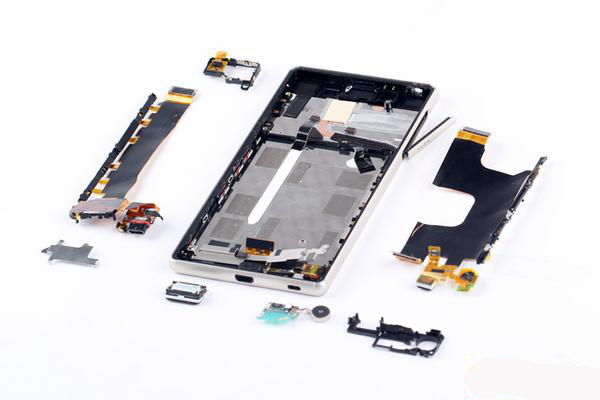
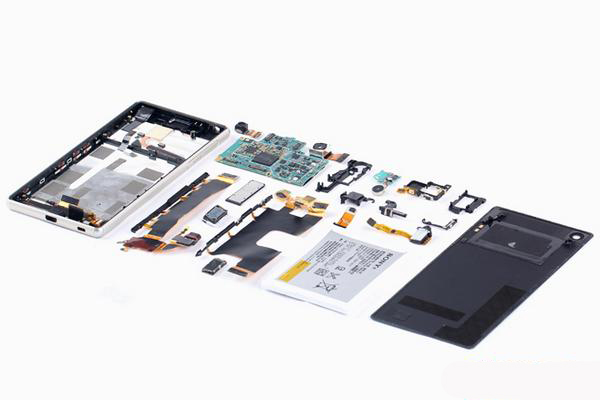
How To Disassemble/Tear Down Sony Xperia Z3+ Dual

The Xperia Z3+ Dual, also known as the Xperia Z4 was released in May as Sony’s latest flagship phone. Endless leaks of this new generation Xperia from the inner structure to outer design were explored not long after the Xperia Z3 was released in September of 2014. Well, now let’s have a closer look at what’s inside the Xperia Z3+ Dual.

Tools Needed:
Hair drier/Heat gun

1. Power off the device, open the SIM card cap and remove the card tray. Then heat up the back to soften the battery door’s adhesive, insert the case opening tool to separate the battery door.
2. Pry up the battery, microphone and charging port flex connectors to release the battery. Be careful on this step as the battery is adhered to the front housing with some strong adhesive.
3. Undo the 4 screws, pry up the camera’s flex connectors and the signal cable connectors to release the motherboard.
4. Remove the smaller parts set into the rear housing: front facing camera, rear facing camera, ear speaker, earphone jack and the retaining brackets.
5. Remove the charging port flex ribbon, microphone flex, vibrating motor and the retaining brackets.
The Xperia Z3+ Dual is now completely disassembled.

2015年7月1日星期三

How To Choose The Right LG Nexus 5 Screen For You


Recently, some customers reported that they’re really confused by the different LG Nexus 5 screens on our website. Here is a list we made to hopefully remedy that problem.

First, take a look at the below chart.
SKUNameCompatible ModelCondition
With 
Frame
Frame
Color
Ear Speaker Mesh Cover
Color
ESLG14011619116-23-218OEM LG Nexus 5 D820 LCD Screen and Digitizer Assembly with Front Housing (No Small Parts, Black Mesh Cover) – Black – Without Any LogoD820Brand New, 100%    Original, A StockYesBlackBlack
ESLG14011619116-14-218OEM LG Nexus 5 D820 LCD Screen and Digitizer Assembly with Front Housing (No Small Parts, Black Mesh Cover) – Red – Without Any LogoD820Brand New, 100%    Original, A StockYesRedBlack
ESLG131212106119-23-218OEM LG Nexus 5 D820 LCD Screen and Digitizer Assembly with Front Housing (No Small Parts, White Mesh Cover) – Black – Without Any LogoD820Brand New, 100%    Original, A StockYesBlackWhite
ESLG14061319179-23-218OEM LG Nexus 5 D820 LCD Screen and Digitizer Assembly with Front Housing(B Stock) (No Small Parts, Black Mesh Cover) – Black – Without Any Logo D820Brand New, 100%    Original, B StockYesBlackBlack
ESLG1410132824-23-218OEM LG Nexus 5 D820 LCD Screen and Digitizer Assembly with Front Housing (No Small Parts, Black Mesh Cover) (Assembled Flex) – Black – Without Any LogoD820Brand New, Not 100%    Original, A StockYesBlackBlack
ESLG131209106115-23-218OEM LG Nexus 5 D820 LCD Screen and Digitizer Assembly – Black – Without Any LogoD820, D821Brand New, 100%    Original, A StockNOW/OW/O
ESLG1410132823-23-218OEM LG Nexus 5 D820 LCD Screen and Digitizer Assembly (Assembled Flex) – Black – Without Any LogoD820, D821Brand New, Not 100%    Original, A StockNOW/OW/O
(Notice: click the SKU or name if you’d like to know more information about the price.)

Here are some further explanations about the conditions of different parts.
A Stock: Replacement parts that are brand new.
B Stock: Replacement parts that have some scratches or other blemishes, but function perfectly.
100% Original: Replacement parts that are 100% manufactured and assembled by the original companies.
Assembled Flex: Replacement parts that are 100% manufactured by the original company, but assembled by non-original companies and function perfectly.

If you still have no idea which to choose, please contact us via Live Chat or email us at