2015年6月21日星期日

How To Fix HTC Nexus 9 Charging Port Replacement


Charging port problems like slow charging or not charging at all are commonly seen in cellphones after frequent use. When your device experiences charging problems, first thing you should do is to check whether the charger is an original or not. Using a non-original charger you risk causing damage to your device and yourself.

Having dust or lint in your phone’s charging port can also prevent charging. In this event, what you’ll need to do is to clean the USB port with some household tools like: a needle, a toothpick, a bobby pin or a Q-tip. Rubbing alcohol can also help it evaporates quickly, and is always good for cleaning electronic equipment.

However, if a charging port fails to work after prolonged use, perhaps replacing the charging port is the best way to fix it.

Here is a tutorial on how to replace the HTC Nexus 9’s USB charger port to you with your charging woes.

Tools Needed:

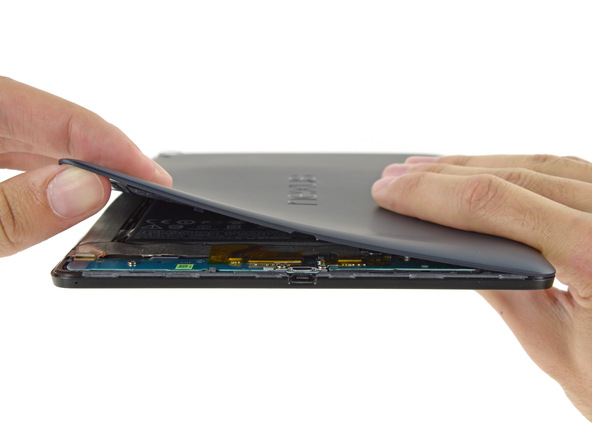
Step 1: Remove The Nexus 9 Battery Door.
▪ Power off the device.
▪ Remove the battery door by hand.
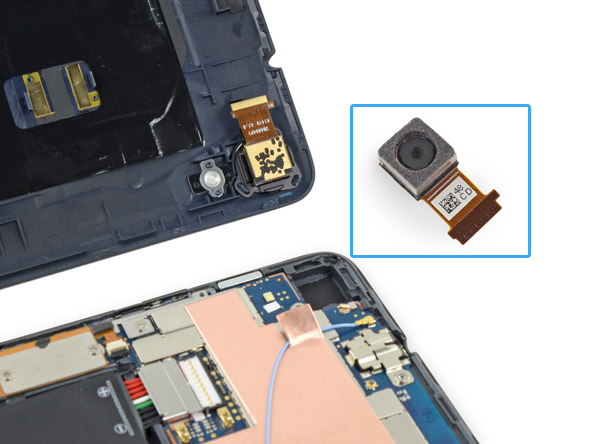
(Notice: the rear facing camera is set in place between the battery cover and motherboard, be careful not to damage it.)

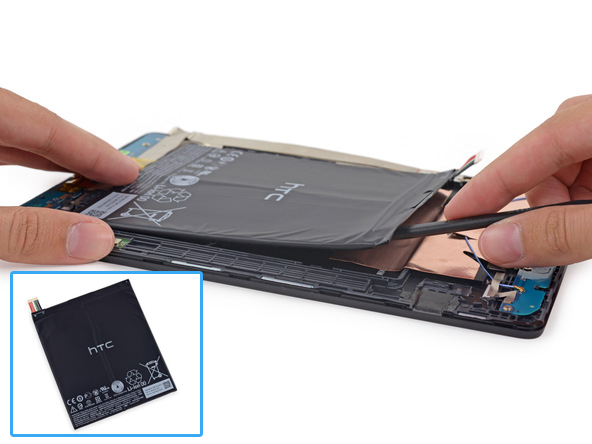
Step 2: Remove The Nexus 9 Battery.
▪ Gently pry off the battery.
(Notice: the battery is glued to the frame with some strong adhesive, be careful.)

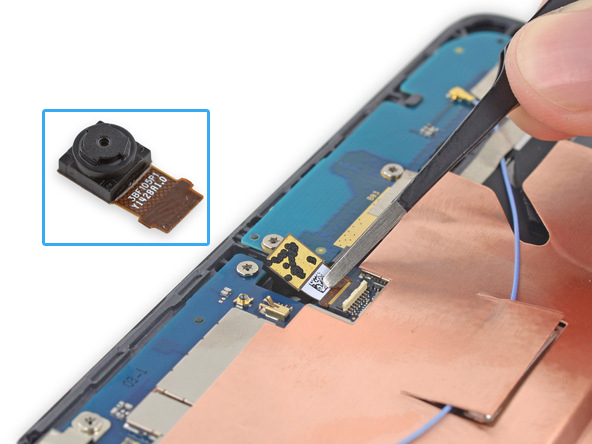
Step 3: Remove The Nexus 9 Front Facing Camera.

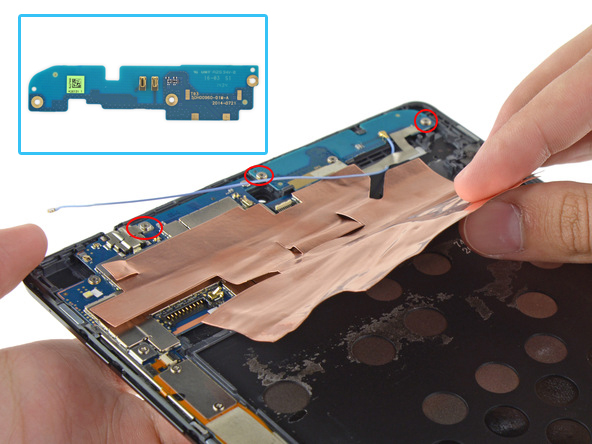
Step 4: Remove The Nexus 9 Antenna Board.
▪ Remove the copper shield.
▪ Undo the 3 screws to release the antenna board.

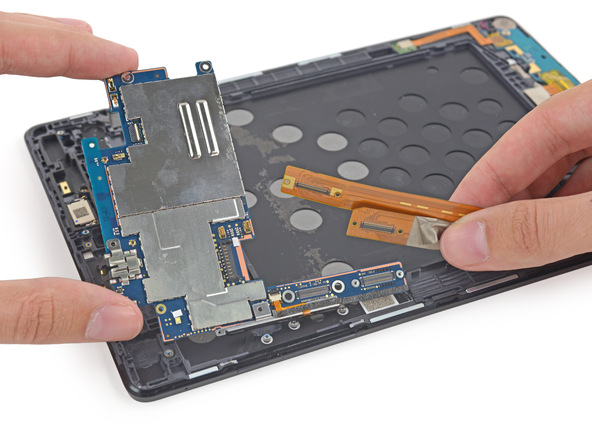
Step 5: Remove The Nexus 9 Motherboard.
▪ Remove the flex ribbon connectors.
▪ Undo the screws to release the logic board.

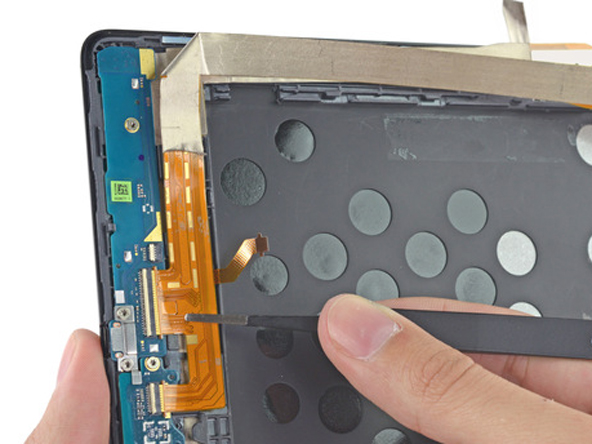
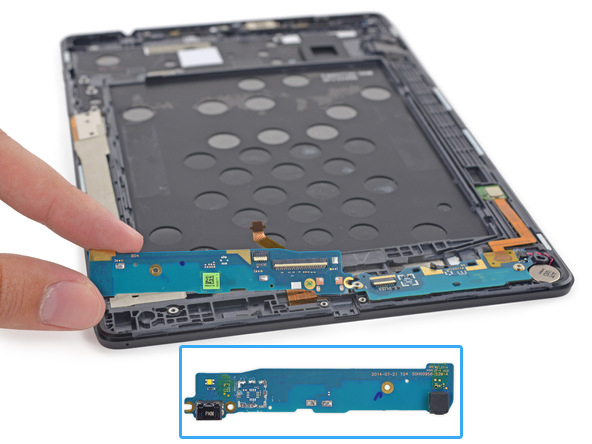
Step 6: Remove The Nexus 9 Charging Port Assembly.
▪ Remove the flex ribbon connectors.
▪ Remove the USB charging port assembly.

And now, reassemble it with a new charging port in the reverse orders. If you’d like to know how to replace a broken Nexus 9 screen, you can check it out here: How To Repair A Cracked Nexus 9 Screen Replacement

2015年6月19日星期五

Top 5 Selfie Mobile Phones You Don’t Want To Miss


Taking selfies has become widely popular around the world in these recent years, as a result so have selfie-focused smartphones. The main difference between selfie-focused mobile phones and other phones is that selfie phones usually feature advanced front facing cameras, aimed at making selfies more attractive.
Love taking selfies? 
Time to upgrade your phone now, here are the top 5 selfie-designed smartphones just for you.

#5: Oppo N1
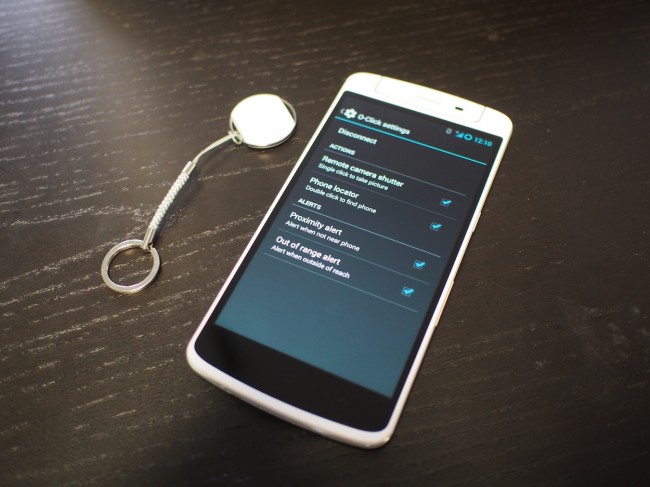
Undoubtedly, the Oppo N1 is the first phone equipped with a rotating camera in the world. This revolutionary rotating camera features 206° of rotation, and enables the camera to be locked at any angle. That’s to say, no matter what angle you choose to take a selfie, the shots are just as impressive as the back facing ones. What’s more, the Oppo N1 comes with a remote control named the O-click, which allows you to control aspects of the phone via Bluetooth.
But if you’re enthusiastic about innovative technology, we recommend you to checkout the Oppo N3. This new generation phone features a camera with a built in motor for handless rotation, and the smartphone allows you to control the angle via on-screen gestures, the O-Click 2.0 Bluetooth Remote Control or Touch Access.
 oppo n1 with o click

#4: Nokia Lumia 735
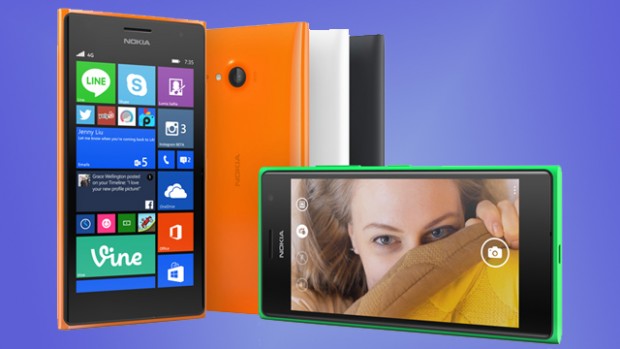
In the past, we post an article about the World’s Biggest Selfie Powered By Nokia’s Lumia 730, reporting the biggest selfie ever captured with 1,151 people included with a Nokia Lumia 730. As the twin of the Lumia 730, the Single-SIM Lumia 735 is another selfie smartphone with a 5 MP front-facing camera and wide-angle lens.
 lumia 735 selfie

#3: Sony Xperia C3
As described by Sony on their official site, the Xperia C3 is perfect for selfies as it’s a Quad-core Android phone sporting a 5 MP Superior Auto front camera with soft LED flash and a 25 mm wide-angle lens. Another reason why the Xperia C3 is specially designed for selfies is its 25 mm wide-angle lens sporting an 80 degree field of view. With the Exmor RS™ technology, HDR (High Dynamic Range) and Superior Auto mode, the Xperia C3 can create stunning shots in any light.
 xperia c3 selfie

#2: HTC Desire Eye
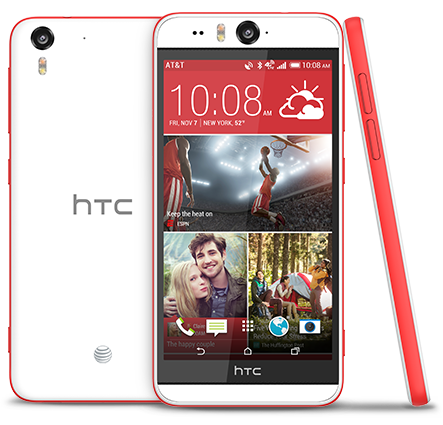
Released in this November, HTC’s Desire Eye is another extraordinary selfie focused smartphone. The front camera will have as many as 13MP, which is the same as the back camera. With the dual LED flash and built-in selfie tools for instant edits, the HTC Desire Eye will give you high quality pictures even in low light settings.
 HTC Desire Eye Selfie

#1: Huawei Ascend P7
The Ascend P7 comes with an innovative Panorama Selfie feature, which means you can create spectacular self-portraits with a wide panoramic background. Huawei defined the Ascend P7 as a “groufie” not “selfie” smartphone because the 8MP front-facing camera and software make it easy for users to capture panoramic group shots in the selfie style.
Remember that selfie from the Oscars featuring a group of celebrities all cramming into the shot? Well, if it had of been shot by a Huawei Ascend P7, perhaps Ellen could have fulfilled her wish of squeezing in more celebrities for the shot.
  huawei ascend p7 oscar selfie

Reasons Behind & Solutions for iPhone 6 Frame and LCD Separation Issues

       
        Reasons Behind & Solutions for iPhone 6 Frame and LCD Separation Issues

Undoubtedly, OEM parts are better than refurbished or aftermarket parts whether in quality or durability. However, as the OEM parts are far more expensive and the supply is not always that stable, most repairs are done with refurbished or aftermarket parts, which can result in many irritating problems. For example, currently iPhone 6 frames are suffering from separation after being assembled with the LCD assemblies. Here we’re going to explain why this happens and how to prevent it.

Reasons:
1. Glue
Generally, iPhone 6 LCD assemblies and frames are held together by PUR glue, which has two types HMG (Hot Melt Glue) and CPG (Cold Press Glue). OEM factories use CPG to assemble the screen and frame, which requires 15 seconds cooling time, 2-3 hours protecting time (Protecting time: time to keep the mold to hold the glued parts). It needs higher cost, longer working time and better equipment to produce and handle. While the assembled flex or refurbished iPhone 6 screen replacements are glued with HMG which the cooling time is 10 seconds and the protecting time is only around 6 seconds. It costs less, doesn’t require a strict working environment, has a shorter working time and results in weaker stickiness.
HMG quality also varies by Low, Middle and High grades due to the different prices. Most third-party manufacturers use mid-grade glue for Apple products, however, it is not sticky enough to meet the higher requirements as the iPhone 6’s frame is thinner and the screen is bigger than previous models.

2. Frame
For assembled flex and refurbished iPhone screen assemblies with frames, both the frame and the front glass are high copies, and the frame is custom-made according to the size of the original front glass. After the molds of these two parts have been made, third party factories will constantly use them which means once the frame separation problems had occurred, many of the parts have already been sold in the market previously and currently.
The sizes of the iPhone 4/4S, 5/5C/5S and 6 frames are as follows.
Model
iPhone 4/4S
iPhone 5/5C/5S
iPhone 6
Frame Width
1.5 mm
1.4 mm
1.4 mm
Screen Size
3.5 inches
4.0 inches
4.7 inches

We can see that the edge of the iPhone’s frame has been getting progressively thinner and thinner, thus the bonding area of the screen and frame is getting smaller. As we mentioned before not only is the problem with the mid-grade glue, but also with the machinery as well as the process that is used for previous iPhone models are not applicable any longer.

As you can see, there’re black areas on the bottom of 5/5C/5S and 6 frames. OEM factories will apply adhesive on that area, while many third-party factories won’t apply any adhesive to those areas in order to cut costs, which results in the glass separating from the frame.

The quality of high copy frames and front glass are not as good as OEM ones, the surface areas of these two high copy parts may not be smooth enough to ensure sufficient contact for the adhesive. This is also a reason why the frame tends to fall off.

 Extended Research: Why the assembled flex frames have a higher refurbish rate than the OEM ones?
The high copy frames used in assembled flex parts are not as strong as the OEM counterparts, and third-party factories have lengthened the height of the frame in order to increase the bonding area. The height ofOEM iPhone 6 frames is 0.89 mm VS 1.18 mm for the high copy iPhone 6 frame.

3. Glass
  iPhone 6 Frame                             iPhone 6 Glass
The assembly work put into iPhone 6 screens and frames should be done in a dust-free room, but many third-party manufacturers are unable to meet this standard. Dust easily sticks to the glass unless these conditions are met, which will affect the quality of the glue.
Besides, there’s a varnish on the bottom of the iPhone 6 glass, if it is not sticky enough and coming off, the frame is guaranteed to come off as well.

ETS Solutions:
1. Working Standards
▪ Use high grade HMG to assemble iPhone 6 LCD assemblies and frames
▪ All work is done in a dust-free room.
▪ Closely monitor the timing and temperature during the assembly work. (Cooling time: 15 seconds).

2. Source Standards
▪ Frame thickness should be less than 1 mm.
▪ Carefully select glass lenses with stickier varnish.

3. QC Standards
▪ Daily test: add forces when testing the frame, and peel the frame off the glass to test the strength of the glue.
▪ Durability test: after assembling the frame to the screen, heat the part at 50℃ for 30 minutes, then place it under 0 temperatures for 120 minutes.
2015年5月21日星期四

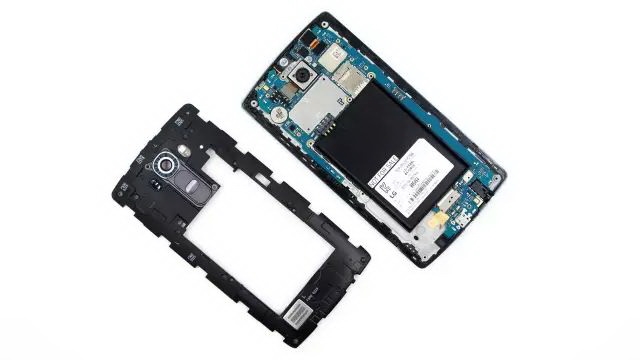
Quick Guide To Disassemble/Tear Down The LG G4

 Quick Guide To Disassemble/Tear Down The LG G4


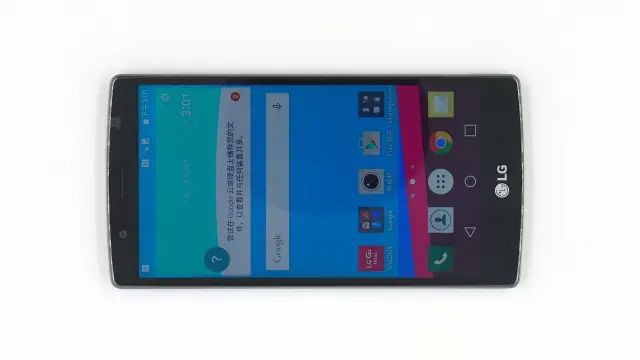
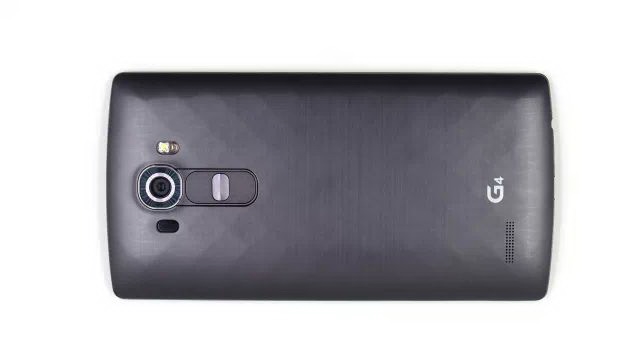
 LG’s new flagship the G4 features a 5.5-inch IPS LCD capacitive touchscreen that is protected by Corning Gorilla Glass 3, not the latest generation Corning Gorilla Glass. However, great news for individuals is that even though the LG G4 is a flagship device, it’s very easy to tear down and fix. Doubt it? Let’s have a look.


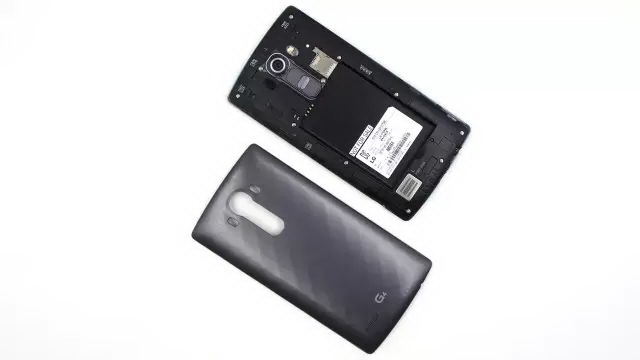
Step 1: Power off the device and remove the G4’s battery door without the help of a case opening tool or a pry tool.


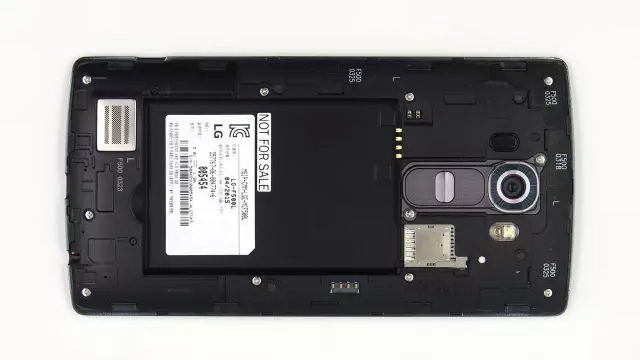
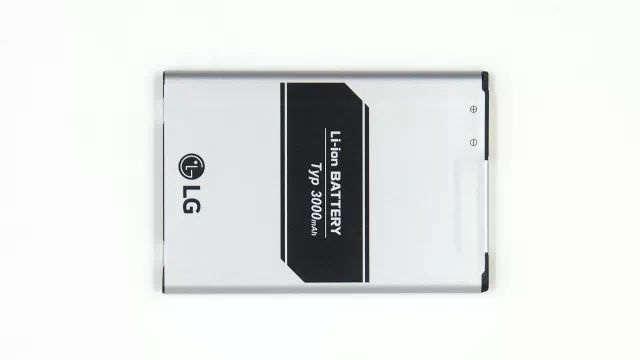
Step 2: Remove the G4’s removable battery.


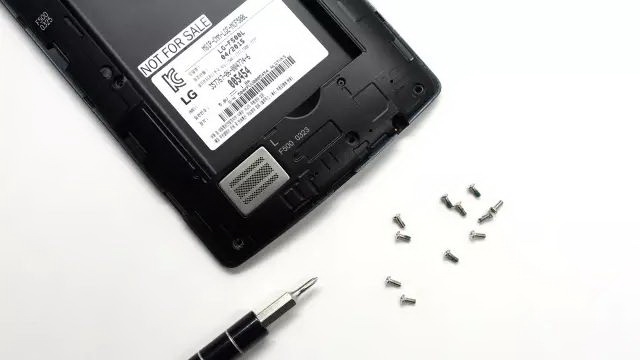
Step 3: Undo the 11 screws to remove the G4’s rear housing from the screen assembly.
Tip: the screws are all the same so no worries about mixing them up.


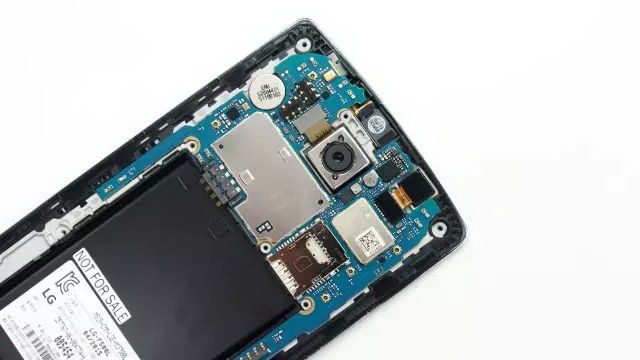
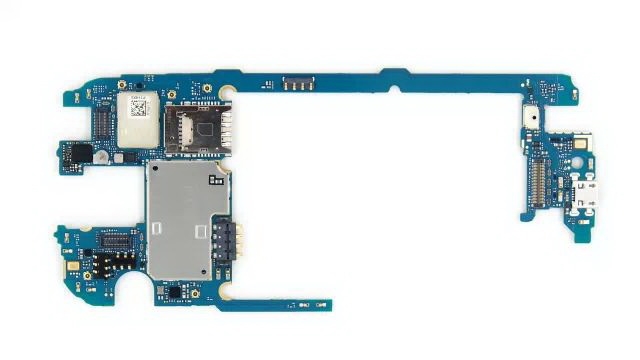
Step 4: Pry up the G4’s screen connector, front and rear facing camera flex connectors to release the logic board.


Step 5: Remove the back facing camera, vibrating motor, ear speaker and earphone jack from the front housing, and the disassembly is finished.


2015年5月12日星期二

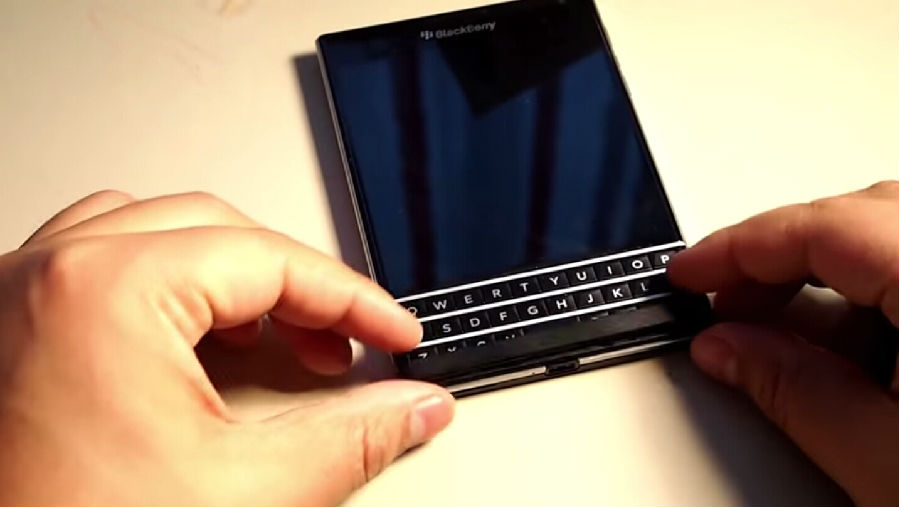
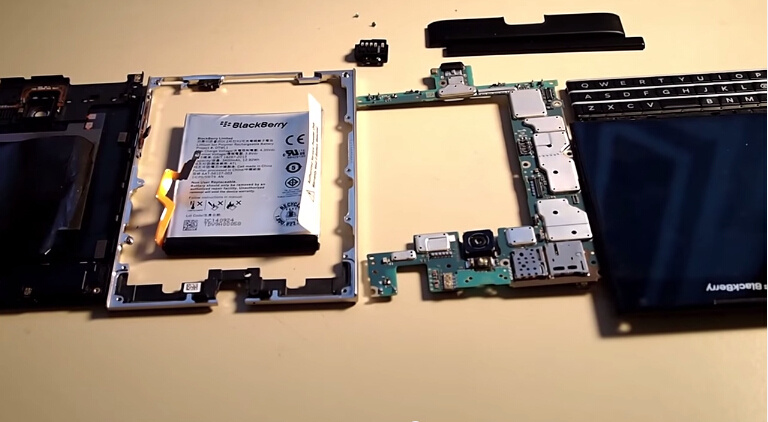
How to Tear Down The BlackBerry Passport within 10 minutes

How to Tear Down The BlackBerry Passport within 10 minutes


The BlackBerry Passport proved to be an easy device to disassemble. This phone is well designed, and its integrated parts help to make for a smooth disassembly. But as always we still recommend any repair work be done by a qualified person to minimize any risk of damaging the phone. If you have the know how to handle it here is the how to below.

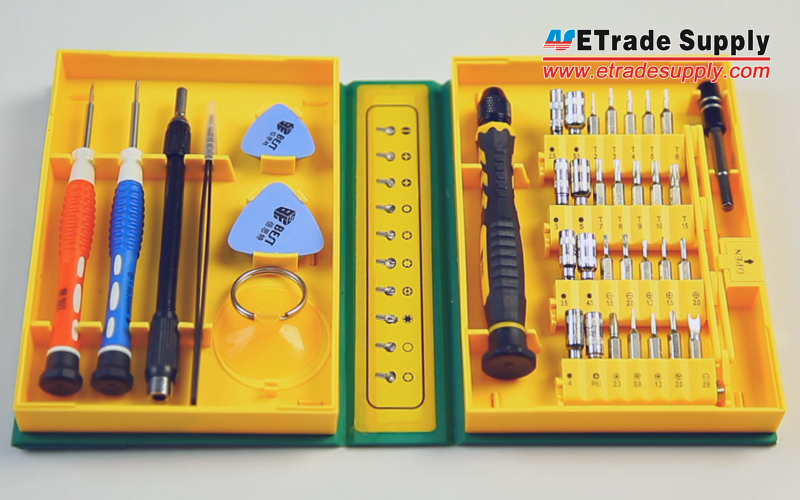
Tools Needed:
T4 Screwdriver
T1 Screwdriver
(Pics from techguyz708)

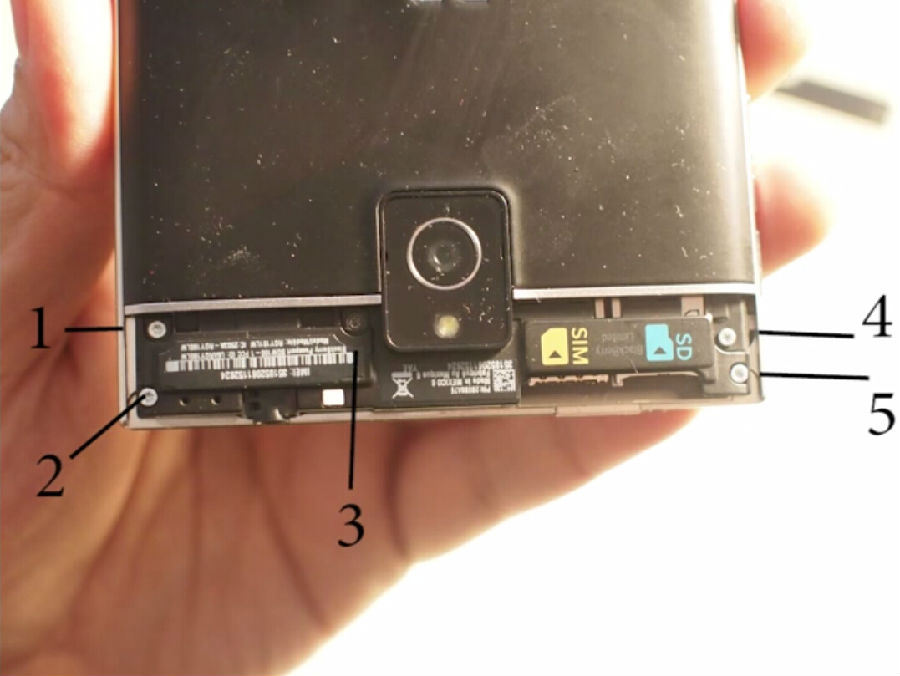
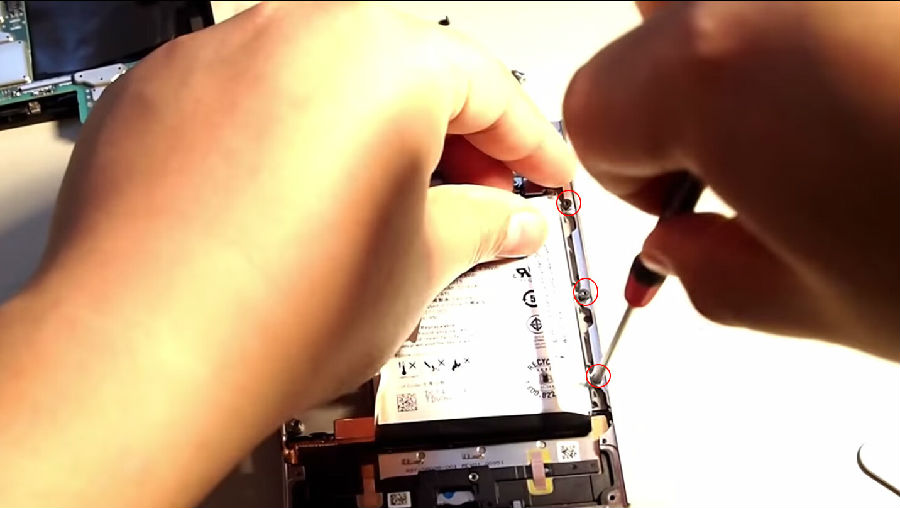
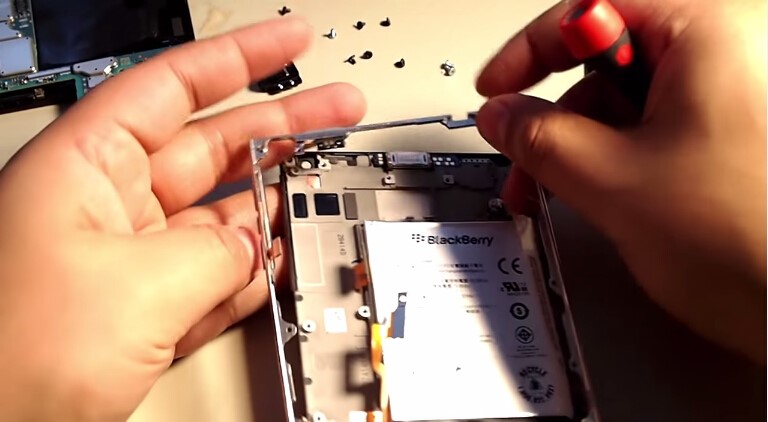
Step1: Pry up the top cover and undo the 5 screws, then pry up the bottom cover and undo 2 screws underneath.(Notice: These screws need to be removed by T4 screwdriver.)

Step 2: Remove the battery door, then undo 6 screws in the motherboard and disconnect the battery's flex cable connectors.

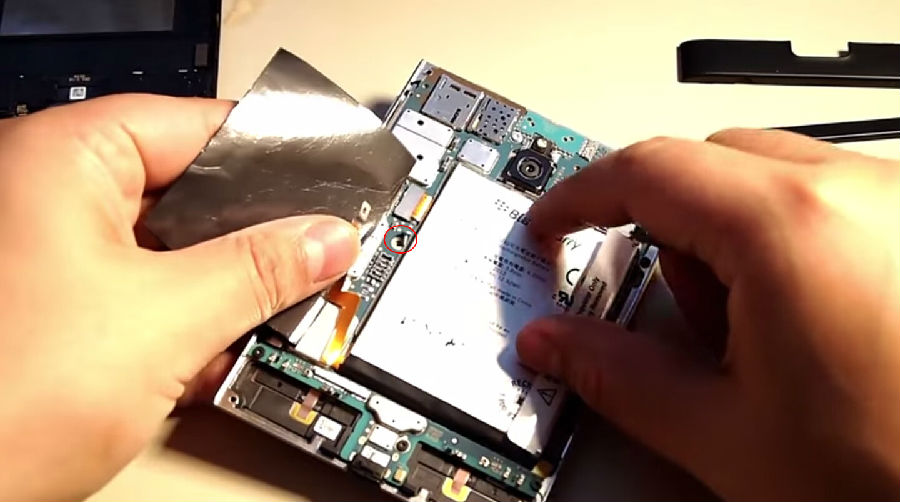
Step 3: Undo the screw securing the LCD screen plus digitizer assembly flex cable connector, and peel off the conductive fabric.

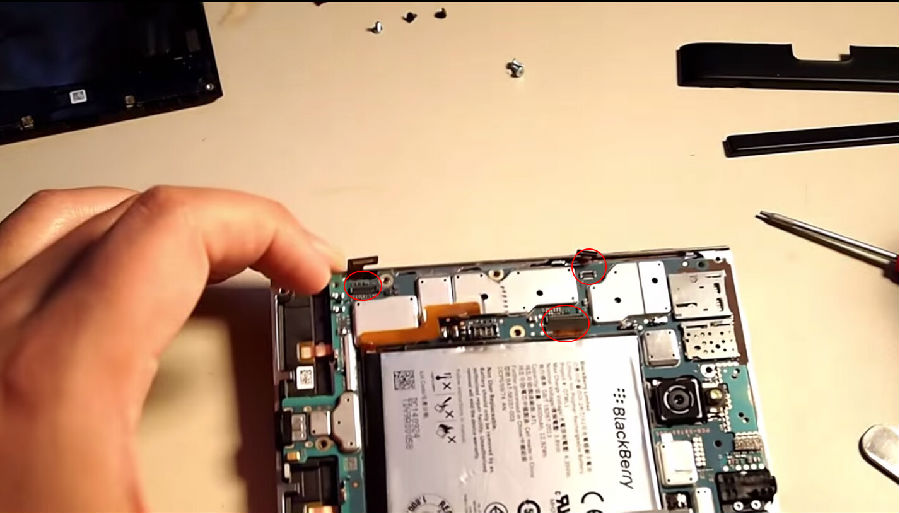
Step 4: Disconnect the connectors on the motherboard, including volume keys, battery and keyboard flex cable connector. 

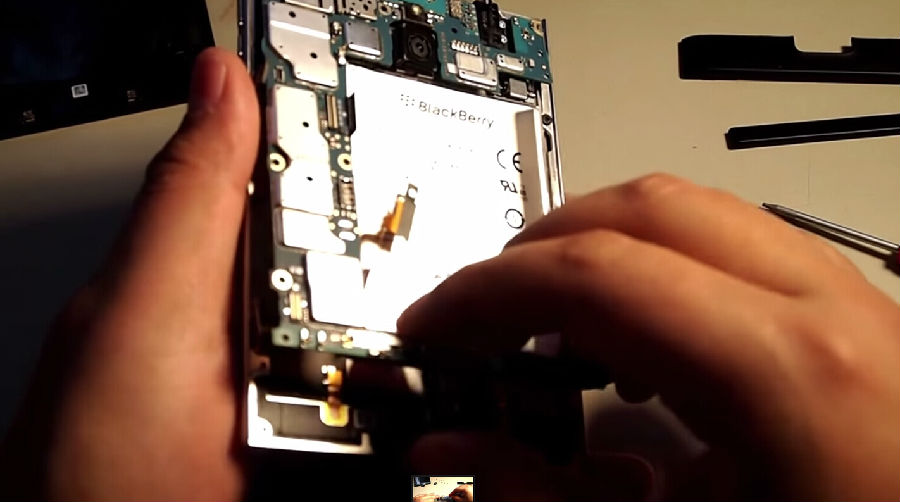
Step 5: Remove the motherboard.

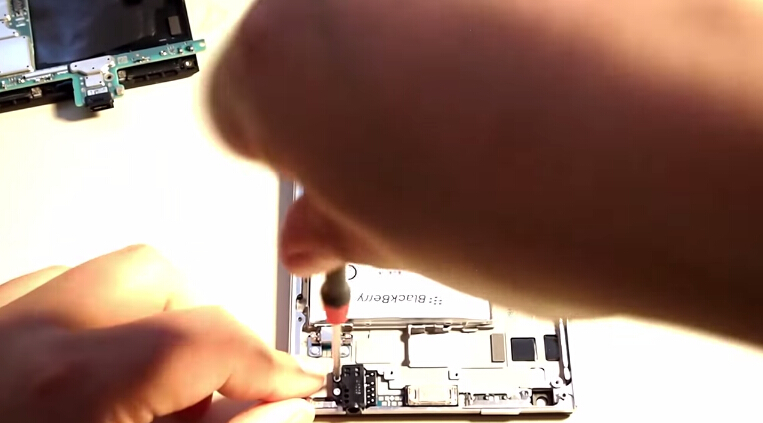
Step 6: Undo the 4 screws from the frame, and 2 screws in the earphone jack. Remove previously stated components.

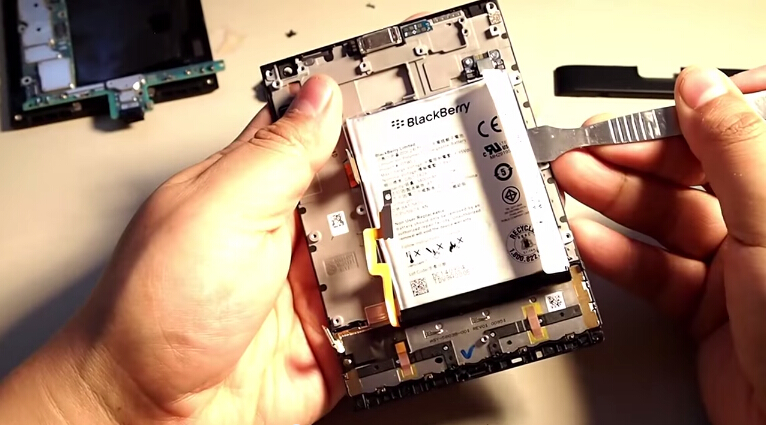
Step 7: Insert the spudger and remove the battery. (Notice: We recommend a plastic spudger, and be gentle. It will take some time, but it's much better to remove your battery undamaged.)

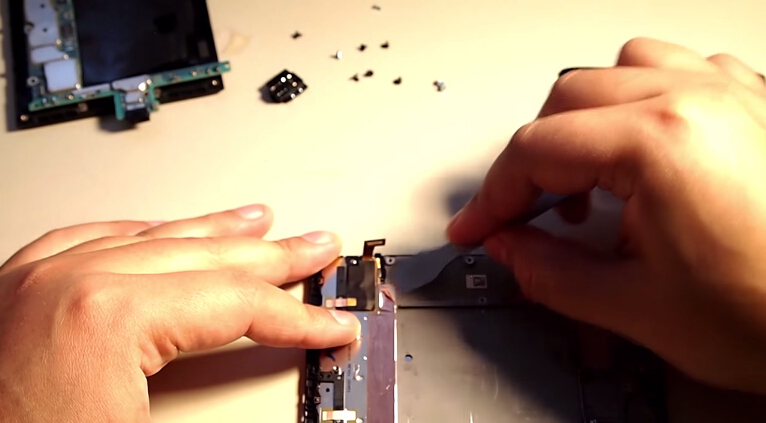
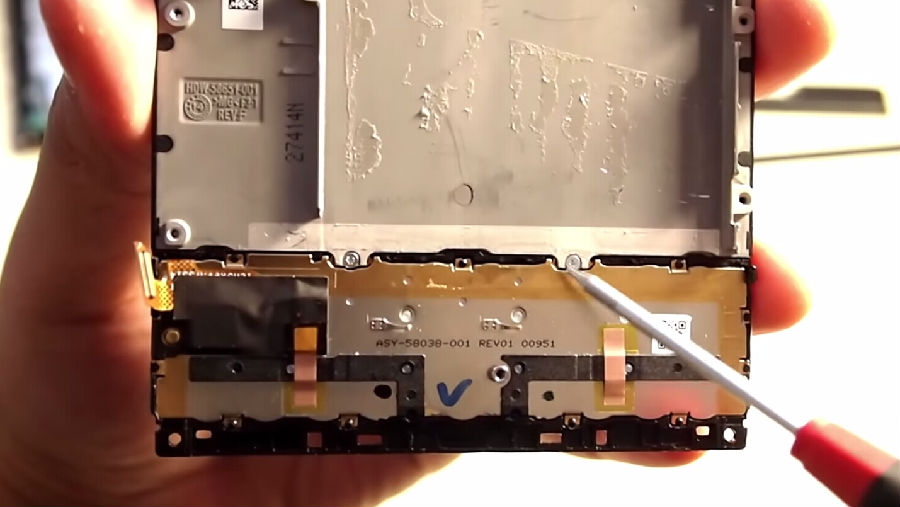
Step 8: Peel off the tape in the gap between the BlackBerry Passport LCD Screen and keyboard, then undo the 2 screws to release the keyboard. (Notice: the 2 screws in the gap between the screen and keyboard are smaller than the other screws, you will need to use a T1 screwdriver.)

It is quite easy to tear down the BlackBerry Passport. If you have any questions, feel free to comment below and let us know, we'd love to be able to help, or you can contact us by email: service@etradesupply.com. We will reply ASAP.

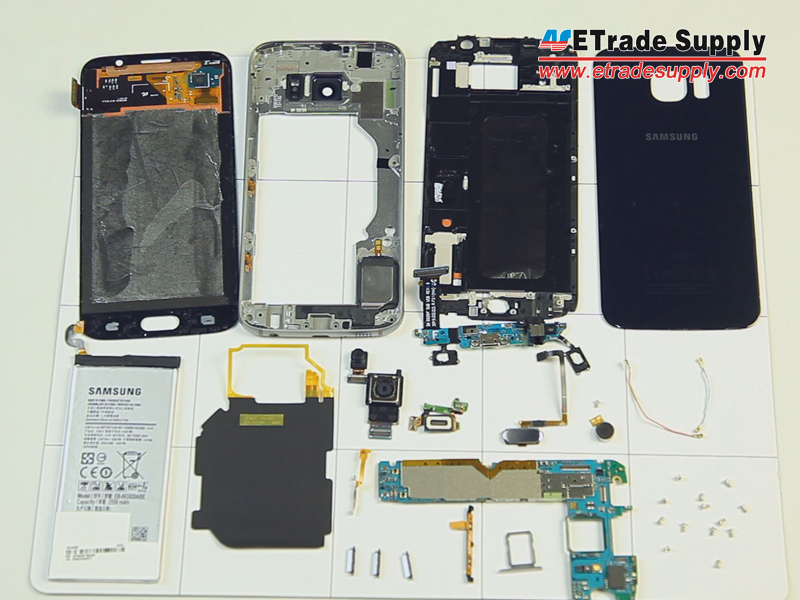
How To Tear Down The Samsung Galaxy S6 In 10 Steps

How To Tear Down The Samsung Galaxy S6 In 10 Steps 

Tools Needed:
▪ Heat Gun/Hair Dryer
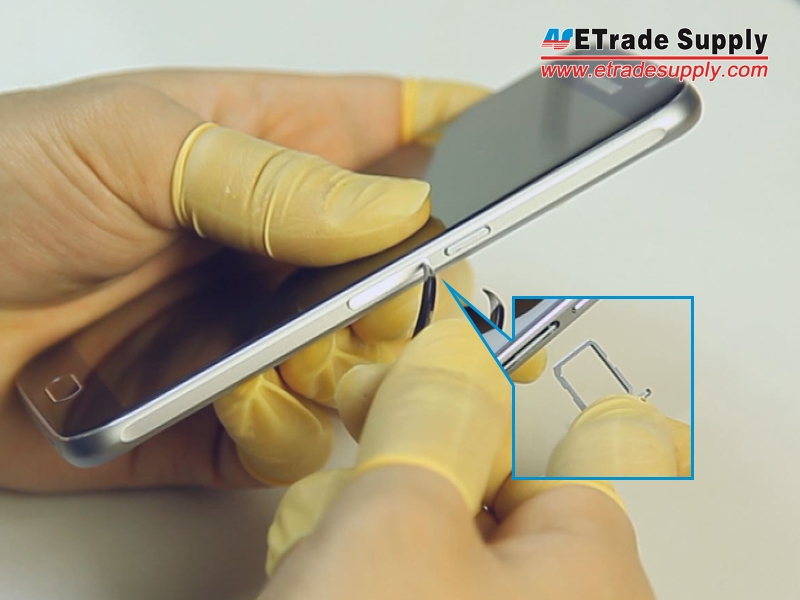
Step 1: Take Out The SIM Card Tray.
▪ Power off the Samsung Galaxy S6.
▪ Use an ejector pin or tweezers to take out the SIM Card Tray.
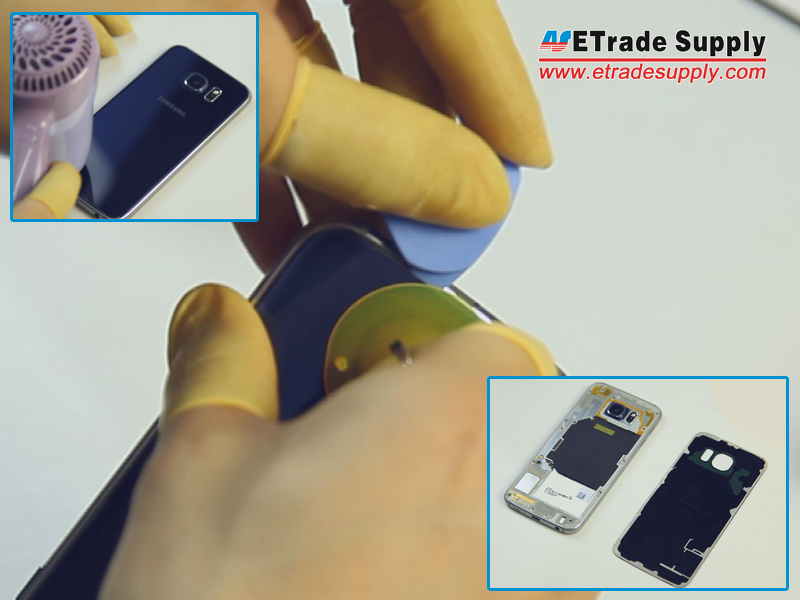
Step 2: Take Apart The Battery Door.
▪ Pull the battery cover up with a screen suction cup tool. (The battery door is stuck to the middle plate with some really strong adhesive, take your time to remove it)
▪ Separate the battery door with a case opening tool.
Step 3: Release The Rear Housing.
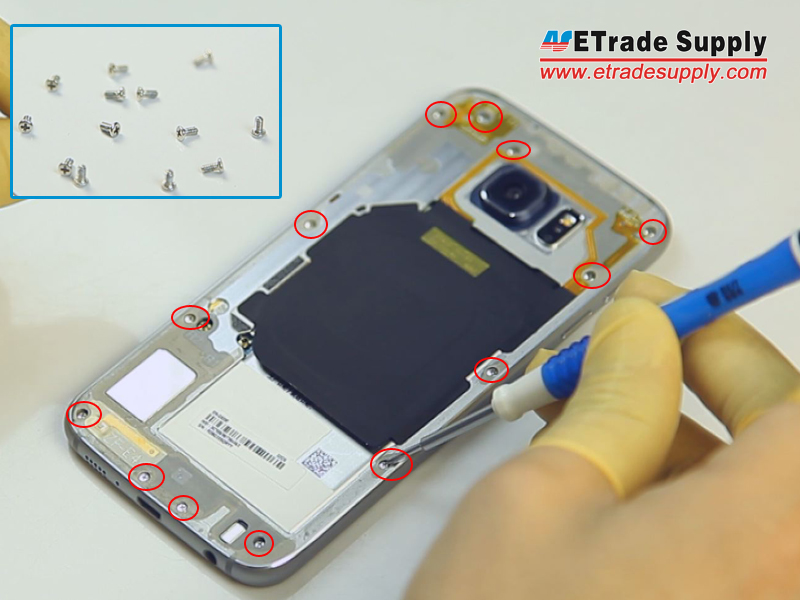
▪ Undo the 13 screws in the rear housing.
▪ Heat up the LCD Assembly.
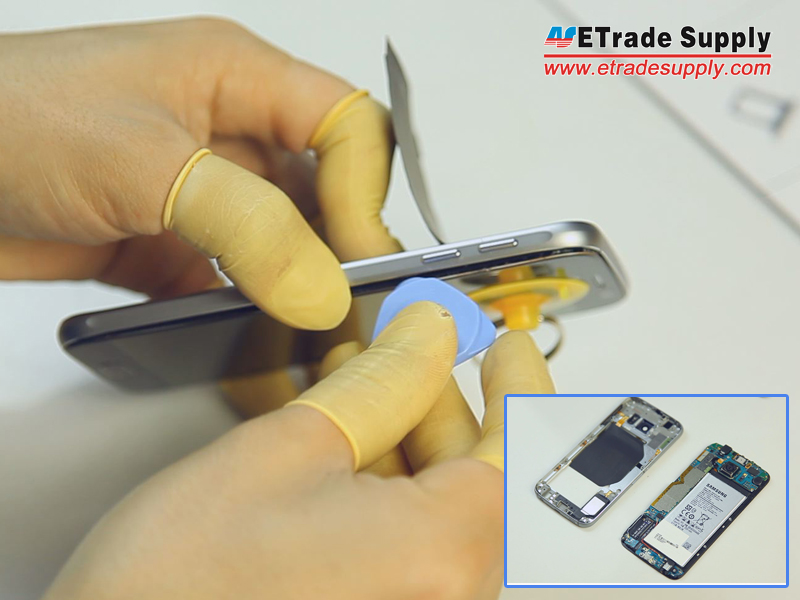
▪ Separate the rear housing from the LCD Assembly with the help of a suction cup tool and case opening tool.
(Notice: be careful not to damage the wireless charging chip attached to the battery.)
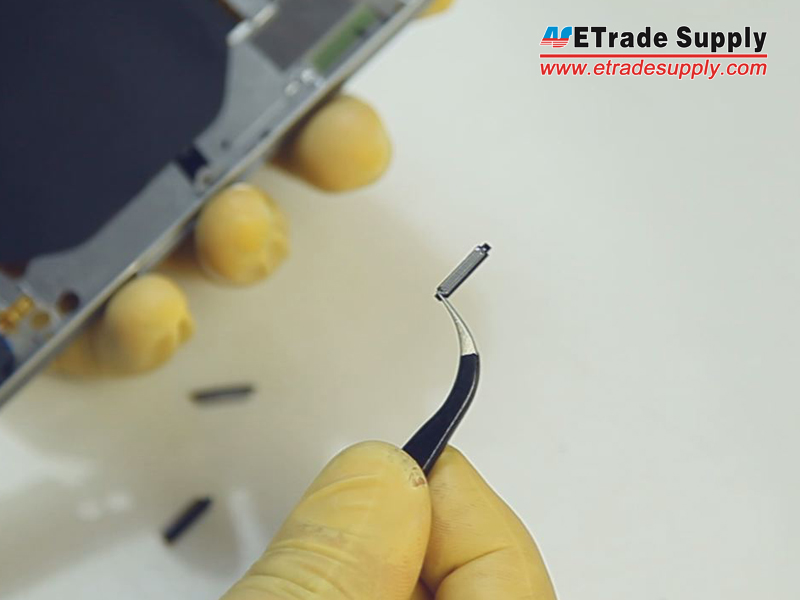
Step 4: Remove The Case Buttons.
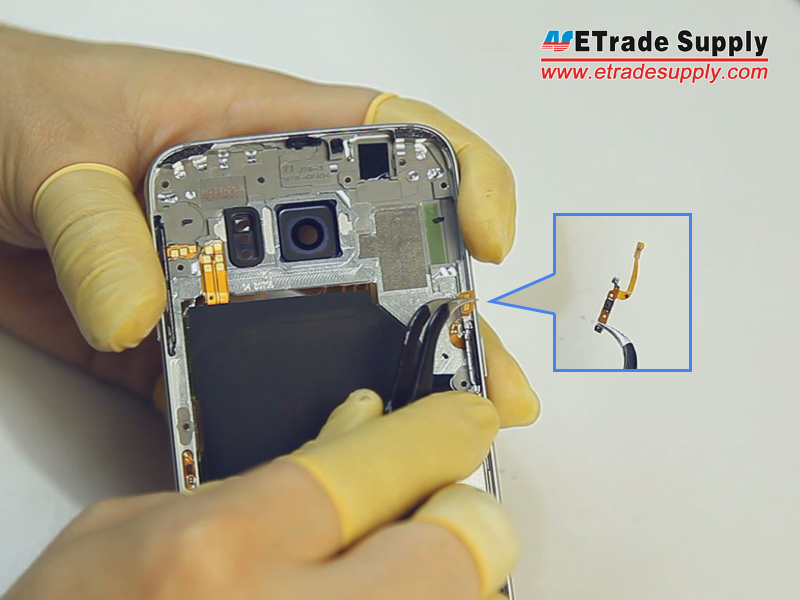
▪ Remove the power button flex.
▪ Remove the volume button flex.
▪ Remove the Case Buttons. (Notice: the Galaxy S6 power button and volume buttons are compatible with each other.)
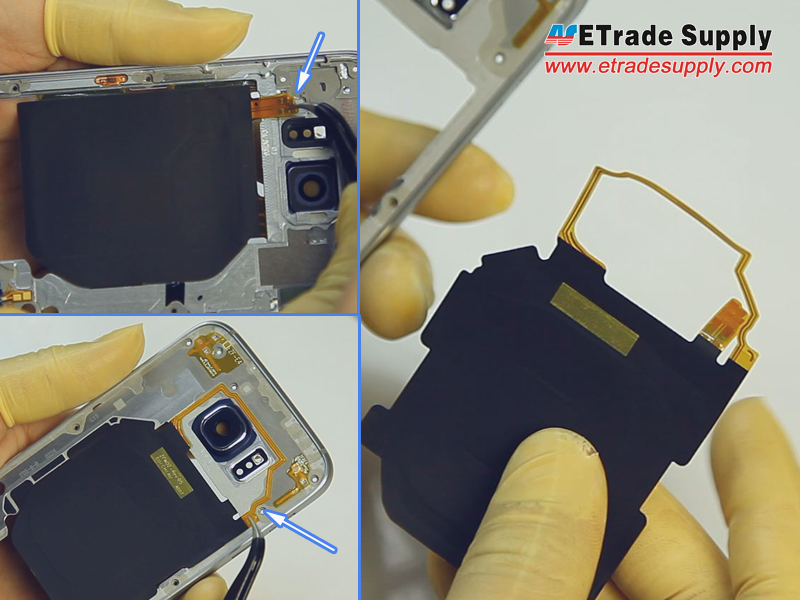
Step 5: Release The Wireless Charging Chip
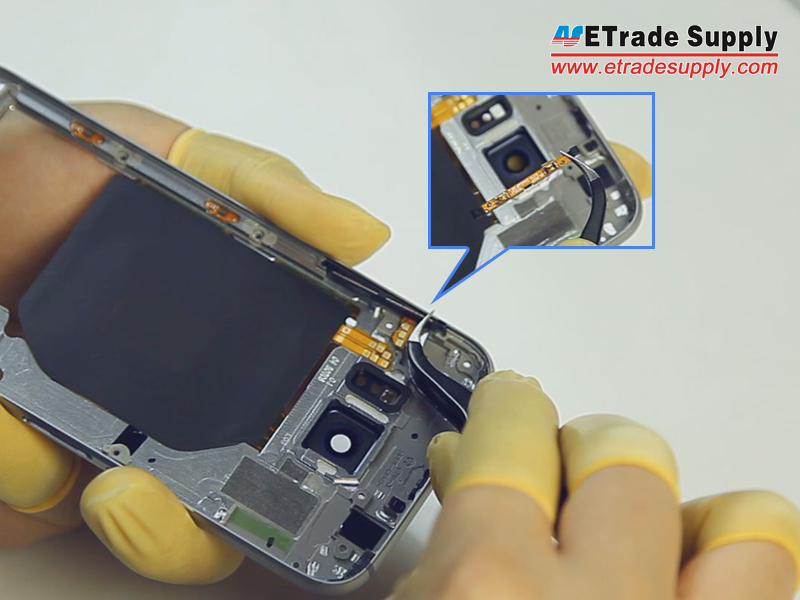
▪ Pry up the wireless charging coil's flex ribbons on both sides of rear housing. (Notice: be careful not to damage the flex ribbons.)
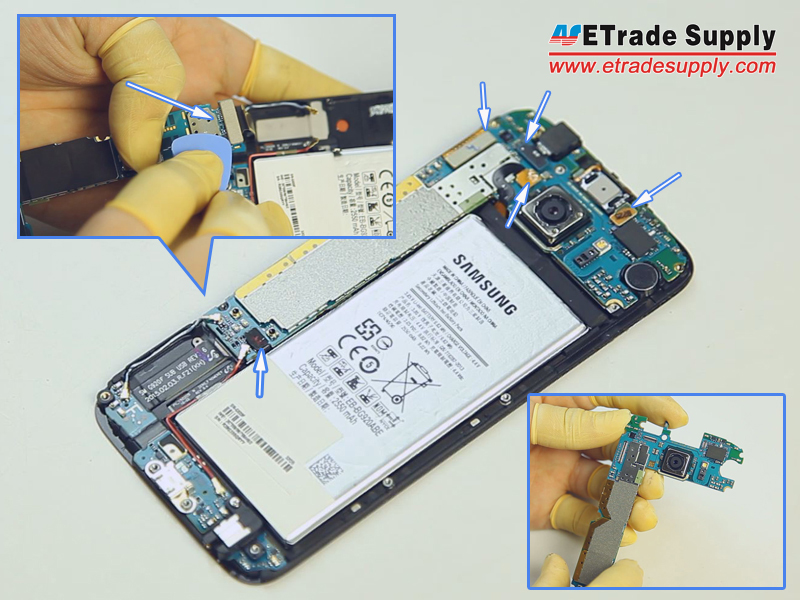
Step 6: Remove The Motherboard.
▪ Pry up the LCD assembly connector, front facing camera connector, battery connector, ear speaker connector and home button flex ribbon connector.
▪ Turn over the motherboard and pry up the connector.
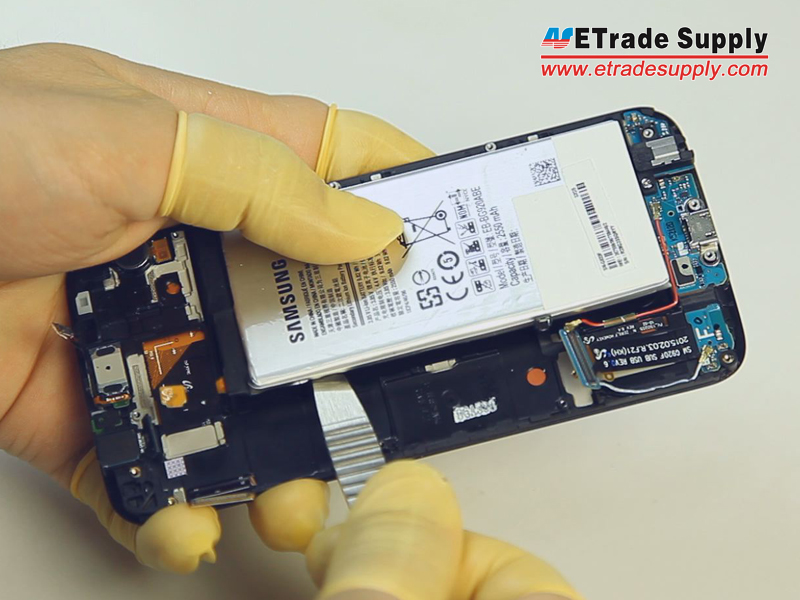
Step 7: Remove The Battery.
▪ Gently pry up the battery with a spudger tool.
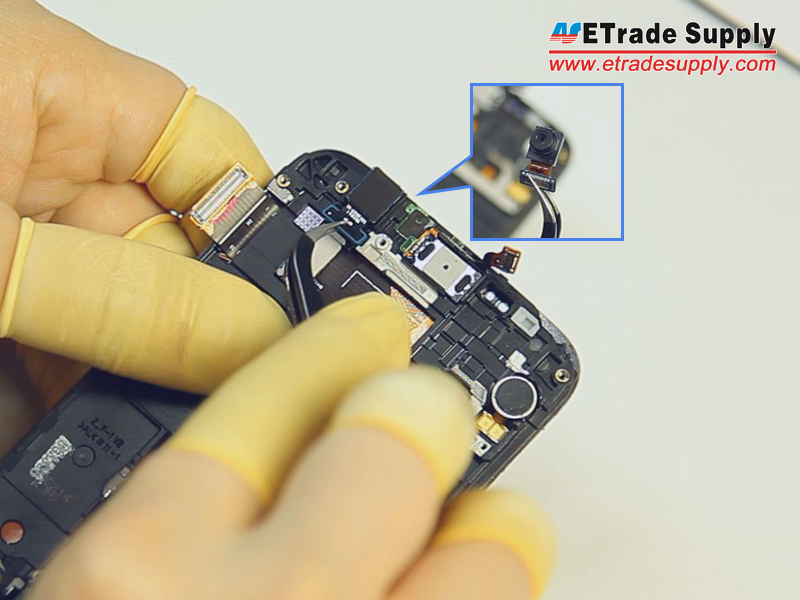
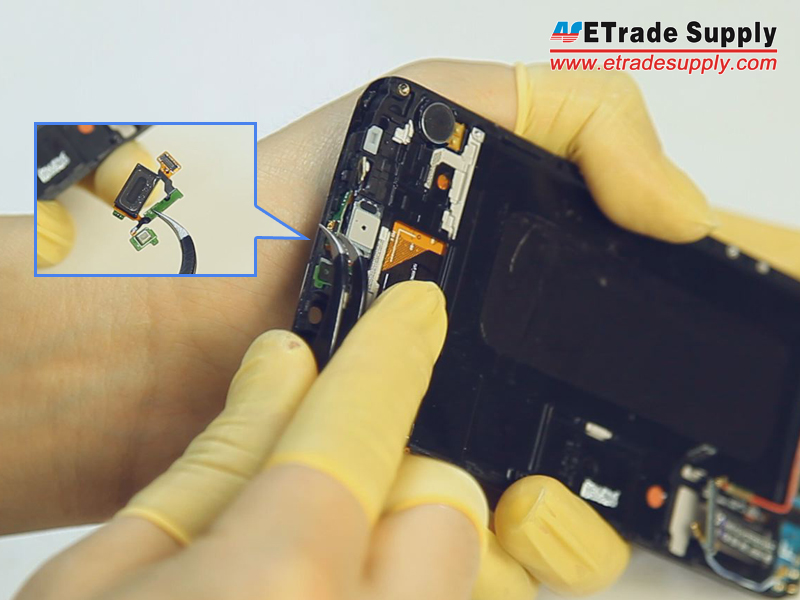
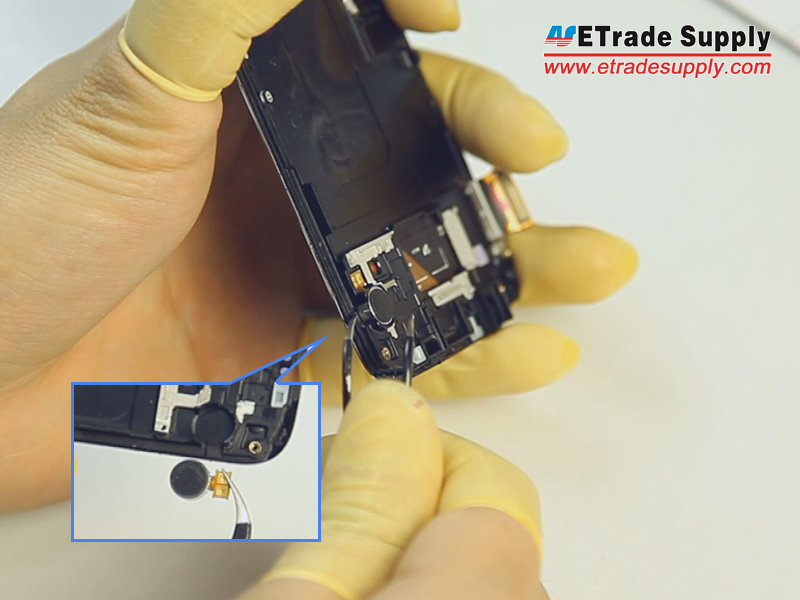
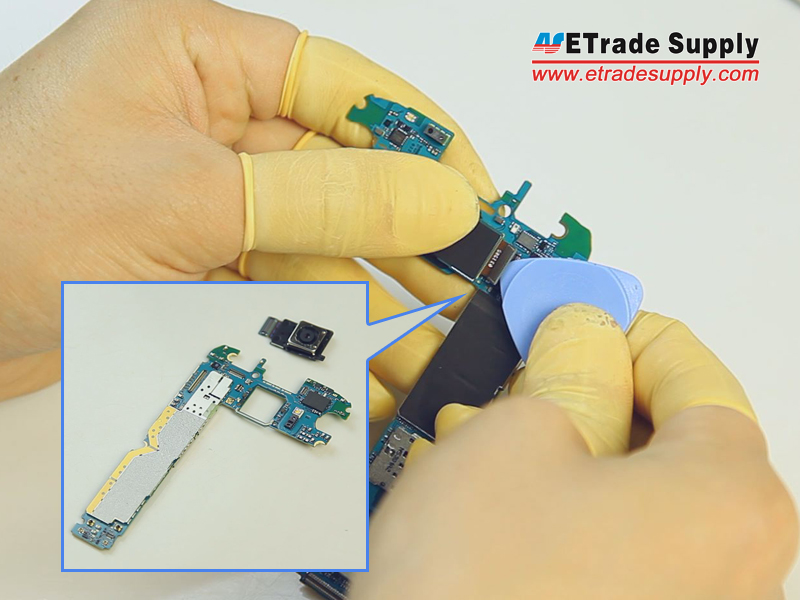
Step 8: Remove Small Components.
▪ Remove the front facing camera.
▪ Remove the ear speaker. (Notice: be careful not to break the flex ribbon.)
▪ Remove the vibrating motor.
▪ Remove the rear facing camera.
Step 9: Release The Charging Port Assembly.
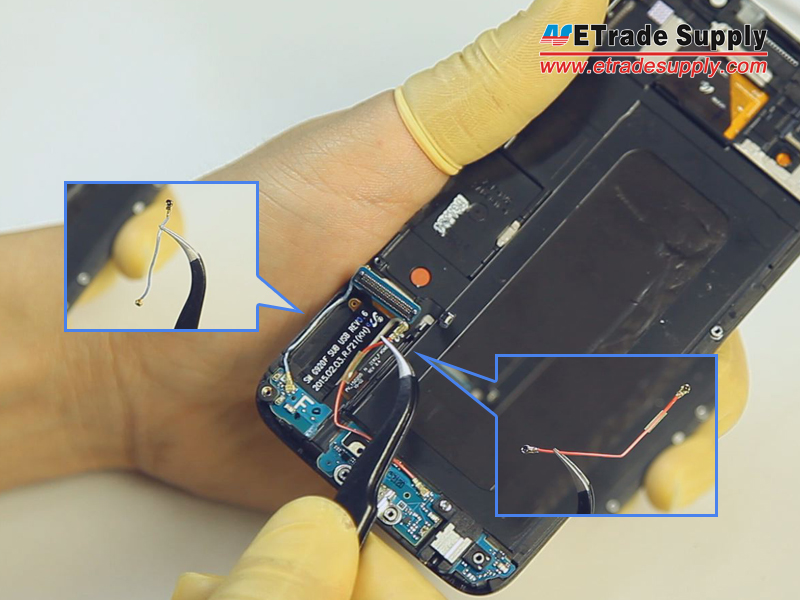
▪ Remove the Bluetooth and Wi-Fi cables.
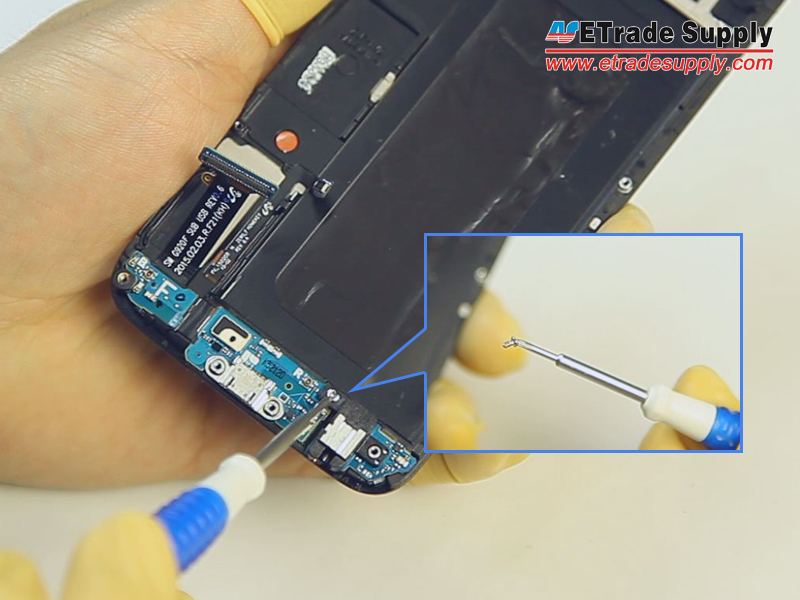
▪ Undo the earphone jack screw. (Notice: the screw is different than the rear housing screws.)
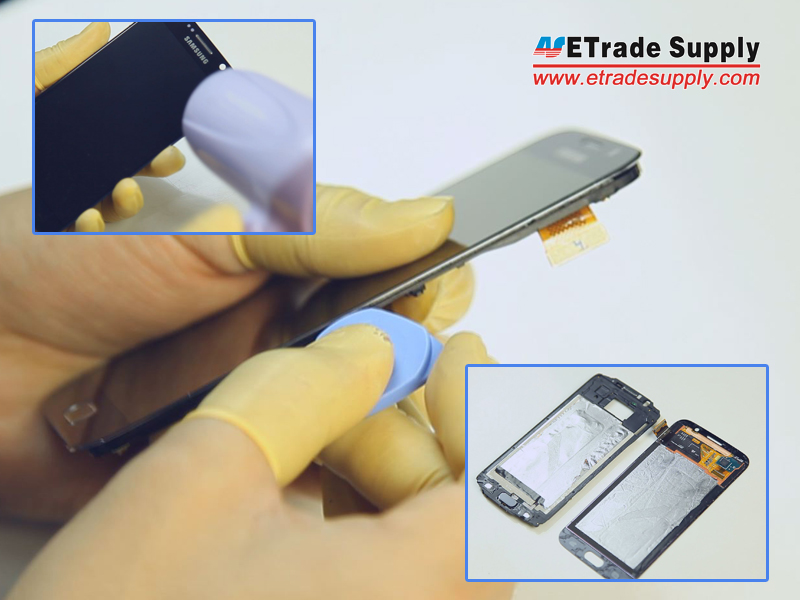
▪ Heat up the LCD Assembly to release the front housing.
▪ Pry up the navigation light stickers.
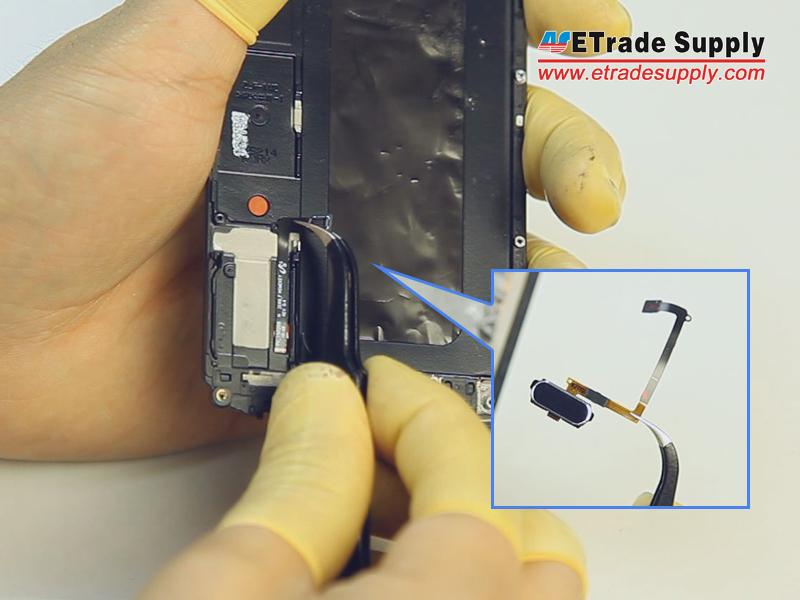
Step 10: Release The Home Button With Flex.
▪ Pry up the connector on the back side of home button.
▪ Pry up the home button.
The Samsung Galaxy S6 disassembly is now complete.
We will do several different Samsung Galaxy S6 test and review videos in the coming days, so stay tuned!